
Revitalize Your Outdoor Space: A Comprehensive Guide to DIY Concrete Crack Repair
Transforming a simple concrete patio, driveway, or sidewalk into an inviting outdoor feature often involves thoughtful landscaping, comfortable furniture, and perhaps a stylish outdoor rug. Yet, even with the best intentions, the inevitable reality for many concrete surfaces is the appearance of unsightly cracks. These aren’t just cosmetic blemishes; they’re potential gateways for further damage, leading to more significant issues like erosion beneath the slab, uneven settlement, and even dangerous tripping hazards. Fortunately, tackling these common concrete woes doesn’t require a complete overhaul or professional intervention for every minor flaw. With the right approach and high-quality products like those offered by Sakrete, DIY concrete crack repair is not only achievable but also a cost-effective way to preserve the integrity and aesthetics of your concrete.
Understanding Concrete Cracks: Causes and Consequences
Concrete, while incredibly durable, is not immune to cracking. These fissures are almost unavoidable and can manifest in various environments and due to a multitude of factors. Understanding why cracks form is the first step toward effective prevention and repair:
- Freeze-Thaw Cycle: This is a primary culprit in regions experiencing cold winters. When water infiltrates tiny cracks or porous sections of concrete, it freezes and expands, exerting immense pressure. This expansion causes existing cracks to widen and new ones to form, gradually compromising the concrete’s structure.
- Improper Water-Cement Ratio: During the initial mixing and pouring of concrete, an incorrect water-to-cement ratio can significantly weaken the material. Too much water leads to a weaker, more porous concrete that is prone to shrinkage cracks as it cures and later susceptible to environmental stressors.
- Settlement and Soil Movement: The ground beneath your concrete slab is not static. Shifting soil, poor compaction during installation, or even extreme dry and wet cycles can cause the ground to settle unevenly, putting stress on the concrete above and leading to cracks.
- Heavy Loads: While concrete is designed to bear weight, excessive or concentrated loads over time can exceed its capacity, resulting in structural cracks. This is particularly relevant for driveways.
- Tree Roots: Aggressive tree roots growing underneath or near concrete can exert upward pressure, causing significant lifting and cracking.
- Lack of Control Joints: Properly placed control joints allow concrete to expand and contract with temperature changes in a controlled manner, directing potential cracks along these predetermined lines rather than randomly across the slab. Without them, stress accumulates, leading to widespread cracking.
Ignoring these cracks is a gamble. What starts as a hairline fracture can quickly escalate into a major issue. Water penetration can erode the sub-base, creating voids that lead to further sinking and larger cracks. Weeds can sprout through, further deteriorating the surface and diminishing curb appeal. Timely repair is crucial to prevent minor issues from becoming costly replacements.
Choosing the Right Solution: Sakrete Concrete Crack Filler
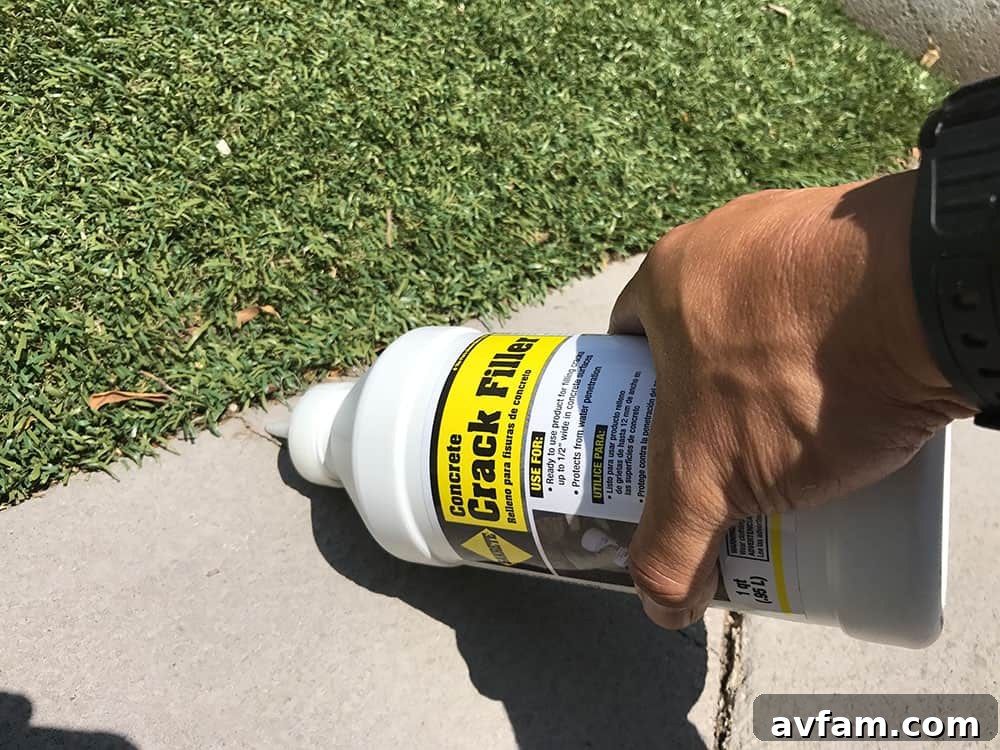
The good news is that a crack in your concrete isn’t an immediate death sentence for your patio or driveway. You don’t need to tear everything up and start anew, especially for smaller, non-structural cracks. Sakrete offers an extensive array of concrete and cement repair products specifically designed with the DIYer in mind, making it simple to restore patios, driveways, sidewalks, and foundations to their former glory. For our patio, plagued by several smaller cracks, the ideal solution was the user-friendly Sakrete Concrete Crack Filler. This specialized product is perfect for addressing fissures up to ½-inch in width and ¼-inch in depth, providing a durable and flexible repair that integrates seamlessly with your existing concrete.
Step-by-Step Guide: Repairing Cracks with Sakrete Concrete Crack Filler
Successful concrete repair hinges on proper preparation and application. Follow these detailed steps to ensure a lasting fix:
- Thorough Cleaning is Key: Begin by meticulously cleaning out the crack. Use a stiff brush, a wire brush, or even a broom to remove any loose particles, dirt, dust, or debris. For deeper cracks, a shop vacuum can be very effective at sucking out stubborn grit. The goal is to ensure the crack walls are as clean as possible, providing an optimal surface for the filler to adhere to. Any remaining loose material will compromise the bond and the longevity of your repair.
- Ensure Complete Dryness: After cleaning, it is absolutely critical that all surfaces within and around the crack are completely dry. Moisture can prevent the crack filler from adhering properly and curing effectively. Allow ample time for the area to dry naturally, or if necessary, use a heat gun or a blow dryer on a low setting to speed up the process, especially after wet cleaning.
- Prepare the Product: Retrieve your bottle of Sakrete Concrete Crack Filler. Before opening, shake the bottle vigorously for at least 30-60 seconds. This ensures that all the components within the filler are thoroughly mixed, guaranteeing a consistent and effective product application.
- Trim the Applicator Tip: Carefully trim the applicator tip to match the approximate width of the crack you are repairing. It’s always best to start with a smaller opening and gradually trim more of the tip if needed. A precise cut will allow for better control and a cleaner application, minimizing excess product.
- Precise Application: Position the trimmed tip directly over the crack. Apply steady, even pressure to the bottle, squeezing the filler directly into the crack. Move along the crack’s length at a consistent pace, ensuring the filler fully penetrates and fills the entire depth of the fissure. Aim for a slight overfill, as this makes the next step easier.
- Smooth and Level: Immediately after applying a section of filler, use a plastic putty knife or a trowel to wipe away any excess product. Hold the knife at a slight angle and drag it smoothly along the crack, ensuring the filler is flush with the surrounding concrete surface. This not only creates a clean finish but also helps to compact the filler into the crack.
- Allow for Curing and Check for Shrinkage: The Sakrete Concrete Crack Filler typically cures overnight. In the morning, inspect the repaired area. It’s common for the filler to shrink slightly during the curing process, especially in deeper cracks. If you notice any noticeable shrinkage or depressions, simply apply another layer of filler, following the same application and leveling steps.
- Protect from Moisture: For the first 24 hours after application, it is imperative to protect the newly repaired area from any exposure to rain, sprinklers, or other sources of water. Moisture during the initial curing phase can compromise the filler’s strength and adhesion. If rain is expected, cover the area with a tarp.
Once the product is fully cured and protected from moisture, your repair is complete! Sakrete Concrete Crack Filler provides a flexible, waterproof barrier that prevents future water penetration, stopping the cycle of erosion and expansion. With one area secured, you might find yourself identifying other cracks, leading to a satisfying process of concrete revitalization.
Maximizing Efficiency with Sakrete’s Tools
Undertaking multiple repairs or larger projects can lead to questions about material quantities. To save money and prevent product waste, Sakrete offers a highly beneficial concrete calculator tool on their website. This resource allows you to input the dimensions of your repair area and accurately determine how much product you’ll need, ensuring you purchase just the right amount for your project.
Beyond Small Cracks: Sakrete Polyurethane Self-Leveling Sealant
While the Concrete Crack Filler is ideal for minor fissures, Sakrete also provides solutions for more substantial repairs. One particularly innovative product is their Polyurethane Self-Leveling Sealant. This advanced sealant is specifically engineered for repairing wider cracks or filling joints in horizontal concrete surfaces. It’s an excellent choice for areas requiring a pristine, flush repair job, such as expansion joints in driveways or large patio slabs.
What makes this product stand out is its unique self-leveling property. Applied with a standard caulking gun, the sealant flows into the crack or joint, naturally settling to create a perfectly level and smooth surface without the need for extensive tooling. It remains tacky for up to eight hours and achieves a full cure in approximately seven days, ensuring long-term durability. However, the good news for busy homeowners is that you can walk or even drive on the repaired area after just 24 hours. Another significant advantage is its paintability; once cured, it can be painted with latex paint without any concern of adhesion issues, allowing for seamless integration with your existing concrete color or a fresh new look.
Comprehensive Concrete Solutions and Maintenance Tips
If your concrete surfaces are battling more than just a few isolated cracks – perhaps crumbling edges, spalling, or extensive structural damage – Sakrete’s comprehensive website is an invaluable resource. They offer an astonishing range of concrete and cement products designed to tackle virtually any repair or construction project you can envision, from resurfacing compounds to anchoring cements. Their site also hosts a wealth of helpful videos that guide you through the step-by-step application process for each product, ensuring you not only use the correct product for your specific application but also apply it precisely as Sakrete intended. This educational support is crucial for achieving professional-grade results on your DIY projects.
Beyond Repair: Proactive Concrete Maintenance
While repair is essential, proactive maintenance can significantly extend the life of your concrete and minimize the occurrence of future cracks:
- Regular Cleaning: Periodically sweep and wash your concrete surfaces to remove dirt, debris, and stains. This prevents grime from settling into microscopic cracks and worsening them.
- Sealcoating: Applying a high-quality concrete sealer every few years creates a protective barrier against water penetration, chemicals, and UV damage, which are major contributors to concrete degradation.
- Proper Drainage: Ensure water drains away from your concrete slabs. Poor drainage can lead to water pooling, increasing the risk of water infiltration and freeze-thaw damage.
- Avoid Overloading: Be mindful of heavy loads on driveways and patios. Avoid parking oversized vehicles or placing extremely heavy objects in one spot for extended periods.
- Address Tree Roots: If tree roots are a persistent problem, consider root barriers or professional tree trimming to prevent damage to your concrete.
- Immediate Spill Cleanup: Clean up oil, grease, and chemical spills immediately to prevent staining and potential concrete erosion.
Empowering the DIYer with Sakrete
Cracked concrete doesn’t have to be an eyesore or a safety concern. With the right tools and products from Sakrete, homeowners are empowered to take control of their outdoor spaces, performing effective, lasting repairs themselves. Whether it’s a minor hairline fracture on a patio or a larger joint needing attention on a driveway, Sakrete’s diverse product line provides tailored solutions for every scenario. By understanding the causes of cracks, selecting the appropriate repair material, and meticulously following application instructions, you can restore the beauty and functionality of your concrete surfaces, ensuring they remain a valuable and attractive part of your property for years to come.