
Conquering Caliche: Your Ultimate Guide to Landscape Lighting Installation in the Southwest
For anyone who has ever attempted to dig a hole in the arid and semi-arid regions of the American Southwest, the term “Caliche” likely brings to mind images of sheer frustration, broken tools, and strenuous, back-breaking labor. My own vivid introduction to this formidable geological formation occurred during a summer landscaping job in my hometown of Tucson, Arizona. It was an unforgettable lesson in just how challenging outdoor projects can be when you’re contending with what feels like nature’s own concrete.
This comprehensive guide is dedicated to empowering homeowners and DIY enthusiasts in the Southwest to tackle Caliche head-on, specifically when it comes to transforming their outdoor spaces with beautiful and functional landscape lighting. We’ll explore what Caliche is, why it’s such a challenge, and—most importantly—reveal the simple, effective solution that turns an impossible task into a manageable weekend project.
Understanding Caliche: The Southwest’s Natural Concrete
Caliche, often pronounced “ka-LEE-chee,” is far more than just unusually hard dirt. Geologically speaking, it is a type of sedimentary rock, a naturally occurring, hardened cement primarily composed of calcium carbonate. This calcium carbonate acts as a powerful binder, fusing together various other materials found in the soil, such as gravel, sand, clay, and silt. The result is an incredibly dense, impenetrable layer that can vary from a few inches to several feet in thickness, making it exceptionally resistant to traditional digging methods.
This unique and challenging soil type is a defining characteristic of desert and semi-desert environments around the globe, but it is particularly prevalent and well-known throughout the American Southwest. States such as Arizona, New Mexico, Texas, Nevada, and parts of Southern California are familiar territories for Caliche. Its formation is linked to low rainfall and high evaporation rates, which cause mineral-rich water to migrate upwards through the soil. As the water evaporates, it leaves behind concentrated calcium carbonate deposits, gradually cementing the soil particles together over millennia.
The pervasive presence of Caliche creates numerous hurdles for any outdoor project. Beyond the obvious difficulty in digging, it significantly impedes proper drainage, restricts root growth for plants, and makes any ground-level installation a considerable undertaking. For landscape lighting, which often necessitates precise, stable holes for stakes, conduits, or wiring, Caliche presents a unique and frustrating set of obstacles that can quickly derail even the most enthusiastic DIYer.
The Irresistible Appeal of Landscape Lighting: Beauty, Safety, and Security
Before we delve deeper into specific solutions, it’s worth reiterating why landscape lighting is such a valuable investment, particularly in regions like the Southwest where outdoor living is a cherished, year-round pleasure. Thoughtfully designed outdoor lighting transcends mere aesthetics; it transforms your property into a captivating nighttime spectacle, highlighting architectural features, illuminating pathways, and showcasing your garden’s beauty. It dramatically boosts curb appeal, making your home more inviting and significantly increasing its perceived value.
Beyond its visual appeal, landscape lighting is fundamentally crucial for safety and security. Strategically placed lights along pathways, steps, and entry points prevent trips and falls, ensuring a safer environment for your family and guests. Furthermore, a well-lit exterior acts as a powerful deterrent to potential intruders, making your property less attractive to unwelcome visitors. Modern outdoor lighting extends the usability of your exterior spaces, allowing you to enjoy your patio, garden, or pool area long after the sun has set. Whether you’re entertaining friends, relaxing with family, or simply admiring your illuminated surroundings, landscape lighting creates a magical ambiance that makes outdoor living truly exceptional.
The Caliche Conundrum: Why Installing Landscape Lights Feels Impossible
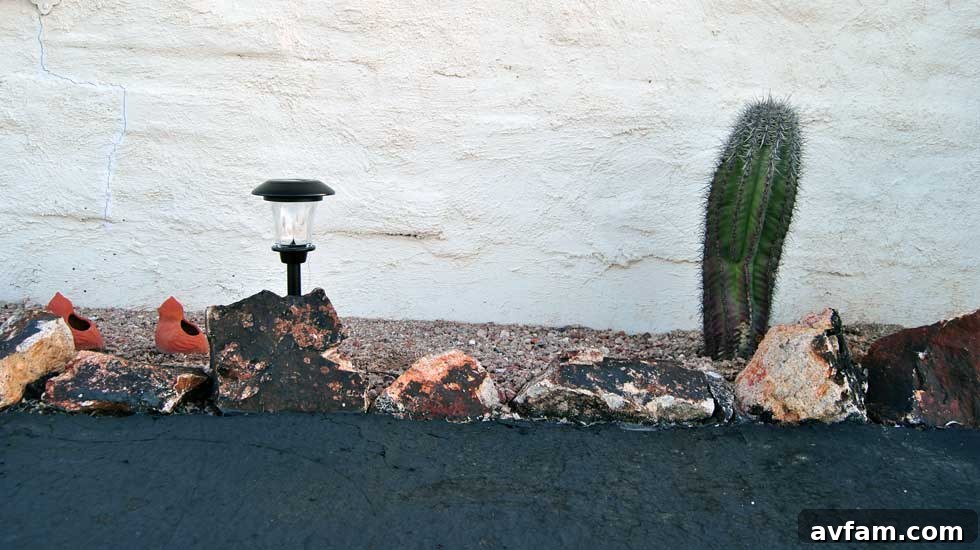
Imagine attempting to install solar path lights or low-voltage spotlights, each requiring a stable stake or post driven firmly into the ground. With typical, soft soil, a few firm pushes or gentle taps with a rubber mallet would suffice. But when faced with Caliche, these stakes often buckle, bend, or refuse to penetrate beyond an inch or two, rendering your efforts futile. This was precisely the challenge my parents encountered when trying to install a series of pegged landscape solar lights along their expansive driveway, turning what should have been a straightforward DIY project into a frustrating battle against geology.
Traditional hand tools like shovels, picks, and crowbars, while useful for other tasks, often prove woefully ineffective against the dense, concrete-like structure of Caliche. They might manage to chip away at the surface, but creating a clean, deep, and appropriately sized hole for a light fixture’s stake or a wiring conduit is an entirely different matter. The sheer density and hardness of the material mean that manual labor is not only physically exhausting but also frequently yields unsatisfactory results, leaving you with bent stakes, damaged lights, or, worst of all, an unfinished project that dampens your enthusiasm.
The Game-Changer: Power Tools to Conquer Hardened Earth
The encouraging news is that living in a Caliche-rich area doesn’t mean you have to abandon your dream of a beautifully lit landscape. My father, a seasoned problem-solver with a practical approach, eventually discovered a remarkably simple yet incredibly effective solution that transformed this formidable geological obstacle into a manageable task. The secret weapon? A powerful cordless drill combined with a heavy-duty masonry bit. This combination isn’t just effective; it’s a revelation for anyone grappling with difficult soil conditions in the Southwest.
The Right Tools for the Job: Your Essential Caliche-Busting Kit
To successfully install landscape lighting in Caliche, you’ll need the following key items in your arsenal:
1. A Robust Cordless Drill (A Hammer Drill is Highly Recommended)
While a standard cordless drill can be used for less dense Caliche or smaller, shallower holes, a hammer drill is overwhelmingly recommended for its superior performance. A hammer drill not only rotates the drill bit but also delivers rapid, powerful percussive blows forward, effectively pulverizing the hard material as it drills. When selecting a drill, look for a model with sufficient voltage (18V or 20V are common and provide ample power) and good torque. The portability and freedom offered by a cordless model are absolutely essential for working efficiently around your yard without the hassle of extension cords.
2. High-Quality Masonry Drill Bits
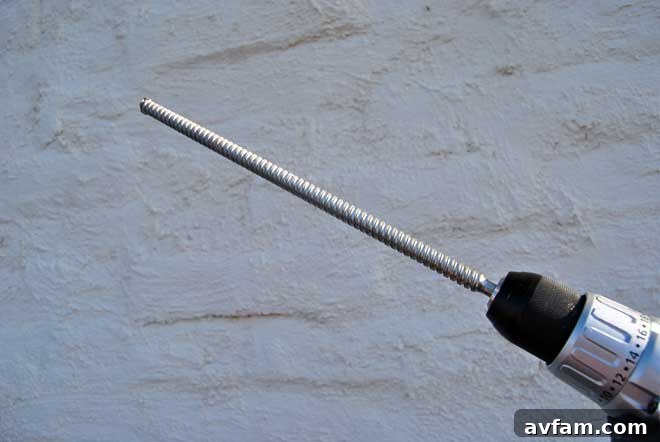
This is where the true magic happens. Standard wood or metal drill bits will dull instantly and are completely ineffective against the abrasive hardness of Caliche. You absolutely need a masonry drill bit, specifically one featuring a carbide tip. Carbide is an extremely hard, resilient material engineered to withstand the intense abrasive forces encountered when drilling into concrete, rock, brick, and, of course, Caliche. For landscape lighting stakes, a 12-inch long masonry bit is typically ideal, as it allows you to create sufficiently deep holes to ensure your lights are stable, secure, and resistant to shifting. The distinctive fluted design of masonry bits also plays a crucial role in efficiently clearing dust and debris from the hole as you drill, preventing binding.
3. Essential Safety Gear
Working with power tools, especially a powerful hammer drill, mandates proper safety precautions. Always wear safety glasses or goggles to protect your eyes from flying debris and dust. Durable work gloves will improve your grip, reduce hand fatigue, and provide protection from vibrations and abrasions. If you’re using a particularly powerful hammer drill for extended periods, investing in ear protection is also a wise decision to safeguard your hearing.
Step-by-Step: Drilling Through Caliche for Your Landscape Lights
Once you have gathered your essential tools and equipped yourself with proper safety gear, the process of installing your landscape lights becomes surprisingly straightforward and far less daunting. Here’s a detailed, step-by-step guide to effectively create holes for your outdoor lighting fixtures:
Step 1: Plan and Mark Your Lighting Layout
Before you even think about drilling, take the time to finalize the precise placement of all your landscape lights. Walk your property, visualize the illumination, and mark each spot clearly with temporary spray paint, small flags, or even small wooden stakes. This meticulous planning ensures that you create holes exactly where they are needed, optimizing your lighting design and preventing unnecessary drilling.
Step 2: Prepare Your Drill and Bits
Securely attach the appropriate size masonry bit to your cordless drill. If you are using a hammer drill, ensure it is set to the hammer drill mode for maximum efficiency. Fully charge all your drill batteries, and if you have spares, keep them readily available, as drilling through stubborn Caliche can consume a significant amount of power.
Step 3: Begin the Drilling Process
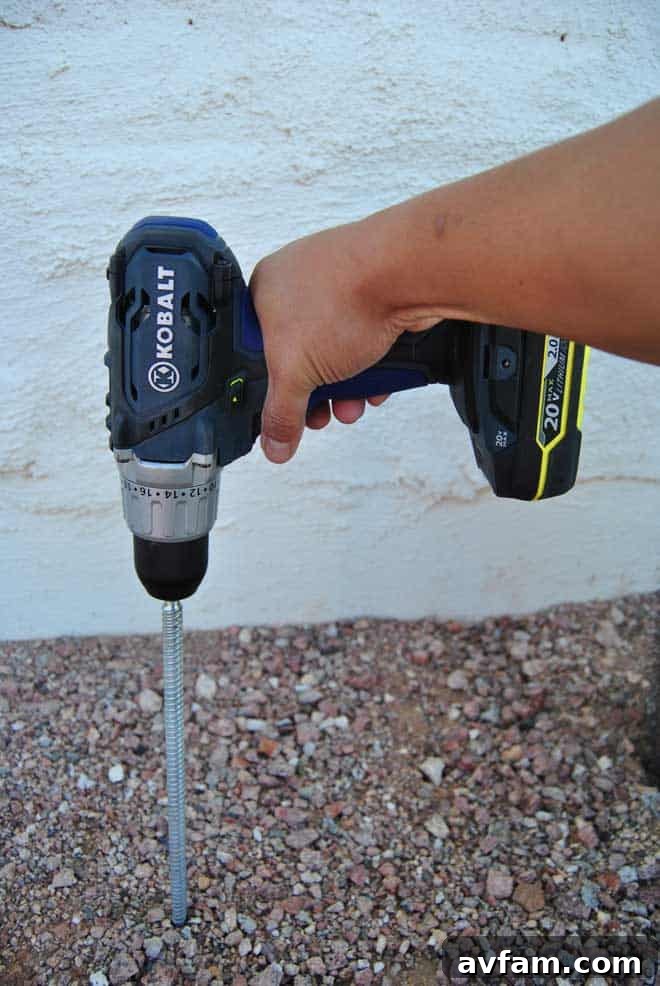
Position the tip of the masonry bit firmly on your marked spot. Begin drilling at a slow speed to prevent the bit from “walking” or skittering across the hard surface, which can damage the bit or the ground. Once the bit has started to bite and create a small indent, gradually increase the drill speed and apply steady, firm pressure. It’s crucial to let the drill do the work; avoid excessive force, which can overheat the bit, strain the drill motor, or even lead to injury. Periodically withdraw the bit slightly from the hole to clear accumulated dust and debris, especially as you drill deeper, to prevent the bit from getting bogged down.
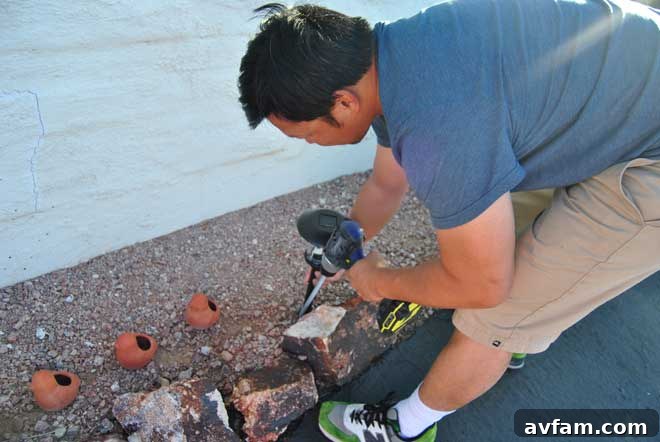
Continue drilling until you reach the desired depth for your landscape light stake. For most solar lights or small spotlights, a 6 to 8-inch deep hole is usually sufficient to ensure excellent stability, but always adjust the depth based on the specific requirements of your lighting fixture.
Step 4: Install Your Landscape Lights
Once the hole is successfully drilled, carefully insert the stake of your landscape light into the newly created cavity. It should fit snugly and securely. If the fit feels a little too loose, you can add a small amount of sand or fine gravel around the base of the stake for extra stability before compacting it gently. If your lighting system involves intricate wiring, the drilled hole can also effectively serve as a pre-drilled pilot for wire conduits, junction box anchors, or larger fixture bases, streamlining the entire installation process.
Tips for Optimal Results and Longevity
- Patience is Paramount: Do not rush the drilling process. While using power tools is significantly faster than manual digging, drilling through Caliche still takes time. Allowing the tool to work at its own pace will yield the best results and extend the life of your equipment.
- Monitor Battery Life Closely: Always have multiple fully charged batteries available, especially if you’re undertaking a larger landscape lighting project. Caliche drilling is power-intensive.
- Maintain Your Bits: Keep your masonry bits clean and free of excessive debris. Overheating can dull carbide tips much faster. If you plan on doing extensive drilling, consider having a spare bit on hand to ensure uninterrupted progress.
- Clear the Hole Thoroughly: After drilling, use a shop vac or even compressed air to clear out all dust and debris from the hole. A clean hole provides a more secure and stable fit for your light fixture’s stake.
Beyond Solar: Adapting for Low-Voltage Landscape Lighting Systems
While this drilling method is perfectly suited for installing individual solar lights with stakes, its utility extends far beyond simple applications. It can be ingeniously adapted for more complex low-voltage landscape lighting systems. For instance, when burying low-voltage wires, you can drill a series of closely spaced holes along your desired trench line. Subsequently, a small chisel or a pickaxe can be used to break out the remaining material between these perforated holes. This “perforate and break” method makes trenching through solid Caliche significantly easier and less labor-intensive than attempting to dig a continuous channel from scratch.
Similarly, for installing larger fixture bases, pathway lights requiring a more substantial foundation, or even small transformer enclosures, a wider masonry bit or specialized core drill can be employed to create the necessary cavities. The core principle remains consistent: leverage the power and precision of specialized drill bits to overcome the extreme hardness and density that characterize Caliche.
Living with Caliche: Broader Landscaping Strategies for the Southwest
Understanding and adapting to Caliche is not just about installing lights; it’s fundamental for any successful landscaping project in the Southwest. Beyond illumination, consider these broader strategies to create a thriving outdoor environment:
- Embrace Raised Garden Beds: For planting flowers, vegetables, shrubs, or even small trees that require richer, well-draining soil, raised garden beds are an excellent solution. They allow you to bring in ideal soil compositions that bypass the problematic Caliche layer entirely.
- Opt for Xeriscaping and Native Plants: Lean into the desert landscape. Many native plants are naturally adapted to thrive in Caliche soil with minimal intervention, or they possess shallow root systems that do not struggle with the underlying hardpan. Xeriscaping also conserves water, aligning with sustainable practices in arid regions.
- Consider Professional Assistance for Large Projects: For extensive projects like installing a new irrigation system, significant regrading, or planting large trees, it might be wise to consult with a local landscaper who possesses extensive experience in Caliche mitigation. They often have access to heavier equipment, such as pneumatic jackhammers or specialized excavators, which can handle larger-scale removal more efficiently.
Conclusion: Illuminate Your Southwest Oasis with Confidence
Dealing with Caliche can undoubtedly be a daunting prospect for any homeowner, but it absolutely does not have to be a barrier to achieving the stunning outdoor living space of your dreams. As my parents vividly discovered, a simple yet incredibly powerful combination of a robust cordless drill and a high-quality masonry bit can transform a frustrating, seemingly impossible task into a surprisingly straightforward and rewarding DIY project. With the right tools at your disposal, a little patience, and a clear plan, you can beautifully illuminate your pathways, highlight your garden features, and significantly enhance the safety and security of your home, all while expertly navigating the unique geological challenges of Southwest soil.
Don’t let hard soil dim your vision for a radiant and inviting outdoor oasis. Embrace the power of specialized tools, equip yourself with this newfound knowledge, and prepare to enjoy the dazzling, radiant results of your efforts. Your illuminated Southwest landscape awaits!
Do you live in the Southwest? What are your personal experiences with Caliche, and what clever solutions or innovative techniques have you discovered for your landscaping projects? Share your invaluable tips, stories, and insights in the comments below to help others in our community!