

Ultimate Guide to Hurricane Window Protection: Boarding Up Your Home for Storm Season
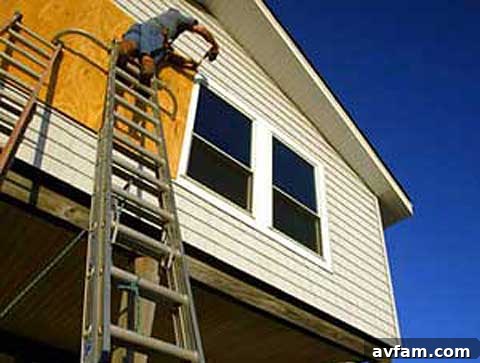
As hurricane season descends upon us, homeowners in vulnerable coastal and low-lying regions face the annual imperative of fortifying their residences against the formidable threats of high winds, torrential rains, and destructive flying debris. While some choose to evacuate, many opt to shelter in place, or find themselves in areas not under mandatory evacuation orders. For these residents, proactive home protection, particularly for windows, becomes an absolute priority. Glass windows are often the most fragile points of a home’s exterior, and their failure during a severe storm can lead to catastrophic internal damage, not to mention a significant safety risk to occupants.
This comprehensive guide will walk you through the essential steps of effectively boarding up your windows with plywood, a proven and reliable method for safeguarding your home. We’ll also delve into why this preparation is crucial, what materials you’ll need, and offer additional tips for broader hurricane readiness.
Why Protecting Your Windows is Paramount During a Hurricane
The destructive power of a hurricane is multifaceted. Beyond the sheer force of its winds, there’s the danger of pressure changes and projectile objects. Here’s why securing your windows is non-negotiable:
- Preventing Glass Shattering: High winds can easily shatter unprotected windows, turning glass into dangerous projectiles both inside and outside your home. Plywood acts as a robust barrier, absorbing impact and preventing breakage.
- Mitigating Flying Debris: Hurricanes often carry loose outdoor items, tree branches, and even parts of damaged structures, transforming them into high-speed missiles. A plywood shield offers critical protection against these impacts.
- Maintaining Structural Integrity: A breach in your home’s envelope, such as a broken window, can allow wind to enter the structure. This internal pressure can cause immense uplift force on the roof and walls, potentially leading to widespread structural failure. Boarding up helps maintain the integrity of your home’s shell.
- Preventing Water Ingress: Broken windows are direct entry points for massive amounts of rain, leading to severe water damage inside your home, including damage to furniture, electronics, flooring, and the potential for mold growth.
- Ensuring Occupant Safety: The most important reason is the safety of those sheltering inside. Flying glass shards and collapsing structures pose an immediate and grave threat to life and limb.
Beyond Plywood: Other Window Protection Methods
While plywood boarding is a cost-effective and highly reliable method, it’s worth noting other options available for hurricane window protection:
- Permanent Hurricane Shutters: These are custom-fitted systems designed for quick deployment. Options include accordion shutters (fold back like an accordion), roll-down shutters (store in a box above the window), colonial shutters (hinged on the sides), and Bahama shutters (hinged at the top). They offer excellent protection but require a significant upfront investment.
- Impact-Resistant Windows: These windows are built with specialized laminated glass that can withstand direct impacts from flying debris without shattering. They offer year-round protection and eliminate the need for last-minute boarding, but they are the most expensive option during construction or replacement.
- Fabric/Textile Hurricane Panels: Made from strong, lightweight woven fabrics, these panels can be secured over windows. They are easier to store and lighter than plywood but may offer slightly less rigid protection against extreme impacts.
For temporary, robust, and budget-friendly protection, plywood remains a go-to solution for many homeowners, particularly when a storm is imminent.
Getting Started: Essential Materials and Timing
Preparation is key. Don’t wait until hurricane-force winds are already whipping through your neighborhood. Boarding up windows is a demanding task, often requiring two people, and it must be done while conditions are calm and safe. High winds can easily turn large plywood sheets into uncontrollable sails, creating a dangerous situation. Monitor weather reports closely and begin preparations well in advance of the storm’s anticipated arrival.
Materials You Will Need:
- Plywood: Opt for exterior-grade plywood, at least 5/8-inch thick, or preferably 3/4-inch for maximum protection. Ensure you have enough panels to cover all vulnerable windows and glass doors.
- Measuring Tape: For accurate measurements of your windows.
- Stud Finder: Essential for locating the structural studs around your window frames.
- Circular Saw or Jigsaw: For cutting plywood panels to size.
- Drill/Driver: A cordless drill/driver or impact driver will be indispensable for pre-drilling holes and driving screws.
- Drill Bits: Various sizes, including pilot bits appropriate for your screws.
- Corrosion-Resistant Screws: Galvanized pan-head or lag screws are ideal. They should be long enough (at least 2-3 inches) to penetrate the plywood and reach at least 2 inches into the framing studs.
- Pencil or Marker: For marking measurements and panel identification.
- Safety Glasses and Gloves: Always prioritize personal safety when working with tools and materials.
- Extension Cords (if using corded tools): Ensure they are outdoor-rated.
Step-by-Step Guide: How to Board Up Your Windows with Plywood
Follow these meticulously detailed steps to ensure your windows are securely protected:
1. Identify and Mark Stud Locations
The structural integrity of your plywood barrier relies heavily on being anchored directly into your home’s framing studs, not just the trim or exterior sheathing. Plywood fastened to inadequate supports can easily be ripped away by hurricane-force winds.
- Locate Studs: Using an electronic stud finder, carefully scan the wall areas around each window. You need to find the studs closest to each side of and directly above and below the window opening.
- Visual Cues: In some wood-framed houses with siding, you might spot lines of nailheads in the siding, which often indicate the location of studs. If these aren’t visible, a stud finder is your best friend.
- Probing (If Necessary): If a stud finder isn’t available or reliable, you might have to carefully drill small pilot holes with a thin bit in areas where you suspect studs might be, until you feel the resistance of solid wood. Be prepared to patch these small holes later.
- Mark Clearly: Once located, use a pencil or marker to clearly mark the center of these studs on the exterior wall. These marks will guide where you’ll drive your screws.
2. Precisely Cut Each Plywood Panel
Accurate cutting ensures maximum coverage and a secure fit. The goal is to create a barrier that extends beyond the window opening, allowing it to be securely fastened into the structural framing.
- Measure Window Openings: Measure the width and height of each window opening.
- Add Overlap: Cut each plywood panel so it extends at least one inch, and ideally two to three inches, beyond the entire window frame on all four sides. This overlap ensures that when you screw the plywood into place, you’re anchoring it securely into the wall’s structural framing (the studs and headers/sills), not just the window trim or sheathing.
- Safe Cutting: Use a circular saw or jigsaw to make clean, straight cuts. Always wear safety glasses and gloves, and ensure the plywood is properly supported during cutting.
3. Number and Orient Each Panel
This step is crucial for efficiency, especially during an emergency or for future hurricane seasons. Imagine scrambling to figure out which board goes where as a storm approaches.
- Match Panels to Windows: After cutting, hold each panel up to its intended window opening to ensure a perfect fit.
- Label Clearly: Using a bold marker, number each panel (e.g., “Window 1,” “Front Left Window”). Then, mark the corresponding window frame with the same number.
- Indicate Orientation: Add an arrow on the panel showing which end goes up. This prevents confusion and ensures quick re-installation year after year. Store your numbered panels in an easily accessible, dry location.
4. Select and Prepare the Right Fasteners
The type and quality of your screws are just as important as the plywood itself. They are the connection point between your protective barrier and your home’s structure.
- Corrosion Resistance: Always use corrosion-resistant screws, such as galvanized or stainless steel. Hurricanes bring heavy moisture, and untreated screws will rust quickly, weakening their hold and leaving unsightly stains.
- Screw Type: Galvanized pan-head or lag screws are highly recommended. Pan-head screws have a wide, flat bottom that grips the plywood surface without sinking in and weakening the material. Lag screws are heavy-duty and provide exceptional holding power. Avoid screws with tapered heads that can easily strip or pull through the plywood.
- Length and Gauge: Ensure the screws are long enough to penetrate the plywood, pass through any siding or sheathing, and embed at least 2 inches (preferably 2.5 to 3 inches) into the solid wood of the framing studs. A screw gauge of 1/4 inch or 5/16 inch is generally sufficient for plywood boarding.
- Avoid Nails: While nails might seem quicker, they do not offer the same holding power as screws, especially against uplift and shear forces. They are also much harder and more damaging to remove.
5. Drill Pilot Holes and Secure the Plywood
This is the final, critical step to anchoring your protective panels firmly in place.
- Two-Person Job: For safety and ease, especially with larger panels, this step requires two people. One person holds the plywood panel firmly against the window opening, aligning it with the marked stud locations.
- Drill Pilot Holes: With the panel held securely, use your drill to create pilot holes through the plywood and into the marked studs behind it. Each hole should be at least one inch away from the panel edge to prevent splitting the plywood. Space these pilot holes approximately every 12 to 16 inches along the perimeter of the panel, ensuring you hit every stud you marked in Step 1. The pilot hole should be slightly smaller than the screw’s diameter to allow the screw threads to bite firmly into the wood.
- Drive the Screws: Once all pilot holes are drilled, use your cordless drill/driver or impact driver to drive the corrosion-resistant screws through the plywood and deep into the framing studs. Drive them until they are snug and the plywood is firmly against the wall, but avoid over-tightening, which can strip the wood or crack the plywood.
Special Considerations for Masonry Houses
For homes constructed with masonry (brick, concrete block, stucco over block), the method for anchoring plywood differs slightly because you cannot screw directly into studs in the same way. You’ll need specialized masonry anchors:
- Lead Shields or Plastic Anchors: These are inserted into pre-drilled holes in the masonry, and then the screws are driven into them.
- Tapcon Screws: These are self-tapping screws designed specifically for masonry. You’ll pre-drill a pilot hole with a masonry bit, then drive the Tapcon screw directly into the concrete or brick.
- Mounting Hardware: Another option is to install permanent threaded inserts or anchor bolts into the masonry around your windows. These allow for quick attachment of plywood panels using wing nuts or bolts when a storm threatens. This is a more involved initial installation but simplifies future deployments.
Regardless of the method, ensure the anchors you use are rated for the loads they might experience during a hurricane and that you follow the manufacturer’s installation instructions precisely.
Beyond Windows: Holistic Hurricane Preparedness
While protecting your windows is critical, it’s just one component of a comprehensive hurricane preparedness plan:
- Secure Outdoor Items: Bring in or securely tie down anything that can become a projectile – patio furniture, garbage cans, grills, decorative items, and even garden tools.
- Trim Trees and Clear Gutters: Trim dead or weak branches from trees and clear your gutters and downspouts to ensure proper water drainage, preventing potential flooding around your foundation.
- Emergency Kit: Assemble a disaster kit with non-perishable food, water, medications, first-aid supplies, flashlights, batteries, a weather radio, important documents, and cash.
- Communication Plan: Establish a family communication plan, including out-of-state contacts, in case local lines are down.
- Fuel and Cash: Fill up your vehicle’s gas tank and withdraw extra cash, as ATMs and gas stations may be inoperable after a storm.
- Evacuation Routes: Know your evacuation routes and shelter locations, even if you plan to stay. Plans can change quickly.
After the Storm: Safe Removal and Damage Assessment
Once the all-clear is given and it’s safe to venture outside, carefully remove your plywood panels. Store them properly for future use. Then, conduct a thorough inspection of your home for any damage, both visible and hidden. Document everything with photos for insurance purposes. Remember, safety first – be aware of downed power lines, sharp debris, and potential structural instability.
Conclusion
Hurricane season demands respect and rigorous preparation. By taking the time to properly board up your windows with plywood, you are not just erecting a physical barrier; you are investing in the safety of your family and the long-term integrity of your home. This proactive measure provides invaluable peace of mind when a storm approaches, allowing you to face the challenges of hurricane season with confidence and readiness. Don’t delay – prepare today.