
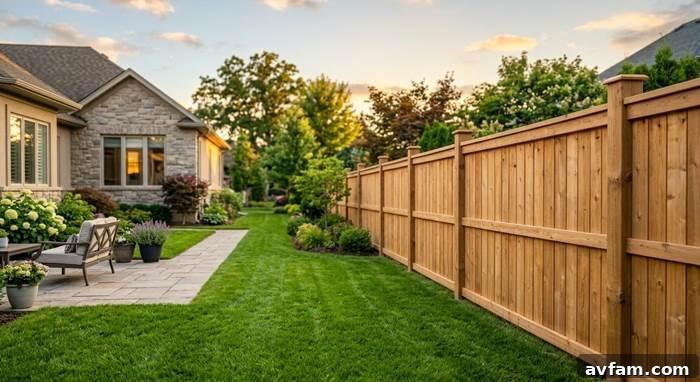
Building a fence isn’t just about the physical labor; it’s about laying a solid plan – confirming property lines, ensuring proper post depth, and identifying any buried surprises.
For many homeowners, a fence project begins with a familiar routine: gathering quotes, pricing out materials, and perhaps spending a Saturday afternoon watching online tutorials on how to set fence posts. The common misconception is that the most challenging aspect will be the sheer physical effort of digging and construction. However, experience consistently shows that this assumption often leads to costly mistakes and significant setbacks.
In reality, the errors that truly drain homeowners’ budgets – sometimes even necessitating the complete demolition and rebuild of an entire fence – almost universally occur well before the first shovel breaks ground. These oversights include neglecting to secure necessary permits, basing the fence on an incorrectly assumed property line, or, most perilously, digging directly through an unmarked underground utility line. While none of these crucial planning steps are inherently complicated, they are frequently overlooked, leading to avoidable headaches and expenses.
Understanding these preliminary steps and appreciating their profound importance is far more critical than simply choosing the perfect stain color or panel style. This guide will walk you through the essential preparations that ensure your fence project is not only successful but also safe, compliant, and durable.
The Foundation of Success: Understanding Your Property and Utilities Before You Dig
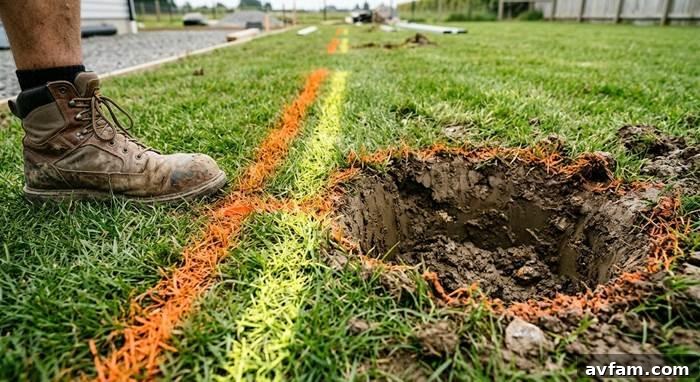
Color-coded paint marks show public utility lines – but irrigation, outdoor lighting, and propane lines won’t appear without a professional locating service.
Why Calling 811 is Non-Negotiable for Public Utilities
Every single fence post hole typically extends two to three feet, or even deeper, into the ground. This depth places them squarely within the common pathways of vital underground infrastructure: gas lines, water mains, electrical conduits, and telecommunication cables. Striking any of these isn’t just an expensive blunder; it can be incredibly dangerous, posing risks of explosions, electrocution, serious injury, or even fatalities.
Alarming statistics underscore this risk. A 2025 survey conducted by the Common Ground Alliance revealed that a staggering 46% of Americans planning to dig that year intended to do so without first calling 811. This represents approximately 27 million individuals who are effectively gambling with their safety and finances, hoping to avoid hitting anything critical. Further data from PG&E, published in 2025, indicated that 89% of all homeowner-caused utility damage incidents in Northern California during 2024 occurred precisely because 811 was never contacted. The average repair bill for such incidents hovers around $3,500, but in worst-case scenarios, a single strike can lead to costs soaring as high as $56,000, according to GP Radar’s 2024 industry analysis.
The solution is simple, free, and legally mandated in most states: call 811 before you dig. This service dispatches professional locators, usually within a few business days, to accurately mark the approximate location of public utility lines on your property using color-coded spray paint. This crucial step prevents potentially catastrophic accidents and saves you from exorbitant repair costs and legal liabilities.
The Hidden Dangers: Private Utility Lines and Professional Locating
While 811 is an indispensable first step, it’s vital to understand its limitations. As experts specializing in utility locating services in San Antonio emphasize, 811 only covers public utilities. This means your private infrastructure – such as your irrigation system, outdoor lighting conduit, propane lines connected to a grill or generator, and pool equipment wiring – will not be identified by the 811 service. On older properties, especially, these private lines may have been installed over many years with minimal or no recorded documentation, making their precise locations a mystery.
To avoid damaging these private systems, which can also result in significant repair bills and disruptions to your home’s amenities, it is highly recommended to engage a professional private utility locating service. These specialists use advanced ground-penetrating radar and electromagnetic induction technologies to detect and mark all buried lines on your property, providing a comprehensive understanding of what lies beneath your digging path. This dual approach – calling 811 for public utilities and hiring a private locator for your own systems – offers the most complete protection and peace of mind before you break ground.
Defining Your Boundaries: The Critical Role of Property Surveys and Permits
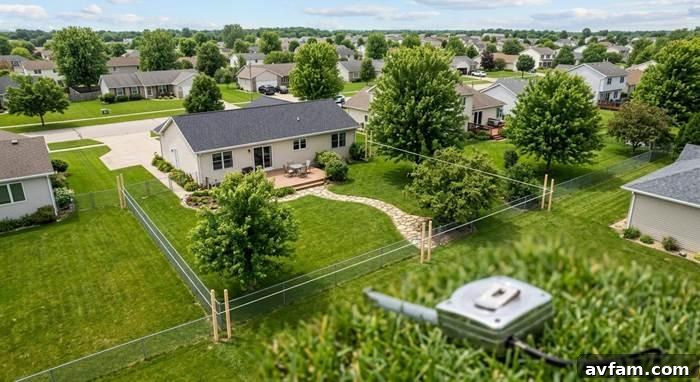
Confirming property lines before buying materials is the step most homeowners skip – and the most expensive one to skip.
Eliminating Guesswork: The Importance of a Property Survey
One of the most frequently skipped, yet potentially most expensive, preliminary steps for homeowners is accurately confirming their property boundaries. Most homeowners operate under the assumption that they know precisely where their land ends, often relying on existing fences, tree lines, or neighborhood common knowledge. However, these assumptions are frequently incorrect – sometimes by a mere few inches, but occasionally by several feet, leading to significant legal and financial repercussions.
Imagine investing time, effort, and money into installing a beautiful new fence, only to discover that it extends even two inches onto your neighbor’s property. Depending on local ordinances, the exact nature of the encroachment, and your neighbor’s patience and temperament, this mistake could escalate into a formal legal dispute, force you to tear down the entire fence, or incur substantial rebuilding costs that completely negate any savings you hoped to achieve by doing the work yourself. Don’t rely on guesswork or informal understandings. Instead, proactively pull your deed plat from county records or utilize your local GIS (Geographic Information System) parcel viewer online. If any genuine uncertainty about your property lines persists, hiring a licensed surveyor before purchasing a single post is an indispensable investment that protects you from future liabilities and costly rework.
Navigating Local Regulations: Permits and HOA Compliance
Equally as critical as defining your property boundaries is understanding and complying with local building codes and permitting requirements. Many municipalities impose specific regulations on fence construction, often requiring a building permit for fences exceeding a certain height, commonly four feet. Additionally, fences in front yards typically face more stringent setback requirements and aesthetic guidelines compared to backyard fences, impacting both design and placement. Permit fees, which typically range from $100 to $500, are a minor expense compared to the potential consequences of skipping this step.
Ignoring permit requirements can lead to severe penalties, including daily fines, official demolition orders from the city, and even the voiding of your homeowner’s insurance coverage should you ever need to file a claim related to the fence, as highlighted by Family Handyman’s fence planning guide. Furthermore, if your property is part of a homeowners’ association (HOA), their specific rules and architectural guidelines will layer on top of municipal codes. HOAs often have strict regulations regarding fence height, materials, colors, and even placement relative to lot lines. Always check both municipal codes and HOA covenants thoroughly before committing to any design or purchasing any materials. Comprehensive due diligence at this stage is crucial for a compliant and stress-free fence installation.
Beyond Aesthetics: Strategic Material Selection for Lasting Durability
Choosing the Right Fence Material for Your Needs
Selecting fence materials based solely on their visual appeal, without considering their suitability for your climate, soil, and maintenance commitment, is a common pitfall that inevitably leads to premature failure and higher lifetime costs. While aesthetics are important, functionality and durability must take precedence.
Wood remains a natural and popular starting point for many, and it performs exceptionally well – but only with consistent, proper maintenance. This includes annual sealing or staining, particularly in wet climates, and specific treatments in termite-prone regions. Neglecting this care will drastically shorten its lifespan. Vinyl fencing, while typically carrying a higher upfront cost (ranging from $30 to $60 per linear foot installed, according to Angi’s 2025 cost data), offers decades of durability with minimal upkeep, making it a cost-effective choice over the long term. Pressure-treated pine presents a middle-ground option: it’s affordable and reasonably durable, but its vulnerability to rot at ground contact necessitates correct post installation to prevent early deterioration. Other options like composite, aluminum, or steel fences each have their own pros and cons regarding cost, maintenance, and strength, making a thorough evaluation critical.
For a practical rundown of various fence types and their long-term performance, This Old House offers a useful fencing overview that is highly recommended reading before you commit to a specific material. If you’re considering less conventional options, such as corrugated steel panels or other creative designs, the backyard privacy fence guide on this site covers some of those innovative approaches, helping you balance unique aesthetics with practical considerations.
Mastering Post Installation: The Unsung Hero of Fence Longevity
Perhaps the most overlooked variable in fence construction is the soil itself. The composition of your soil significantly impacts the stability and longevity of your fence posts. Clay-heavy soil, for instance, is notorious for expanding when wet and contracting when dry, a cyclical movement that can gradually loosen fence posts over several years, compromising the entire structure. Sandy soil, on the other hand, offers excellent drainage but provides poor grip for posts if not properly secured with adequate concrete fill. Loamy soils typically offer a better balance but still require careful consideration.
The fundamental rule for post depth is straightforward: bury at least one-third of the post’s total length underground, with a minimum depth of two feet, regardless of post height. This ensures sufficient anchorage against wind, soil shifts, and general wear and tear. A vast majority of fence failures can be traced back to shallow posts, rather than inherently “bad” materials. While quick-set concrete works perfectly fine, the key is using a sufficient quantity of it and ensuring proper compaction around the post for maximum stability. Proper post installation techniques are paramount for a fence that stands straight and strong for decades.
The Finer Points: Gates, Grades, and Precision Layout
Conquering Uneven Terrain: Stepping vs. Racking Your Fence
Yard slope and uneven grades trip up more DIY fence installations than faulty lumber or poor material choices. A fence constructed without proper consideration for the terrain will inevitably result in unsightly gaps underneath the panels, sections that tilt noticeably off-angle, or entire runs that simply refuse to align correctly. There are two primary approaches to addressing sloping ground, each with distinct implications for design and material choice: stepping and racking.
Stepping involves installing horizontal fence sections that drop at uniform intervals, creating a stair-step appearance. This method works well with most pre-built fence kits and offers a clean, architectural look. However, it can create small gaps underneath the fence at each step, which may be an issue for pet containment or privacy. Racking, conversely, allows the fence panels to continuously follow the natural slope of the ground. This eliminates under-fence gaps but often requires specialized flexible panels or custom fabrication, as most standard pre-built fence kits are not designed for racking. It’s crucial to understand which method your chosen fence material or kit supports before making a purchase.
Building a Gate That Lasts: Strength, Hardware, and Design
Gates require a separate level of attention and reinforcement, as they are subjected to dynamic loads every time they open and close. The posts flanking a gate bear significantly more stress than standard fence posts; therefore, they need to be set deeper into the ground and packed with a greater volume of concrete to prevent sagging and misalignment over time. This additional stability is non-negotiable for gate longevity.
Another area where builders commonly cut corners is gate hardware. Opting for cheap hinges and latches is the most frequent reason a gate begins to drag, fails to latch correctly, or becomes otherwise non-functional within just 18 months of installation. While saving $30 on hardware might seem appealing upfront, it invariably leads to frustration, constant adjustments, and ultimately, the expense of replacing faulty components. Invest in heavy-duty, weather-resistant hinges and a robust latch mechanism designed to withstand repeated use and environmental exposure. A well-built gate with quality hardware enhances security, functionality, and the overall value of your fence.
The Art of Accuracy: Avoiding Layout Errors
Layout errors represent the final, yet easily preventable, trap in fence construction. Attempting to eyeball panel spacing or the overall fence line along a long run will almost certainly result in visibly misaligned posts, uneven panels, and a fence that looks amateurish, even on perfectly flat ground. The solution is simple and time-efficient: use stakes, string lines, and a can of spray paint. This meticulous setup process takes perhaps an hour of your time but saves countless hours of frustrating repositioning posts that didn’t end up where you thought they would be.
Before any digging commences, mark out your entire fence line clearly, accounting for gate openings and corners. Double-check measurements and ensure lines are straight and square. If the fence is part of a larger outdoor renovation, such as a patio or garden, working through the full yard layout comprehensively before committing to the fence line will prevent costly rework later. Considering innovative yard and garden designs is an excellent way to visualize how all the outdoor elements fit together seamlessly before a single hole is dug, ensuring a cohesive and functional outdoor space.
The Smart Builder’s Advantage: Planning Pays Off for a Lasting Fence
Ultimately, the actual installation process of a fence – digging the holes, mixing concrete, running precise string lines, and nailing boards into place – becomes a remarkably smooth and manageable task when all the essential legwork has been diligently completed beforehand. The real problems, those forcing homeowners to redo entire sections, incur hefty fines, or endure awkward, strained conversations with neighbors, almost invariably stem from critical steps that were skipped or overlooked during the planning stage.
To ensure your fence project is a resounding success, follow these indispensable guidelines: Absolutely confirm your property lines with official records or a professional survey before you purchase a single post. Prioritize safety by calling 811 to mark public utilities, and then go a step further by hiring a professional service to locate all your private underground lines before any digging begins. Select fence materials that are not only aesthetically pleasing but also perfectly suited to your local climate and soil conditions, aligning with your long-term maintenance commitment, rather than just your immediate budget.
When installing posts, always set them deep, adhering to the one-third rule and a minimum of two feet, using ample, properly mixed concrete for maximum stability. Crucially, account for your yard’s slope and uneven grades well in advance, deciding on a stepping or racking method before you find yourself standing in a half-dug yard, bewildered as to why nothing aligns. Invest in quality hardware for gates and ensure their posts are extra reinforced.
By meticulously addressing these foundational elements, the fence you meticulously plan and build this season will not only meet your immediate needs but will also be the one that stands straight, secure, and beautiful for decades to come, a testament to thoughtful preparation and smart execution.