
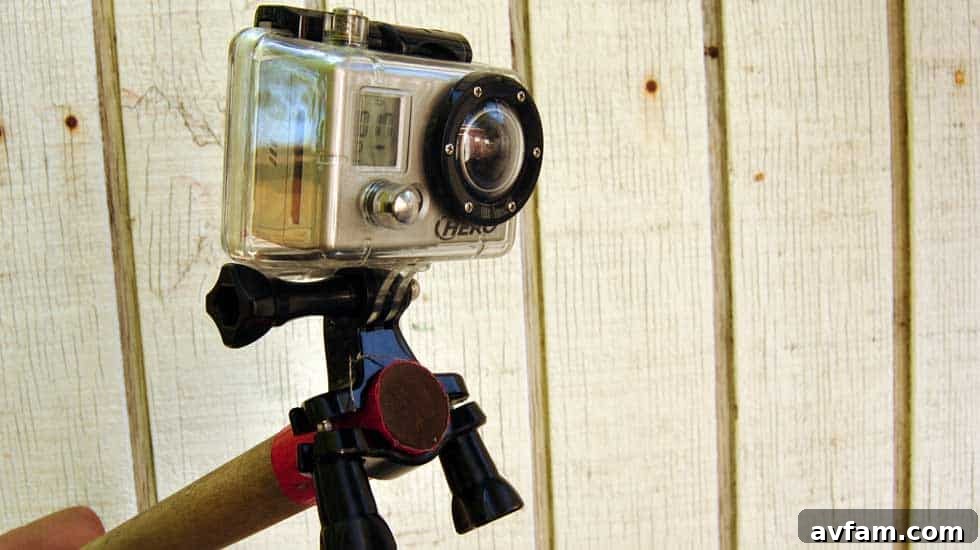
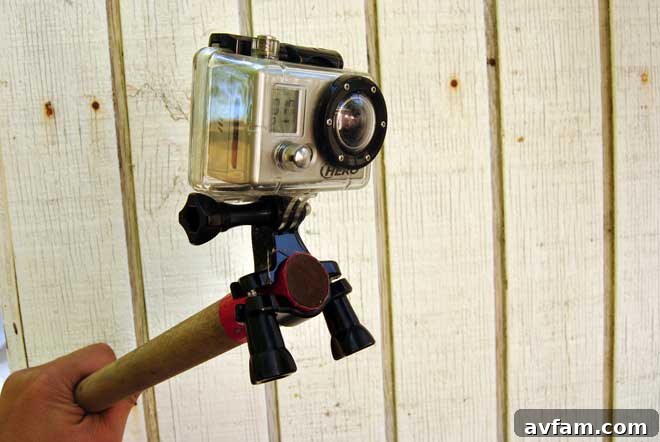
For adventure enthusiasts and casual videographers alike, the GoPro camera has become an indispensable tool for capturing life’s most thrilling moments. From extreme sports to cherished family vacations, its compact size, rugged design, and incredible versatility make it the perfect companion for documenting experiences from unique and immersive perspectives. We’ve been thoroughly enjoying our original GoPro Hero, experimenting with various official mounts like the head mount – admittedly a bit goofy-looking but incredibly fun for POV shots – the surfboard mount for aquatic escapades, and the paddle/handlebar mount for biking or kayaking adventures. While these accessories are fantastic for their specific uses, we often found ourselves wanting to achieve more dynamic, creative, and interesting angles that these mounts couldn’t quite provide. Specifically, we yearned to capture our toddler son’s world from his perspective, a much more engaging view than the typical adult-height, looking-down photos that, while sweet, lack the immersive quality we desired.
This quest for fresh angles often leads to the versatile pole mount, an accessory that extends your reach and transforms your footage. While a plethora of commercial GoPro pole mounts are readily available from GoPro itself and countless other retailers, the spirit of DIY (Do-It-Yourself) offers a remarkably rewarding and often more cost-effective alternative. There are countless DIY GoPro pole ideas circulating online, ranging from simple to complex. Our primary goal with this project was to create something exceptionally simple, using the absolute minimum of materials, and – most importantly – leveraging items we already had on hand. This approach not only results in significant cost savings but also provides the immense satisfaction of crafting a functional piece of gear perfectly tailored to your specific needs and preferences. This comprehensive guide will walk you through building your very own, incredibly simple, budget-friendly, and highly effective GoPro pole mount, proving that you don’t need to break the bank to elevate your videography game and unlock new creative possibilities.
The Essential Components for Your DIY GoPro Pole Mount
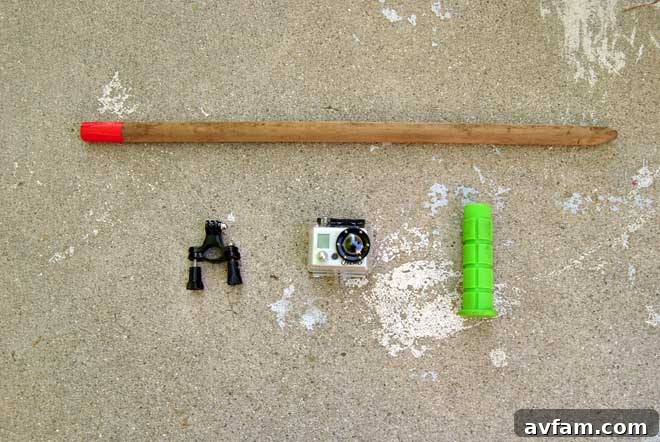
Building a custom GoPro pole doesn’t require an extensive shopping list or specialized tools. Our minimalist design focuses on functionality, durability, and ease of assembly, ensuring you can quickly put together a reliable mount. Here’s a detailed look at the core components that make up our straightforward DIY GoPro pole, along with considerations for each:
1. The Core Structure: A Two-Foot 1-Inch Wood Dowel
The dowel serves as the backbone of your pole mount, providing the necessary length and rigidity. While alternative materials like lightweight aluminum tubing or PVC pipes are also viable options, a wooden dowel offers a fantastic balance of accessibility, ease of handling, and cost-effectiveness for a DIY project. We specifically opted for a two-foot, one-inch diameter wooden dowel. The one-inch diameter is crucial as it provides a sturdy, robust base for securely mounting your GoPro without feeling flimsy, while also offering a comfortable and substantial grip for your hand. The two-foot length is incredibly versatile; it’s perfect for capturing engaging low-angle shots of children or pets, extending your reach for unique selfie perspectives, or achieving a slightly elevated viewpoint that adds a dynamic feel to your footage. When selecting your dowel, carefully consider your primary use case: a shorter dowel (e.g., 1 to 1.5 feet) is more portable, discreet, and ideal for ‘selfie stick’ applications or vlogging, whereas a longer one (e.g., 3 to 5 feet) can achieve more dramatic overhead shots, provide a safer distance from subjects in action, or help you navigate crowded environments. While wood is inherently heavier than aluminum, its natural feel, ready availability at most hardware stores, and low cost make it an excellent choice for a quick and budget-friendly project. Always ensure the wooden dowel is smooth, straight, and free of splinters or significant imperfections for comfortable and safe handling.
2. The Ergonomic Grip: One Oury Bicycle Grip (Green)
A comfortable and secure grip is paramount for any handheld camera accessory, especially one you might be holding for extended periods. Without a proper grip, holding the pole can quickly become uncomfortable, increasing the risk of fatigue and, more critically, the chance of accidentally dropping your valuable GoPro. We specifically chose an Oury bicycle grip, renowned within the cycling community for its excellent cushioning, superior tactile feel, and impressive durability. Bicycle grips are engineered for comfort and longevity during prolonged use in various conditions, making them perfectly suited for this application. The specific color (green in our case) adds a personal touch and makes your pole easily identifiable amongst your gear. When selecting a grip, it is essential to ensure its internal diameter is compatible with your dowel’s diameter for a snug, non-slip fit. A properly installed grip will not only significantly enhance comfort but also provide superior control, especially in dynamic shooting situations or when your hands might be wet, muddy, or sweaty. This seemingly small addition dramatically improves the user experience, ergonomics, and overall safety of your DIY mount, making it a joy to use.
3. The Camera Connector: One GoPro Handlebar Mount
This component is where your GoPro truly connects to your custom-built pole. The GoPro handlebar mount is an incredibly versatile and robust accessory specifically designed to attach your camera securely to various cylindrical objects, such as bike handlebars, seat posts, or, in this ingenious application, a wooden dowel. Its robust clamping mechanism and durable construction ensure that your camera remains firmly in place, even during vigorous activities or challenging environments. The significant advantage of utilizing an existing GoPro mount is that it provides a reliable, industry-standard interface for your camera without requiring any complex fabrication or specialized tools. If you already own a GoPro camera, chances are you might have one of these versatile mounts lying around from an accessory kit, making this project even more cost-effective. It is crucial to ensure that the handlebar mount you choose is compatible with your dowel’s diameter; the 1-inch dowel works perfectly with most standard GoPro handlebar mounts, which typically accommodate diameters ranging from approximately 0.75 to 1.4 inches. This mount allows for quick and secure attachment and detachment of your GoPro, providing unparalleled flexibility across a wide range of shooting scenarios and ensuring your camera is always ready for action.
4. The Personal Touch: Gorilla Glue Duct Tape – Camo (Optional but Recommended)
While technically optional, adding tape serves both aesthetic and highly practical purposes, allowing you to personalize your DIY pole mount. We utilized Gorilla Glue duct tape in a cool camo pattern to add a bit of flair and provide a layer of protection to the end of the dowel. Beyond simple decoration, tape can offer enhanced grip, particularly if your wooden dowel feels too smooth or if you wish to protect the wood from moisture, abrasions, and general wear and tear. Various types of tape can be employed depending on your preferences: electrical tape can provide a sleek, minimalist look; athletic tape can offer significantly enhanced grip and comfort; or brightly colored tapes can make your pole stand out and be easily spotted if inadvertently dropped in the wilderness or a crowded area. This is your chance to infuse your personality into the project, making your pole uniquely yours. It’s a simple, inexpensive step that adds character, improves functionality, and can subtly extend the lifespan of your homemade gear, making it truly a custom accessory.
Crafting Your DIY GoPro Pole Mount: A Comprehensive Step-by-Step Guide
With all your essential materials gathered, it’s time to assemble your custom GoPro pole. This process is refreshingly straightforward and can be completed in a relatively short amount of time, leaving you with a highly functional, versatile, and personalized accessory for your action camera.
Step 1: Preparing Your Dowel to Perfection
Before initiating the assembly, it is crucial to ensure your wooden dowel is precisely the ideal length for your specific, intended use. We were fortunate to already have a dowel cut to a two-foot length, which we’ve found to be incredibly practical for a wide range of filming scenarios. If you’re starting with a longer dowel, carefully measure and cut it to your desired size. Take a moment to thoughtfully consider the types of shots you’ll be capturing most often: a shorter pole (e.g., 1 to 1.5 feet) is excellent for handheld vlogging, discrete selfies, or dynamic close-up action, offering superior portability. Conversely, a longer pole (e.g., 3 to 5 feet) can provide dramatic overhead views, allow you to film from a safer distance, or offer unique perspectives in crowded environments. Use a fine-toothed saw to make a clean, straight cut for a professional finish. After cutting, it’s highly recommended to lightly sand the cut ends to remove any potential splinters and smooth the edges. This attention to detail ensures a more polished aesthetic and prevents any discomfort or injury during handling. Remember, the length you choose will significantly impact the types of shots you can effectively capture, so think creatively about your videography needs and aspirations.
Step 2: Expertly Securing the Handlebar Grip
A well-attached and comfortable grip is absolutely essential for both user comfort and the overall security of your DIY pole. Take your chosen bicycle grip and carefully slide it onto one end of the dowel. This step might require a bit of effort, as quality grips are intentionally designed to fit snugly and securely. To significantly ease the process, you can apply a small amount of dish soap mixed with water to the inside of the grip and the very end of the dowel. The soapy mixture acts as a temporary lubricant, allowing the grip to slide on much more smoothly. However, it’s crucial to work quickly! Wood has a natural tendency to expand slightly when it absorbs moisture, which could make the grip even harder to slide on if you delay. Once the grip is successfully in place, position it so it feels perfectly comfortable and ergonomic in your hand, ensuring it’s pushed firmly all the way to the end of the dowel for a maximally secure fit. Allow any residual moisture to fully evaporate before proceeding to the next step, which ensures the grip adheres tightly to the wood, preventing any unwanted movement during use.
Step 3: Personalizing Your Pole with Tape (Optional but Recommended)
Now comes the exciting opportunity to infuse your personal style and potentially enhance the dowel’s durability. We wrapped a bit of our camo-patterned Gorilla Glue duct tape around the end of the dowel opposite the grip. While this is primarily for decoration and provides a slight protective layer, you are encouraged to get creative. You might choose to wrap the entire dowel for a completely different aesthetic, or use brightly colored, reflective tape to make your pole highly visible, which can be particularly useful if you’re filming in challenging low-light environments or want to easily spot it among your other gear. Consider utilizing waterproof tape or a marine-grade sealant for added protection if you anticipate frequently using your pole near or in water. This step is all about making the pole uniquely yours, allowing it to reflect your personal style or clearly signal its purpose. It’s a small but impactful detail that makes your DIY project feel truly complete and custom-made, enhancing both its appearance and longevity.
Step 4: Securely Attaching the GoPro Mount
This is arguably the most critical step, as it’s where your GoPro pole truly takes its functional shape. Take your GoPro handlebar mount and firmly attach it to the end of the dowel that does *not* have the bicycle grip. It’s imperative to ensure the mount is oriented correctly so that your GoPro camera will face the desired direction once it’s attached. Tighten the screws on the handlebar mount securely using the provided tool (this is typically an Allen wrench or a robust thumb screw, depending on the specific mount type). It cannot be overstated that this connection must be exceptionally stable and robust. After tightening, gently wiggle the mount to rigorously test its security – there should be absolutely no play, looseness, or rotation. A loose mount could result in dangerously shaky footage or, far worse, your expensive GoPro detaching mid-action and suffering significant damage. Double-check that all clamping components are firmly engaged and ready to reliably support your camera, ensuring a worry-free filming experience.
Step 5: The Final Check and Camera Attachment
Before you embark on your thrilling filming adventures, take a crucial moment for a meticulous final inspection of your newly constructed DIY pole. Ensure the grip is absolutely firm and non-slip, that the tape (if used) is smoothly and securely applied without any loose edges, and most critically, that the GoPro mount is unequivocally secure and unyielding. Once you are thoroughly satisfied with all these checks, carefully attach your GoPro camera to the handlebar mount. Make sure the quick-release buckle clicks firmly and audibly into place, and that the thumb screw is tightened down completely to prevent any unwanted movement or vibration during filming. Give your GoPro a gentle but firm shake to confirm it’s locked in place. Congratulations! You’ve successfully built your very own DIY GoPro pole mount. Now you’re fully equipped and ready to capture incredible footage from perspectives you couldn’t achieve before, all thanks to your ingenuity, a few simple materials, and a commitment to creative filmmaking.
Unlocking Boundless Creative Angles with Your DIY GoPro Pole
The profound beauty of a pole mount lies in its unparalleled ability to extend your reach and dramatically alter your perspective, transforming what would otherwise be ordinary shots into truly extraordinary and captivating captures. Your new DIY GoPro pole opens up an entirely new universe of creative possibilities, allowing you to tell stories from angles previously unattainable. Here are some inspiring ideas to fuel your next filming session and maximize the potential of your homemade accessory:
Dynamic Low-Angle Shots for Immersive Storytelling
One of the most compelling uses for a pole mount is getting down to the eye level of your subjects, particularly children, pets, or small wildlife. A pole mount allows you to track them seamlessly at their unique vantage point, creating incredibly engaging and immersive footage that truly captures their world as they experience it. Imagine filming a playful dog bounding through a vibrant field, a curious toddler exploring a new park, or a small animal foraging – now you can film from their distinct perspective, making viewers feel as though they are part of the action, adding a deeply personal and intimate dimension to your storytelling.
Elevated Perspectives for Grander Views
Conversely, utilize the pole to gain a slightly higher or significantly elevated vantage point. This technique is exceptionally effective for shooting over crowds at bustling events, capturing expansive group photos where everyone can comfortably fit into the frame, or getting a sweeping overview of a majestic landscape that’s just beyond your natural reach. It can also prove invaluable in helping you skillfully avoid unwanted foreground elements or distractions, thereby providing cleaner, more professional, and aesthetically pleasing compositions that draw the viewer’s eye to your intended subject.
Immersive Action and Sports Footage
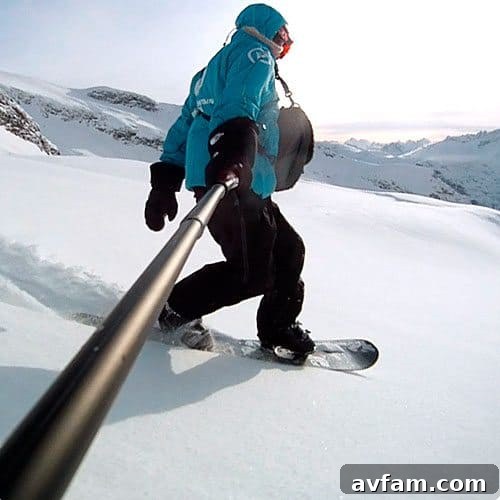
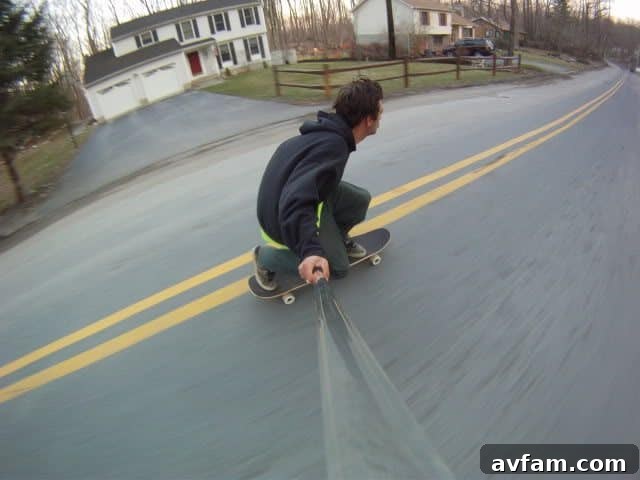
Whether you’re skateboarding through urban streets, cycling along scenic routes, hiking challenging trails, or even simply enjoying a leisurely walk, a pole mount empowers you to capture unique third-person or compelling follow-cam shots. You can effortlessly hold the pole behind you for an engaging self-follow shot, or extend it forward to dynamically capture your surroundings as you gracefully move through them. It’s particularly effective for beautifully capturing the fluid motion and energy of various sports without necessitating complex and expensive rigging setups, offering a raw and authentic feel to your action sequences.
Captivating Underwater Explorations
If your GoPro camera is waterproof (as most modern GoPros are), your DIY pole instantly transforms into an invaluable underwater extension. This allows you to safely explore vibrant coral reefs, capture schools of fish gracefully swimming by, or film your friends and family enjoying a refreshing swim without having to dive too deep or get uncomfortably close yourself. The extended length of the pole provides crucial distance, enabling you to get closer to elusive marine life without disturbing their natural habitat, or to capture wider, more expansive underwater scenes that truly convey the majesty of the aquatic world.
Unique Selfie and Group Shots
Moving far beyond the limitations of a standard arm’s-length selfie, a pole mount acts as a super-extended arm, enabling you to capture much wider selfies that include more of your breathtaking surroundings or comfortably accommodate larger groups of friends and family in a single frame. This expanded perspective adds significant context and a richer narrative to your self-portraits, transforming them from simple snapshots into compelling visual stories that capture the essence of the moment and the people involved.
Surprisingly Stabilized Tracking Shots
While not a full-fledged gimbal, the added length and mass of a well-constructed pole can surprisingly help stabilize handheld footage, particularly when tracking a moving subject. Holding the pole with both hands, especially at arm’s length, can provide a smoother, more controlled movement than simply holding the camera directly. This technique can effectively reduce undesirable micro-jitters and vibrations, resulting in noticeably smoother and more professional-looking video clips, adding a polished touch to your dynamic shots.
Maintaining Your Wooden GoPro Pole for Lasting Performance
Since your innovative pole is crafted from wood, a little proactive care and maintenance can significantly contribute to its longevity and continued performance. If you anticipate frequently using your pole outdoors, in damp environments, or near water, it is highly advisable to consider applying a protective waterproof sealant or a durable wood varnish. This will create a barrier against moisture intrusion, protect against UV degradation, and significantly prolong its life, keeping it in pristine condition for many adventures. Regularly check the tightness of the GoPro mount’s clamping mechanism to ensure it remains absolutely secure, especially after periods of heavy or dynamic use. Keep the bicycle grip clean for optimal comfort, hygiene, and sustained tactile performance. With proper care and a touch of attention, your DIY pole mount will faithfully serve you well on countless thrilling adventures to come, becoming a reliable and indispensable part of your GoPro kit.
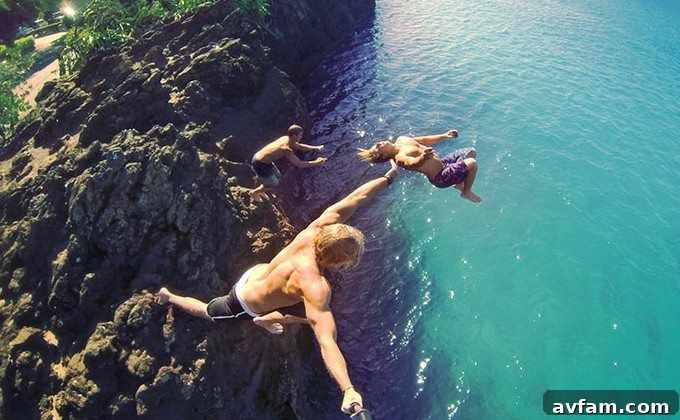
Here are some photos captured with GoPros using various pole mounts, showcasing the incredible versatility and creative potential. The options truly are endless!
Embrace the incredibly satisfying spirit of DIY and unleash your inherent creativity! Building your very own GoPro pole mount is an exceptionally rewarding and highly cost-effective way to dramatically expand your camera’s capabilities and unlock new photographic and videographic horizons. Whether you’re capturing your toddler’s delightful adventures from their unique perspective, filming thrilling sports moments with dynamic flair, or exploring the mesmerizing underwater world, this simple yet profoundly effective homemade accessory will undoubtedly prove to be an invaluable and frequently utilized addition to your essential gear bag. Stop waiting, start building, and go capture those unforgettable moments with fresh, dynamic, and truly engaging angles that tell your story like never before!