
The Ultimate Guide to Power Tool Pumpkin Carving: Unleash Your Creativity This Halloween!
As autumn leaves fall and the air turns crisp, the beloved tradition of pumpkin carving returns, signaling the arrival of Halloween. For many, this annual ritual involves struggling with dull knives, messy hands, and the sheer effort of cutting through thick pumpkin rinds. But what if there was a way to transform this labor-intensive task into an enjoyable, efficient, and even more creative experience? Enter the world of power tools.
While traditional carving knives offer a certain charm, power tools can revolutionize your pumpkin artistry. From speeding up the initial cuts to allowing for intricate details that manual tools simply can’t achieve, integrating power tools into your carving process can elevate your jack-o’-lanterns and decorative pumpkins to a whole new level. Imagine perfectly circular eyes, complex textures, or sweeping designs carved with unprecedented precision and speed. This guide will walk you through the essential power tools that can help you achieve stunning results, turning your pumpkin carving dreams into a vibrant reality.
Why Choose Power Tools for Your Pumpkin Masterpiece?
Embracing power tools for pumpkin carving isn’t just about making the job faster; it’s about expanding your creative horizons and tackling challenges that traditional methods struggle with. Here’s why you might want to consider going electric this Halloween:
- Unmatched Efficiency: Power tools drastically cut down on the time and effort required, especially when dealing with large, tough pumpkins. What might take an hour with a hand saw could be done in minutes with a reciprocating saw.
- Superior Precision: Achieve cleaner lines, perfect circles, and intricate patterns that are difficult to replicate with manual carving tools. Tools like the Dremel allow for detail work that borders on sculptural artistry.
- Effortless Power: Say goodbye to hand fatigue. Power tools do the heavy lifting, allowing you to focus on the design rather than the strain of cutting. This is particularly beneficial for those with limited hand strength or when carving multiple pumpkins.
- Versatility in Design: Different tools offer unique capabilities, from cutting large openings to etching delicate textures. This opens up a world of creative possibilities beyond the traditional scary face, allowing for more artistic and complex designs.
- Consistent Results: Once you get the hang of using specific power tools, you’ll find that you can produce consistently high-quality cuts and designs, making your pumpkins stand out from the crowd.
Essential Safety First: Carving Pumpkins with Power Tools
Before you plug in your first tool, it’s paramount to prioritize safety. Power tools are incredibly effective, but they also require respect and caution. Always keep the following safety guidelines in mind:
- Wear Personal Protective Equipment (PPE): Always wear safety glasses or goggles to protect your eyes from flying pumpkin bits and debris. Gloves can provide a better grip and protect your hands from minor scrapes.
- Stable Work Surface: Ensure your pumpkin and work surface are stable and secure. A wobbly pumpkin is an accident waiting to happen. Use a non-slip mat if possible.
- Read Your Tool Manuals: Familiarize yourself with each tool’s specific operation, safety features, and recommended attachments.
- Unplug or Remove Batteries: Always unplug corded tools or remove batteries from cordless tools before changing blades, attachments, or performing any adjustments.
- Keep Hands Clear: Maintain a safe distance between your hands and the cutting blade or bit. Never hold the pumpkin directly in the line of a cut.
- Proper Lighting: Work in a well-lit area to clearly see your design and the tool’s operation.
- Appropriate Clothing: Avoid loose clothing, dangling jewelry, or long hair that could get caught in moving parts.
- Adult Supervision: If children are involved in the carving process, ensure close adult supervision, especially when power tools are in use. Consider having them assist with design or gutting rather than operating the tools themselves.
With safety as your foundation, you’re ready to explore the exciting possibilities that power tools bring to pumpkin carving.
Top Power Tools for Next-Level Pumpkin Carving
Let’s dive into the specific power tools that can elevate your pumpkin carving game. Each tool offers unique advantages, making certain tasks easier, faster, and more precise.
1. Jigsaw
The jigsaw is an indispensable tool for initial cuts and creating larger openings. It’s particularly adept at cutting the top off a pumpkin, a task that can often be cumbersome with traditional knives. Its thin, oscillating blade allows for smooth, curved cuts, making it perfect for defining large features like mouths or eyes.
- Best For: Cutting off pumpkin tops, creating large, sweeping curves for mouths, eyes, or other major design elements. It’s also excellent for cutting out intricate silhouette designs.
- Usage Tips: Plunge the blade directly into the pumpkin rind and guide it along your marked line. For better control and cleaner cuts, we’ve found that rotating the pumpkin around the saw, rather than moving the saw around the pumpkin, often yields superior results. Use a finer-toothed blade designed for wood or scrolling for smoother edges.
- Advantages: Speed, ability to cut tight curves, relatively easy to control once you get the hang of it.
2. Oscillating Tool
Often considered the Swiss Army knife of power tools, the oscillating tool is incredibly versatile and shines in pumpkin carving. Its rapidly vibrating blades and attachments can perform a multitude of tasks, from precise cuts to surface preparation.
- Best For: Trimming stems, cutting out eyes with small circular blades, carving eyebrows, removing pumpkin guts, and even creating textured surfaces.
- Attachments & Uses:
- Cutting Blades: Attach a straight cutting blade to trim the stem flush or make detailed, intricate cuts for features like teeth or small patterns.
- Circular/Segment Blades: These are excellent for smaller, precise circular cuts, perfect for eyes or decorative patterns.
- Scraper Attachment: This is a game-changer for cleaning out the pumpkin’s interior. It quickly and efficiently removes stringy guts and thins the walls, providing a smooth surface for carving.
- Sanding Attachment: For the truly creative, a sanding pad can be used to lightly sand the pumpkin’s surface, creating unique textures, gradients, or frosted effects.
- Advantages: Exceptional versatility, precision in tight spaces, ergonomic design for detailed work, ability to tackle multiple aspects of carving with one tool.
3. Mini-Reciprocating Saw (e.g., Milwaukee Hackzall)
A down-sized version of the powerful reciprocating saw, the mini-reciprocating saw offers a fantastic balance of power and maneuverability. Its compact size and comfortable grip make it ideal for slicing through medium to large pumpkins with ease.
- Best For: Quick, robust cuts for larger design outlines, sectioning pumpkins, or efficiently removing substantial pieces of rind. It’s perfect when you need more power than a jigsaw but still require a good degree of control.
- Usage Tips: Use a wood-cutting blade. Its linear cutting motion is straightforward. Hold the pumpkin firmly and let the saw do the work. The speed and power will make short work of even the toughest pumpkin walls.
- Advantages: High power in a smaller package, excellent for tackling thicker rinds, less fatiguing than larger reciprocating saws.
4. Rotary Tool (Dremel Tool)
When it comes to intricate details, fine lines, and delicate etching, the rotary tool, commonly known as a Dremel, is unparalleled. Its high-speed rotation and vast array of attachments make it the ultimate tool for adding artistic flair to your pumpkin.
- Best For: Creating fine details, etching patterns, adding texture, carving thin lines, shading, and giving your pumpkin a three-dimensional effect. Think intricate spiderwebs, tiny stars, or delicate lettering.
- Attachments & Uses:
- Engraving Bits: For fine lines and detailed patterns.
- Grinding Stones: To remove pumpkin material precisely and create smooth edges or deeper cuts.
- Sanding Drums: For creating textured surfaces or smoothing rough edges.
- Carving Bits: For deeper, more defined cuts and sculpting.
- Usage Tips: The pencil-hold hand position of a rotary tool provides exceptional control, allowing you to dictate the depth and straightness of your cuts with precision. Practice on a scrap piece of pumpkin first to get a feel for different bits and speeds.
- Advantages: Unrivaled precision for detail work, incredible versatility with numerous attachments, allows for truly artistic and complex designs.
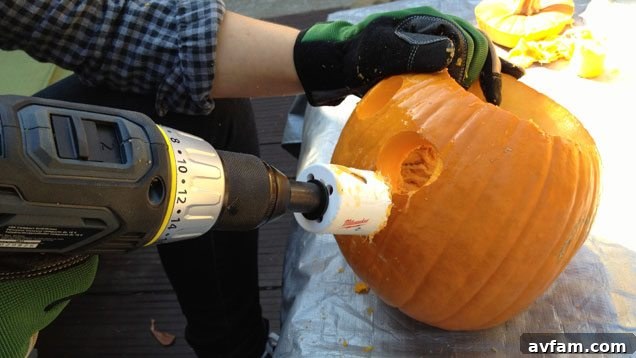
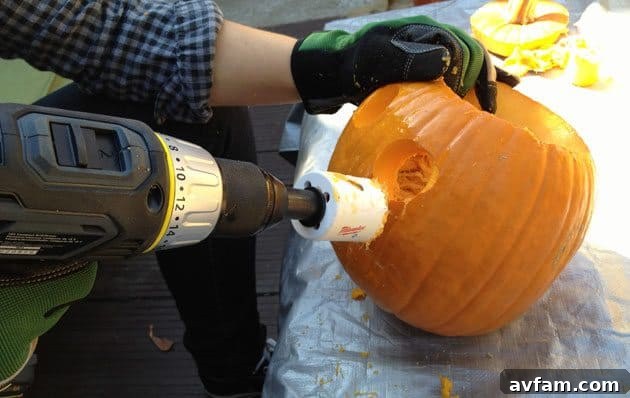
5. Drill with Hole Saws and Spade Bits
For perfectly circular features and repetitive patterns, a standard drill equipped with hole saws and spade bits is an essential tool. It offers speed and consistency that’s impossible to achieve by hand.
- Best For: Creating perfectly round jack-o’-lantern eyes, polka-dot patterns, decorative perforations, or unique cut-outs for mouths and noses.
- Attachments & Uses:
- Hole Saws: Available in various diameters, hole saws are designed to cut clean, perfect circles. They are ideal for uniform eyes or large circular design elements.
- Spade Bits: These bits create flat-bottomed holes and come in different shapes and sizes, allowing for unique cut-out patterns beyond simple circles.
- Usage Tips: Mark your desired locations with a marker. Start drilling slowly to prevent the bit from skidding, then increase speed once it’s bitten into the rind. Ensure the pumpkin is stable to prevent it from spinning.
- Advantages: Creates perfectly symmetrical circles and consistent patterns quickly, saving time and ensuring a polished look.
6. Reciprocating Saw
When you’re faced with a colossal pumpkin – one of those “big boys” that challenge even the most seasoned carvers – a full-sized reciprocating saw becomes your best friend. This corded or high-powered cordless beast makes short work of thick rinds and substantial cuts.
- Best For: Tackling exceptionally large and thick pumpkins, quickly cutting out very large sections, or making the initial opening cuts on oversized gourds where other tools might struggle.
- Usage Tips: Use a long, coarse-toothed wood-cutting blade. Due to its power, this tool requires a firm grip and controlled movement. It’s less about detail and more about raw cutting power. Always be aware of the blade’s travel path and ensure no obstructions (or body parts) are in the way.
- Advantages: Unmatched power for cutting through the thickest pumpkin walls, extremely fast for large cuts, ideal for professional-grade or competitive carving where speed and raw power are crucial.
Preparing Your Pumpkin for Power Tool Carving
Before any power tool touches your pumpkin, a little preparation goes a long way to ensure a smooth and successful carving experience:
- Select the Right Pumpkin: Choose a pumpkin with a firm rind and no soft spots. A flatter bottom helps with stability.
- Clean the Exterior: Wipe down your pumpkin with a damp cloth to remove any dirt or grime. This helps with marking your design and keeps your tools cleaner.
- Cut the Opening: Decide if you want to cut the top or the bottom. Cutting from the bottom provides a cleaner top appearance and allows you to simply place the pumpkin over a light source. Use a jigsaw or oscillating tool for a quick, precise cut. Angle your cut inward for a lid that won’t fall through.
- Gut and Thin the Walls: This is a crucial step. Scoop out all seeds and stringy pulp. An oscillating tool with a scraper attachment can make this task incredibly fast and less messy. For intricate designs, you might want to thin the pumpkin walls to about 1 inch thick, allowing light to pass through more easily and making carving less strenuous.
- Transfer Your Design: Sketch your design directly onto the pumpkin with a dry-erase marker (easy to correct) or a permanent marker. Alternatively, use stencils and a pounce wheel or simply tape them on and trace.
Beyond the Basic Jack-o’-Lantern: Creative Power Tool Carving Ideas
With power tools at your disposal, your creativity is the only limit. Move beyond the traditional triangle eyes and jagged smile with these inspiring ideas:
- Intricate Scenes: Carve detailed landscapes, haunted houses, or spooky forest scenes. Use a Dremel for fine details like individual branches or tiny windows.
- Textured Surfaces: Use sanding attachments or various grinding bits on your Dremel to create unique textures on the pumpkin’s surface, adding depth and visual interest. Think weathered wood, stone, or even animal fur.
- Multi-Layered Designs: Carve at different depths to create a sense of dimension. Remove the outer skin for one layer of light, then carve deeper for brighter light, and even deeper to cut all the way through.
- Portraits and Silhouettes: Use precise tools like the Dremel and jigsaw to carve out recognizable faces, famous characters, or intricate silhouette designs.
- Luminaries and Patterns: Instead of cutting out entire shapes, use various drill bits to create an array of holes in different sizes and patterns. When lit, these create a beautiful starry night effect or intricate light displays.
- Hybrid Carving: Combine carving with painting or accessories. Carve a base design, then use paint to add color or attach props like googly eyes, hair, or hats for a mixed-media pumpkin.
Maintenance and Cleanup After Your Carving Session
Once your masterpiece is complete, a few final steps will ensure your tools are ready for their next adventure and your workspace is tidy:
- Clean Your Tools: Pumpkin residue can be sticky and corrosive. Immediately after use, clean your power tools. Wipe down surfaces with a damp cloth, and use a brush or compressed air to remove debris from vents and moving parts.
- Inspect Blades/Bits: Check blades and bits for any damage or dullness. Sharpen or replace them as needed to ensure optimal performance for future projects.
- Proper Storage: Store your power tools in their cases or a dry, clean area to protect them from dust and moisture.
- Dispose of Pumpkin Waste: Collect all pumpkin guts and scraps. Composting is an excellent way to dispose of organic waste.
Embrace the Power, Carve with Confidence!
Pumpkin carving with power tools might seem daunting at first, but with a little practice and a commitment to safety, you’ll unlock a new level of creativity and efficiency. Gone are the days of tedious, hand-cramping efforts. Instead, you can look forward to producing impressive, intricately designed pumpkins that will be the envy of your neighborhood.
So, this Halloween, don’t just carve a pumpkin – sculpt a masterpiece. Equip yourself with the right power tools, follow the safety guidelines, and let your imagination run wild. The satisfaction of seeing your elaborate designs come to life with speed and precision is truly rewarding. Happy carving!
What’s your favorite power tool for pumpkin carving, or what creative design are you planning to bring to life this season?