
One of the most rewarding endeavors for any homeowner is the classic “weekend project.” In just a couple of days, you can experience a significant rush of productivity and immense satisfaction, all while enhancing your living space. There’s a unique sense of accomplishment that comes from stepping back and admiring a completed project that not only improves your home’s aesthetics but potentially even your lifestyle.
Transform Your Home This Weekend: The Ultimate DIY Exterior Shutter Guide
Are you eager to embark on your next fulfilling weekend project? We have just the perfect idea for you. Adding exterior shutters to your home is a project that offers a remarkable blend of visual appeal, practical benefits, and DIY satisfaction. This simple yet impactful upgrade can dramatically transform the look of your home’s exterior. But the advantages don’t stop there. Functional exterior shutters, designed to easily swing shut over your windows, can significantly boost your home’s security. Moreover, as authoritative sources like This Old House highlight in their installation tutorial, these robust additions play a crucial role in protecting your windows against severe weather and strong storm winds, preventing potential damage and offering peace of mind.
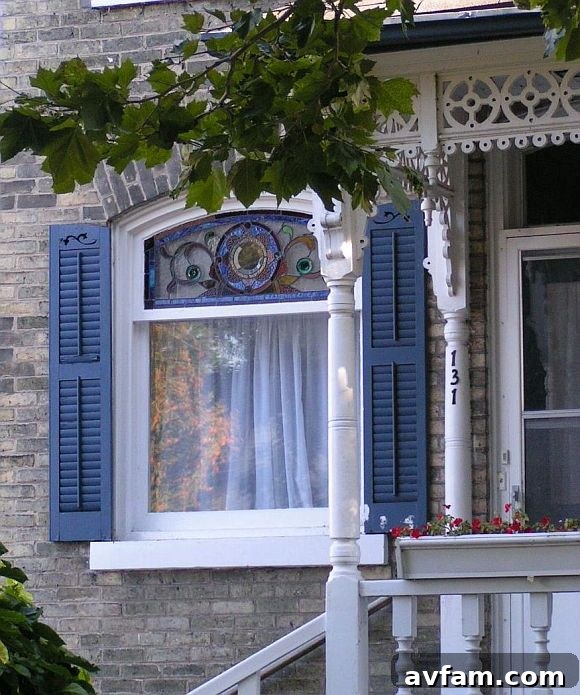
Why Exterior Shutters Are a Must-Have for Your Home
Beyond their charming aesthetic, exterior shutters offer a multifaceted enhancement to any residence. Understanding these benefits can solidify your decision to make them your next DIY project.
Enhanced Curb Appeal and Architectural Harmony
The visual impact of exterior shutters is immediate and profound. They add character, depth, and a touch of timeless elegance to your home’s facade. Available in a vast array of styles—from classic louvered and traditional raised panel to rustic board and batten, or even the unique Bermuda style—shutters allow you to accentuate your home’s architectural lines. Choosing the right style and color can instantly elevate your home’s curb appeal, making it stand out in the neighborhood and potentially increasing its market value. A carefully selected color can provide a striking contrast or a harmonious blend with your existing exterior palette, infusing a pop of personality or understated sophistication.
Boosted Home Security and Privacy
Functional exterior shutters are more than just decorative accents; they serve as a robust deterrent against potential intruders. When securely closed and latched, they add an extra layer of protection, making it significantly more difficult for unwanted visitors to access your windows. This physical barrier provides an invaluable sense of security, especially for ground-floor windows or when you are away from home. Furthermore, when closed, shutters offer an excellent degree of privacy, shielding your interior from prying eyes without the need for interior blinds or curtains during certain times.
Superior Protection Against the Elements
Historically, shutters were primarily designed for protection, and this function remains vital today. During harsh weather conditions, such as strong winds, heavy rain, hail, or flying debris, functional shutters act as a resilient shield for your windows. They prevent costly damage to glass panes, frames, and interior furnishings. In regions prone to hurricanes or severe storms, impact-resistant shutters are often a critical component of a home’s defense strategy, safeguarding your most vulnerable openings.
Potential for Increased Energy Efficiency
While often overlooked, exterior shutters can contribute to your home’s energy efficiency. When closed, they provide an additional layer of insulation against extreme temperatures. In hot climates, they can block direct sunlight, reducing solar heat gain and lessening the load on your air conditioning system. Conversely, in colder months, they can help insulate windows, preventing heat loss and keeping your home warmer. This subtle but effective insulating capability can lead to noticeable savings on your utility bills over time, making them a smart long-term investment.
Choosing the Perfect Shutters for Your DIY Project
Before you dive into installation, selecting the right shutters is paramount. This involves considering functionality, material, style, and accurate measurements.
Functional vs. Decorative Shutters: Make the Right Choice
The first distinction to understand is between functional and decorative shutters. Decorative shutters are purely aesthetic; they are permanently affixed to the wall beside the window and do not close. Functional shutters, on the other hand, are mounted with hinges and can swing open and closed, providing all the protective and security benefits mentioned above. For a DIY project aiming for both beauty and utility, functional shutters are the clear choice, although they require more precise installation.
Material Matters: Durability, Maintenance, and Aesthetics
The material of your shutters will influence their durability, required maintenance, and overall cost. Common options include:
- Wood: Offers classic beauty and can be painted or stained. Requires more maintenance (repainting/restaining) but provides excellent authenticity. Cedar and cypress are popular choices for their natural resistance to rot and insects.
- Vinyl: A budget-friendly and low-maintenance option. Comes in various colors and styles, resistant to moisture and insects, but can fade over time and may not offer the same structural rigidity as wood.
- Composite (Wood Composite/Faux Wood): A blend of wood fibers and synthetic materials. Offers the look and feel of wood with enhanced durability and less maintenance than pure wood. Resistant to rot, warping, and insects.
- Aluminum: Extremely durable, lightweight, and resistant to rust and rot. Often used for hurricane shutters due to its strength. Available in various finishes.
Most shutters are custom-made to fit your specific window dimensions. You’ll need to provide precise measurements to your vendor. According to This Old House, the cost can vary widely, typically ranging from $100 to $500 or more per window, depending on the chosen style, material, custom features, and other factors. If budget is a significant concern, consider installing functional shutters on your home’s most visible windows first, and then adding more shutters in phases as your budget allows.
Accurate Measurements are Absolutely Critical
This cannot be stressed enough: the success of your functional shutter installation hinges on accurate measurements. Shutters must fit snugly within the window casing to close properly. Here’s how to measure:
- Width: Measure the inside width of your window opening at the top, middle, and bottom. Use the smallest measurement. Divide this number by two for the width of each individual shutter.
- Height: Measure the inside height of your window opening from top to bottom on both sides and in the middle. Use the smallest measurement.
- Casing: Ensure your measurements account for the window casing where the hinges will be mounted.
When closed, you should aim for a minimal gap, typically around a 1/4-inch or smaller, on all sides of the shutters. This tiny margin for error means precision is paramount during measurement and installation.
Your Step-by-Step DIY Shutter Installation Process
With your perfect shutters selected and ordered, it’s time to prepare for the installation. This project is manageable for a dedicated DIYer, but patience and attention to detail are your best tools.
Phase 1: Preparation Day – Setting the Stage for Success
Before you start drilling, dedicate a full day to preparation. This phase is crucial for a smooth and efficient installation.
- Inspect and Clean Windows: Thoroughly clean your window frames and exterior trim. Inspect for any signs of rot, loose paint, or damage. Make any necessary repairs or touch-ups before proceeding.
- Remove Old Shutters (If Applicable): If you’re replacing existing shutters, carefully remove them along with any old hardware. Patch and paint any holes left behind to ensure a clean surface.
- Prepare and Finish Your New Shutters: If your shutters are unfinished, this is the ideal time to paint or stain them. Choose a bright, contrasting color to add a vibrant pop to your home’s exterior, or a complementary hue for a more subtle look. Ensure you use exterior-grade paint or stain, applying a primer first for optimal adhesion and longevity. Painting them before hanging prevents paint from getting on your house and allows for full coverage.
- Gather All Your Hardware and Tools: Lay out all your shutter components, including the shutters themselves, hinges, shutter dogs (tiebacks), locking hardware, screws, and any copper capping. Ensure you have all necessary tools: tape measure, level, drill with appropriate bits, screwdrivers, a caulk gun (for sealing), and safety glasses.
Phase 2: Understanding Shutter Positioning – The Golden Rule
This is arguably the most critical step and the most frequently botched aspect of shutter installation. Functional shutters *must* fit inside the window casing, aligning with the trim. If you hang shutters outside the casing, they simply will not shut properly, rendering them purely decorative and compromising their protective features. Remember the 1/4-inch (or smaller) gap: this is your target for the space around the closed shutters. Dry-fit them temporarily to visualize the placement and ensure proper clearance.
Phase 3: Hinge Installation – Precision is Paramount
Installing the hinges is the heart of the functional shutter process. This Old House advises that this step may involve some trial and error, especially for your first set of shutters, but it will become easier with practice.
- Mark Hinge Locations: With the shutter temporarily held in its correct closed position, mark the exact locations for the hinges on both the window frame and the edge of the shutter itself. Ensure the hinges are evenly spaced and positioned for optimal support.
- Mount Hinge Plates to Window Frame: Using your drill, attach the hinge plates securely to the window frame or casing. Use screws that are long enough to bite firmly into the underlying wood.
- Attach Hinges to Shutters: Next, attach the other half of the hinges to the edge of each shutter. Ensure they align perfectly with the hinge plates on the window frame.
- Mount the Shutters: Carefully lift each shutter and align its hinges with the hinge plates on the window frame. Insert the hinge pins to connect the shutter to the frame. Test the swing of the shutter; it should open and close smoothly without binding. Make small adjustments as needed until you achieve perfect operation.
Phase 4: Mounting Shutter Dogs (Tiebacks) and Locking Hardware
Once the shutters are hanging correctly, it’s time to add the finishing hardware that secures them in both open and closed positions.
- Install Shutter Dogs/Tiebacks: These decorative and functional pieces hold your shutters open against the house. With the shutter fully open, mark the position for the shutter dog on the siding or trim. Ensure it holds the shutter firmly in place. Drill pilot holes and securely attach the shutter dogs.
- Attach Locking Hardware: For enhanced security and to keep your shutters securely closed against high winds, install locking hardware. This typically includes slide bolts or surface bolts that can be engaged from the exterior to keep the shutters tightly shut. Position them for optimal security and ease of use, then attach them securely to the shutters and window frame.
- Optional: Add Copper Capping: If desired for aesthetic appeal or added weather protection, install copper capping along the top edge of your shutters. This can offer a distinctive finish and help divert water away from the shutter’s top edge.
Maintaining Your Newly Installed Shutters
To ensure your new exterior shutters remain beautiful and functional for years to come, regular maintenance is key. Periodically inspect them for any signs of wear and tear, loose hardware, or paint chipping. Re-paint or re-stain as needed, and keep the hinges lubricated for smooth operation. A quick clean with soap and water can remove dirt and grime, preserving their fresh look.
Conclusion: Enjoy the Fruits of Your Labor!
And voilà – new, functional, and beautiful shutters! Stepping back to admire your handiwork, you’ll undoubtedly feel a profound sense of accomplishment. This weekend project not only gives your home a significant aesthetic upgrade but also bolsters its security and protects it against the elements, potentially even improving its energy efficiency. It’s a tangible investment that pays dividends in curb appeal, peace of mind, and the satisfaction of a job well done.
Do you already have shutters on your house? If so, did you undertake the installation yourself, or did you hire a professional? If not, would you now consider a DIY shutter installation project after reading this guide? We’re all ears and would love to hear about your experiences or plans in the comments below!
Photo Credit: Flickr.com/cindyfunk