
Ultimate Guide to Fence Installation: Boost Your Home’s Security, Aesthetics & Privacy
A well-chosen and expertly installed fence is more than just a boundary – it’s a significant upgrade to your property that offers a multitude of benefits. Whether you’re looking to enhance an existing perimeter or establish new boundaries, adding a fence can dramatically improve your home’s security, elevate its aesthetic appeal, and create a more private and functional outdoor living space. From keeping beloved pets safe to increasing your property’s value, the advantages are clear and compelling.
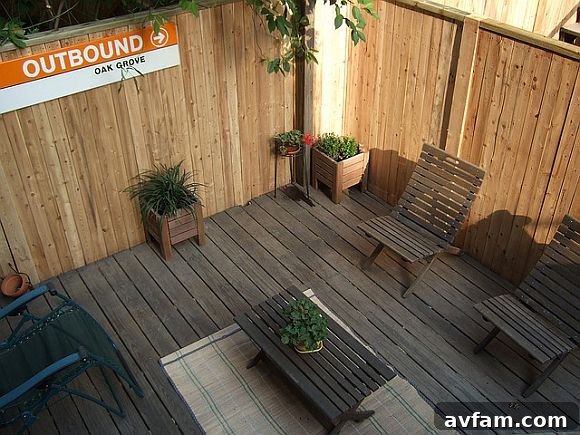
Why Investing in a New Fence is a Smart Choice for Homeowners
Beyond simply defining your property lines, a new fence brings a wealth of advantages. Let’s explore the key reasons why homeowners consistently choose to invest in quality fencing:
Enhanced Security and Peace of Mind
One of the primary motivations for fence installation is boosted security. A sturdy fence acts as a physical deterrent, making your property less accessible to unauthorized individuals. It creates a clear perimeter, which can discourage potential intruders and give you a greater sense of safety, especially if you have children or valuable outdoor possessions. Knowing your home is better protected allows for genuine peace of mind.
Boosted Curb Appeal and Property Value
Aesthetically, a well-designed fence can transform the entire look and feel of your yard and home. It adds structure, defines garden spaces, and can complement your home’s architectural style, significantly enhancing its curb appeal. This visual upgrade isn’t just for show; it often translates directly into increased property value, making your home more attractive to potential buyers should you decide to sell in the future.
Safety for Pets and Children
For pet owners, a secure fence is indispensable. It provides a safe enclosure where your furry friends can roam freely without the risk of wandering into busy streets, getting lost, or bothering neighbors. Similarly, families with young children benefit immensely from a fenced yard, creating a safe play area where kids can enjoy the outdoors without constant worry about them straying beyond your property’s confines. This is particularly crucial if you have a swimming pool, where a compliant fence is often a legal requirement and a life-saving barrier.
Increased Privacy and Seclusion
Depending on the style and height, a fence can offer invaluable privacy, transforming your yard into a secluded sanctuary. Whether you’re hosting a backyard barbecue, enjoying a quiet afternoon, or taking a dip in your pool, a privacy fence can shield your activities from prying eyes. This creates a more intimate and comfortable outdoor environment, allowing you to relax and enjoy your space without inhibition.
Noise Reduction and Boundary Definition
While not a soundproof barrier, a solid fence can help reduce ambient noise from busy streets or neighbors, contributing to a calmer atmosphere in your yard. Furthermore, a fence clearly defines your property boundaries, preventing disputes with neighbors over shared land and establishing a clear delineation for landscaping and maintenance responsibilities.
Choosing the Right Fence Materials: A Comprehensive Guide
The market offers a vast array of fencing materials, each with unique characteristics, costs, maintenance requirements, and aesthetic qualities. Selecting the perfect material for your fence installation project is a crucial decision that will impact its longevity, functionality, and overall look. Here’s a deeper look into the most popular options:
Wood Fencing: Classic Appeal and Versatility
- Types: Picket, privacy, post and rail. Common woods include cedar, redwood, pine (pressure-treated).
- Pros: Timeless aesthetic, natural look, versatile designs, good privacy potential, can be stained or painted, relatively affordable for some styles.
- Cons: Requires regular maintenance (sealing, staining, painting) to prevent rot, warping, and insect damage; susceptible to weathering; lifespan can be shorter than other materials if not properly maintained.
- Ideal For: Homeowners seeking a traditional look, high customization, and good privacy.
Vinyl (PVC) Fencing: Durability Meets Low Maintenance
- Types: Picket, privacy, rail, decorative. Often designed to mimic wood.
- Pros: Extremely low maintenance (no painting or staining needed), highly durable, resistant to rot, pests, and weathering; excellent longevity; easy to clean; available in various styles and colors, provides excellent privacy.
- Cons: Higher initial cost than wood; can be susceptible to cracking in extreme cold; repair can be challenging as sections may need full replacement; limited color choices compared to paintable wood.
- Ideal For: Those prioritizing minimal upkeep, long-term durability, and a clean, consistent appearance.
Chain Link Fencing: Practicality and Affordability
- Types: Galvanized, vinyl-coated.
- Pros: Very affordable, highly durable, low maintenance, quick installation, excellent for containing pets or defining boundaries without obstructing views.
- Cons: Less aesthetic appeal compared to other options; offers no privacy (though privacy slats can be added); can rust over time if not coated; can be easily climbed.
- Ideal For: Budget-conscious homeowners, pet containment, securing large areas, or properties where an unobstructed view is desired.
Wrought Iron Fencing: Elegance and Security
- Types: Ornamental, security, custom designs.
- Pros: Extremely strong and secure; offers a classic, elegant, high-end aesthetic; highly durable with proper maintenance; long lifespan; allows for open views.
- Cons: Very high initial cost; requires regular painting/powder coating to prevent rust; can be labor-intensive to install; offers no privacy.
- Ideal For: Enhancing historical homes, providing robust security, or adding a luxurious, decorative touch to a property.
Aluminum Fencing: Aesthetic Versatility with Less Maintenance
- Types: Ornamental, pool fences, various heights and styles.
- Pros: Resembles wrought iron but is much lighter and rust-proof; low maintenance (powder-coated finishes last for years); durable; often more affordable than wrought iron; versatile in design; suitable for sloped yards.
- Cons: Not as strong as steel or wrought iron; higher initial cost than wood or chain link; offers no privacy.
- Ideal For: Achieving an ornamental look without the rust concerns of iron, pool safety, or properties needing an elegant, low-maintenance barrier.
Other Options: Composite and Invisible Fences
While less common for full perimeter fencing, composite fencing combines wood fibers and recycled plastic, offering durability and low maintenance similar to vinyl, often with a more natural wood-like texture. Invisible fences use an underground wire and a collar worn by pets to create an electronic boundary. These are excellent for pet containment without altering aesthetics but offer no security or privacy for humans.
Planning Your Fence Installation Project: Essential Steps
Before you break ground, thorough planning is paramount for a successful and stress-free fence installation. Overlooking these critical steps can lead to costly delays, rework, or even legal issues.
1. Check Local Regulations and Obtain Permits
Almost all municipalities have specific regulations regarding fence height, setback from property lines, and materials. Before purchasing any materials or beginning work, contact your local city or county planning department. You might need to obtain a building permit, especially for taller fences or certain materials. Non-compliance can result in fines or requiring you to remove and rebuild your fence.
2. Understand Your Property Lines
Never assume where your property line lies. Incorrect fence placement can lead to disputes with neighbors. Consider hiring a professional surveyor to accurately mark your property boundaries. Once you know your exact lines, it’s courteous and often beneficial to discuss your plans with adjoining neighbors, especially if the fence will be on a shared boundary.
3. Call Before You Dig: Utility Markings (811)
This step is non-negotiable for safety. Before you dig any post holes, contact 811 (in the U.S.) or your local utility locating service. They will mark the location of underground utility lines (water, sewer, gas, electricity, cable, internet) on your property, preventing dangerous and expensive accidents. Always wait for all lines to be marked before starting excavation.
4. Assess the Terrain and Site Preparation
Walk your property and identify any slopes, rocky areas, or existing landscaping that might impact your fence installation. Clear the fence line of any debris, bushes, or roots that could hinder the process. Plan for gates, corners, and any special considerations for uneven ground.
DIY Fence Installation Guide: A Step-by-Step Approach for Wooden Fences
While installing a fence is a significant undertaking, many homeowners find it a rewarding DIY project. With the right tools, preparation, and patience, you can achieve professional-looking results. This guide focuses on wooden fence installation, a common and versatile choice for DIYers.
Essential Tools and Materials You’ll Need:
- Treated Boards and Fence Posts: Choose appropriate dimensions and wood type (e.g., pressure-treated pine, cedar).
- Posthole Digger: Manual or power auger.
- Shovel and Tamping Rod: For clearing holes and compacting concrete.
- Tape Measure and Pencil/Marker: For accurate measurements.
- String Line and Stakes: To ensure straight fence lines.
- Level (Post Level and Standard Level): Crucial for vertical and horizontal alignment.
- Saws: Hand saw, circular saw, or miter saw for cutting wood.
- Hammer or Nail Gun: For attaching rails and pickets.
- Nails or Screws: Exterior-grade, corrosion-resistant.
- Concrete Mix: Fast-setting or regular.
- Gravel or Crushed Stone: For drainage at the base of post holes.
- Safety Gear: Gloves, eye protection, ear protection.
- Wood Chisel (Optional): For minor adjustments or notches.
- Stain/Sealant and Brushes/Rollers (Optional): For finishing.
Step 1: Marking Your Fence Line and Post Locations
After your utility lines are marked, use stakes and a string line to outline your fence path. This ensures a straight and accurate installation. Mark the locations for your corner posts first, then intermediate posts, typically spaced 6 to 8 feet apart depending on your fence design and local wind load requirements. Adjust spacing slightly if needed to avoid cutting panels into very small pieces.
Step 2: Digging Post Holes
Using your posthole digger or power auger, excavate holes for each post. The general rule is to bury at least 1/3 of the post’s length, plus an additional 6 inches for drainage. So, for an 8-foot tall fence post (6 feet above ground), your hole should be about 30 inches deep. Make the hole 3 times wider than the post itself to allow for sufficient concrete. For example, a 4×4 post might require a 12-inch diameter hole.
Step 3: Setting the Corner and End Posts
Place about 6 inches of gravel or crushed stone at the bottom of each post hole. This provides drainage and prevents wood rot. Insert your first corner post, ensuring it is perfectly plumb (vertical) using a post level. Mix your concrete according to manufacturer instructions. Pour the concrete into the hole, filling it gradually and tamping it down to remove air bubbles. Ensure the post remains plumb throughout the process. Crown the concrete slightly around the post to shed water. Repeat for all corner and end posts, allowing the concrete to cure fully as per instructions (usually 24-48 hours) before proceeding.
Step 4: Installing Intermediate Posts
Once your corner posts are set and sturdy, stretch a string line tightly between them at the top and bottom. This will guide the alignment and height of your intermediate posts. Install the remaining posts one by one, ensuring each is plumb and aligned with the string line before filling with concrete. Periodically check your measurements to maintain consistent spacing.
Step 5: Attaching Rails
After the concrete has fully cured, you can begin attaching the horizontal rails that will support your fence boards. Typically, there are top and bottom rails, and sometimes a middle rail for taller fences. Ensure these rails are perfectly level across each section. If installing on a slope, cut the rails to align with the grade of the land for a uniform appearance. Use exterior-grade screws or nails and a hammer or nail gun to securely fasten the rails to the posts. For added strength, you can use metal brackets.
Step 6: Installing Pickets or Fence Boards
This is where your fence truly takes shape. If you’re building a privacy fence, install vertical boards (pickets) side-by-side without any gaps, ensuring they are level and consistently spaced. For a picket fence, you’ll intentionally leave small, even gaps between boards. Use a spacer block to ensure uniform gaps. Attach each picket to the top and bottom rails with at least two screws or nails per rail connection. Work systematically along each section, checking for straightness and plumb as you go.
Step 7: Installing Gates
A gate requires robust support. Ensure the gate posts are extra sturdy and well-anchored with concrete. Install heavy-duty gate hinges and latches, ensuring the gate swings freely and closes securely without sagging. Adjust hinges as needed for perfect alignment.
Step 8: Finishing Touches and Cleanup
Once all boards are installed, walk along your fence line and make any necessary adjustments. For wooden fences, consider applying a stain, paint, or protective sealant. This not only enhances its appearance but also significantly increases its longevity by protecting against moisture, UV rays, and rot. Clean up all construction debris, and admire your newly installed fence!
Maintaining Your New Fence for Lasting Beauty and Functionality
A fence is an investment, and like any investment, it benefits from regular care. Proper maintenance will extend its lifespan, preserve its appearance, and ensure it continues to serve its purpose effectively.
- Regular Inspections: Periodically walk your fence line to check for loose boards, damaged posts, rust spots (on metal fences), or signs of rot/pest infestation (on wood fences). Address minor issues promptly before they become major problems.
- Cleaning: Depending on the material, your fence may benefit from occasional cleaning. Power washing can remove dirt, mold, and mildew from vinyl and some wood fences. Always use appropriate cleaners and pressure settings for your fence type.
- Wood Fence Specifics: Reapply stain or sealant every 2-5 years, depending on your climate and product choice. Trim back vegetation that can hold moisture against the wood, promoting rot.
- Metal Fence Specifics: Inspect for rust and touch up any chipped paint or powder coating to prevent corrosion. Lubricate gate hinges regularly.
- Vinyl Fence Specifics: Typically only requires washing with soap and water to remove dirt and grime.
- Gate Maintenance: Regularly check gate hinges, latches, and posts for alignment and smooth operation. Lubricate moving parts.
DIY vs. Professional Fence Installation: Making the Right Decision
Deciding whether to tackle fence installation yourself or hire a professional is a key choice, with distinct advantages and disadvantages for both paths.
Advantages of DIY Fence Installation:
- Cost Savings: The most significant benefit is saving on labor costs, which can be a substantial portion of a professional installation’s total price.
- Personal Satisfaction: There’s a great sense of accomplishment in building something with your own hands and seeing the finished product.
- Flexibility: You can work at your own pace and schedule, fitting the project around your personal commitments.
- Learning Experience: It’s an opportunity to learn new skills and understand the construction process.
Disadvantages of DIY Fence Installation:
- Time-Consuming: Installation is physically demanding and can take significantly longer for a DIYer, especially for larger or more complex fences.
- Physical Labor: Digging post holes, mixing concrete, and handling heavy materials require considerable strength and stamina.
- Tool Investment: You might need to purchase or rent specialized tools, which can reduce cost savings.
- Potential for Errors: Without experience, mistakes in measurement, alignment, or structural integrity can lead to a less durable or aesthetically pleasing fence, potentially requiring costly repairs.
- Safety Risks: Working with power tools, heavy materials, and digging can pose safety hazards if proper precautions aren’t taken.
Advantages of Professional Fence Installation:
- Expertise and Experience: Professionals have the knowledge to navigate complex terrain, ensure proper structural integrity, and adhere to local codes.
- Efficiency and Speed: They can complete the project much faster due to specialized tools, crew size, and experience.
- Quality Assurance: Reputable contractors often offer warranties on their work and materials, providing peace of mind.
- No Heavy Lifting: You avoid the physical strain and labor involved.
- Permit Handling: Many professionals will handle the permitting process and ensure compliance with all regulations.
Disadvantages of Professional Fence Installation:
- Higher Initial Cost: The primary drawback is the higher upfront expense due to labor and contractor overhead.
- Less Control: While you’ll discuss the design, the day-to-day execution is out of your hands.
Conclusion: Your Perfect Fence Awaits
Whether you opt for the cost-saving satisfaction of a DIY fence installation or the guaranteed expertise of a professional, adding a new fence to your property is an investment that truly pays off. From enhancing security and boosting curb appeal to providing invaluable privacy and keeping your loved ones safe, the benefits are undeniable. By carefully planning your project, choosing the right materials, and committing to proper installation and maintenance, you can enjoy a beautiful, functional, and long-lasting fence that elevates your home for years to come.
Photo: Flickr.com/photos/ann-dabney/1140873733/