
Transforming your home can be a daunting prospect, but some projects prove to be surprisingly straightforward and immensely rewarding. Our compact 100-square-foot studio space, serving as our dedicated home office, perfectly exemplifies this. Despite its modest size, it feels incredibly spacious and functional within our 900-square-foot home, offering a much-needed separate zone for productivity. The journey to revitalize this crucial area led us to discover the remarkable benefits of Shaw luxury vinyl flooring, a decision that has truly elevated our daily lives.
In a previous discussion, we delved into the myriad advantages of Shaw luxury vinyl flooring, a product line celebrated for its exceptional durability, stunning aesthetics, and superior water resistance. Among their impressive offerings, the Floorte series stood out as the ideal solution for our studio. Its innovative design and robust construction promised a long-lasting, beautiful floor, while its reputation for easy, DIY installation sealed the deal. We were amazed to find that installing our new Floorte floor was not only manageable but also completed in just a single afternoon, despite it being our very first attempt at such a significant home improvement project. This hands-on experience has inspired us to share our step-by-step guide, demonstrating just how simple it can be to achieve professional-looking results with Shaw Floorte luxury vinyl planks.
Prepping the Floor for Shaw Luxury Vinyl
Effective subfloor preparation is arguably the most critical step in any flooring installation, and luxury vinyl planks are no exception. A meticulously prepared subfloor ensures the longevity, performance, and aesthetic appeal of your new Shaw Floorte flooring. Before laying down the first plank, our initial task involved painting the room. This strategic move prevented any accidental paint drips or splatters from marring our pristine new floors, allowing us to work freely and without worry. Once the freshly painted walls and ceiling were completely dry, we turned our attention to removing the old vinyl square tiles that had graced the studio floor for many years.
These aging tiles, having long surpassed their prime, were already showing signs of wear and tear, with many panels shifting and loosening. Equipped with a sturdy pry bar, we made quick work of their removal, efficiently pulling up the old tile panels in under 30 minutes. The ease with which they came up was a testament to their age and condition, but it also underscored the importance of thorough preparation for the new installation.
A crucial safety note when undertaking any demolition involving older flooring is to exercise extreme caution. Adhesives used in vintage tiles, particularly those installed before the 1980s, may contain hazardous materials like asbestos fibers or crystalline silica. If there’s any doubt about the composition of your old adhesive, it is always safest to assume these substances are present. Avoid any actions that could disturb these materials, such as scraping, sanding, or chipping away at the old adhesive, as this can release dangerous airborne particles. For peace of mind and safety, consider having the material tested or hiring a professional abatement service if you suspect asbestos. Your health and safety should always be the top priority in any home improvement project.
Once the old tiles were safely removed, our focus shifted to creating an immaculate subfloor. We thoroughly cleaned the entire area, paying special attention to corners and wall edges with our shop vacuum, to eliminate any dirt, dust, or debris. Even the smallest particle can hinder the proper installation and long-term performance of your new Shaw luxury vinyl planks. The subfloor must not only be completely clean but also perfectly flat, dry, and structurally sound. Any unevenness should be addressed with a self-leveling compound, and any moisture issues must be resolved to prevent future problems like warping or mold growth. A properly prepared subfloor is the foundation for a flawless and durable luxury vinyl floor.
Determining the Ideal Layout for Your LVP Flooring
Before you begin the exciting process of installing your Shaw Floorte luxury vinyl flooring, meticulous planning of the floor layout is essential. This crucial step prevents common issues such as having unsightly narrow plank widths at wall junctures or very short, awkward pieces at the end of rows, which can detract from the overall aesthetic of your finished floor. Proper planning ensures a professional-looking result and minimizes material waste.
The general guideline for installing vinyl planks is to run them parallel to the longest exterior wall in the room. This orientation typically enhances the sense of space and provides a more visually appealing flow, especially in rectangular rooms. Begin by measuring your room carefully to determine the exact dimensions. It’s often beneficial to dry-lay a few rows of planks without adhesive or locking them together, especially in a complex room, to visualize the pattern and identify any potential issues with cuts or plank widths. This pre-layout allows you to adjust your starting point to avoid thin strips of planks along the perimeter, ensuring that your first and last rows are substantial enough for a stable and attractive finish. Aim for a staggered pattern that mimics natural hardwood, offsetting each row by at least 6-12 inches (or about one-third to one-half the length of a plank) to achieve a dynamic and authentic look.
Seamless Shaw Floorte Luxury Vinyl Flooring Installation
The Shaw Floorte luxury vinyl flooring is renowned for its user-friendly installation, thanks to their patented Fold n Tap method. As its descriptive name suggests, this innovative system allows planks to be easily pieced together, creating a secure, floating floor without the need for messy glues or complex tools. For most installations, no additional underlayment is required; Floorte planks can be installed directly over a smooth, clean concrete subfloor. While Floorte does offer various padding options for those seeking enhanced sound dampening or added comfort underfoot, it’s generally not a necessity for structural integrity. In our studio, we opted for direct installation over our concrete subfloor, and the results were exceptional.
A key characteristic of Floorte vinyl plank flooring is its design for floating installation. This means the planks are not, and should never be, permanently secured or glued to the subfloor. This floating method allows the entire floor to expand and contract naturally with changes in temperature and humidity, preventing buckling or gapping. It’s also important to remember that heavy, fixed objects such as kitchen cabinets or permanent islands should not be installed directly over a floating floor, as this can impede its natural movement. To accommodate this essential expansion and contraction, a ¼” expansion space must be maintained at all edges of the flooring, including along walls, doorways, and around any fixed objects. This gap will later be covered by baseboards or trim, creating a seamless and professional finish.
Once you’ve finalized your layout plan and determined the orientation of your planks, you’re ready to begin the installation. It’s typically recommended to start from the left side of the room and work towards the right, keeping the planks in front of you. As you lay the first row, use spacers along the walls to precisely maintain that crucial ¼” expansion space. Consistency here is key to a successful installation.
The alignment of the very first plank, and indeed the first two rows of planks, is paramount and will largely dictate the overall success and straightness of your entire installation. Begin by placing the first plank in the top left corner of the room, ensuring it is precisely ¼” away from the wall. This initial placement sets the tone for the entire project. The second plank is then installed by aligning its end tongue over the end groove of the first plank and gently dropping it into place. The Fold n Tap system is designed for a snug fit with only a bit of light, consistent pressure. If you find yourself struggling or needing to force the connection, stop immediately. Forcing planks can damage the delicate tongues and grooves, compromising the integrity of the locking mechanism. Re-check your alignment, lift the plank, and try again with a gentle touch. Patience at this stage will save you considerable frustration later.
To fully engage the short side of each plank and ensure a tight, flush fit with the adjacent plank, we found a rubber mallet to be incredibly useful. A few light taps along the edge helped to secure the connection without causing any damage. Remember, the goal is a gentle engagement, not forceful hammering.
For the second row, it’s crucial to cut down the length of the first plank to create a natural, random, staggered appearance, mimicking the look of real hardwood. While personal preference plays a role, a good rule of thumb is to offset each subsequent row of planks by approximately one-third to one-half the length of a plank. This avoids a stair-step or H-joint pattern, which can look unnatural and weaken the floor. Be mindful that any plank shorter than 6 inches at the end of a row or as a starter piece will not only look out of place but can also be less stable.
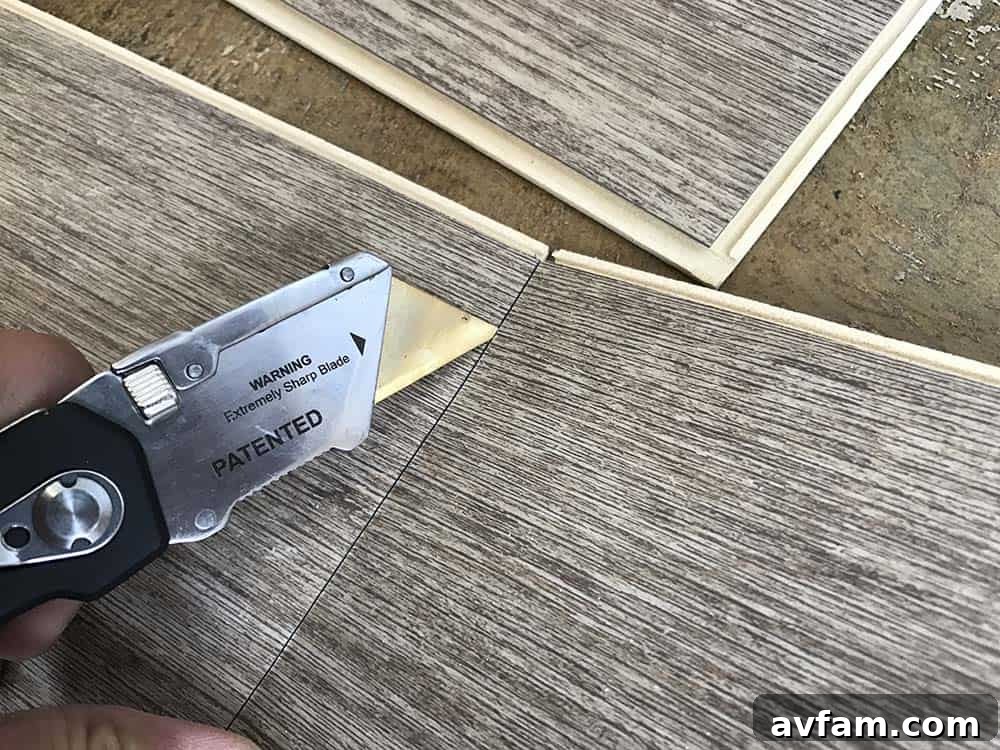
The most efficient and recommended method for cutting Floorte planks is to score them firmly with a utility knife on each side, then simply snap them cleanly in half over an elevated edge. This provides a surprisingly clean and straight cut. For more intricate cuts, such as those around doorframes, vents, or other obstacles, a jigsaw is an invaluable tool. While we used a miter saw to clean up some rough edges, it’s generally not the ideal tool for the primary cuts of luxury vinyl planks, as scoring and snapping is often quicker and cleaner for straight lines. Always ensure you measure twice and cut once, minimizing waste and ensuring precise fits.
As you progress with the installation, make it a habit to regularly check that each row remains perfectly square to the starting wall. If you notice the flooring beginning to go askew, it’s imperative to identify the point where the deviation occurred and correct it. Continuing with an off-square floor will only compound the problem and lead to an unsatisfactory finish. Always remember that the planks are designed to snap together easily and smoothly; if you’re encountering resistance, do not force them. Instead, re-examine the connection points, clear any debris, and ensure proper alignment before attempting to join them again. This iterative process of laying, checking, and gently correcting will ensure a high-quality, professional installation.
Once we established a consistent rhythm and mastered the Fold n Tap technique, the flooring installation proceeded remarkably smoothly. We encountered a few tricky spots, requiring a bit of extra careful measuring and massaging to fit planks precisely around a small corner and near the windowsill. However, the inherent flexibility and workability of Floorte luxury vinyl planks made these challenges manageable. As a precautionary measure, and a wise tip for any DIY flooring project, we had factored in a few extra planks when ordering. This foresight proved beneficial, providing peace of mind in case any planks were damaged during cutting or installation, or if we miscalculated our quantities. Having that buffer meant we could complete the project without unexpected delays or frantic reordering.
Final Touches and Enjoying Your New Shaw Floorte Floor
Once the last Shaw Floorte luxury vinyl plank was perfectly laid and secured, the sense of accomplishment was immense. The final steps were surprisingly minimal and straightforward, a testament to the clean and efficient nature of this DIY-friendly flooring system. We simply swept the room one last time to collect any stray dust or small offcuts, and that was it! There was no lingering mess of adhesive, no specialized tools to clean, and none of the typical construction debris associated with other flooring types. The remarkable aspect of Floorte is that the floor is immediately ready for use, allowing you to enjoy your newly transformed space without delay.
With the installation complete, the next and equally exciting phase involves the finishing details. This includes installing baseboards or quarter-round trim to elegantly cover the essential ¼” expansion gap around the perimeter of the room. This not only provides a polished aesthetic but also protects the edges of your new luxury vinyl floor. The ease of installation and the immediate usability of Shaw Floorte flooring make it an incredibly appealing choice for homeowners looking to undertake a DIY renovation. The transformation of our studio was swift, satisfying, and has significantly enhanced the functionality and beauty of our home office. This success now brings us to our final post in this series, where we will provide an in-depth review of how our Shaw Floorte flooring performs in daily use, highlighting its durability, ease of maintenance, and overall value.