
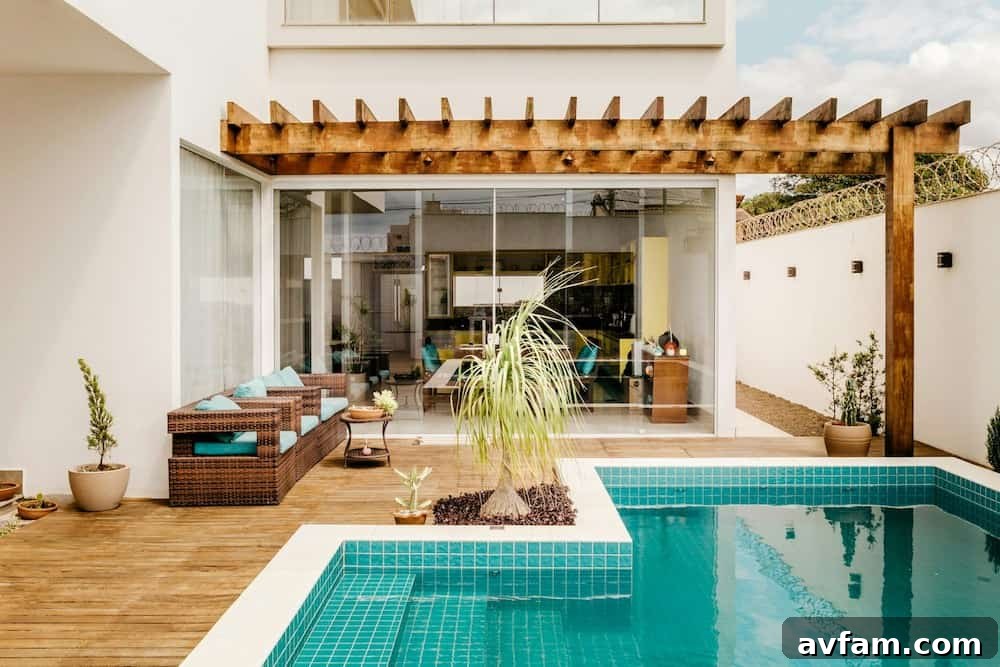
Building a pergola is an immensely rewarding endeavor, transforming any outdoor space into a stylish and functional extension of your home. Whether you dream of enhancing your garden’s allure, creating an inviting patio retreat, or adding a captivating focal point to your backyard, a DIY pergola project offers both creative satisfaction and tangible benefits. This comprehensive guide is designed specifically for beginners, demystifying the entire process from conceptualizing your ideal pergola to executing the step-by-step construction. By the end, you’ll possess the knowledge and confidence to embark on your own successful pergola build, creating a beautiful and enduring outdoor sanctuary.
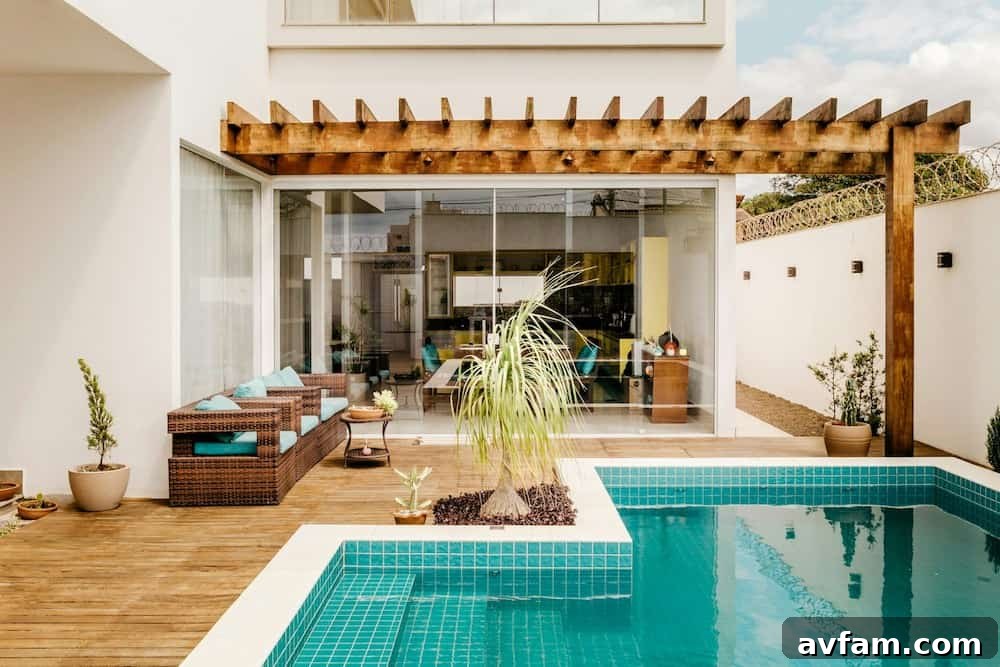
Understanding the Basics of a Pergola for Your Outdoor Space
Before you pick up a single tool or even sketch a design, gaining a clear understanding of what a pergola is and its fundamental components is crucial. This foundational knowledge will empower you to make informed decisions throughout your building journey, ensuring your pergola perfectly meets your needs and complements your property.
What Exactly is a Pergola?
At its core, a pergola is an outdoor structure characterized by vertical posts supporting an open roof framework of horizontal beams and often, perpendicular rafters or purlins. Unlike a fully enclosed gazebo, a pergola’s distinctive open-air design offers partial shade rather than complete shelter. This unique structure creates a wonderful sense of definition and enclosure within an outdoor area, fostering a cozy and inviting atmosphere ideal for relaxation, dining, or socializing. Think of it as an architectural bridge between indoors and out, seamlessly blending with the natural environment.
The history of pergolas is rich and fascinating, tracing back to ancient civilizations. While rudimentary shade structures existed for millennia, the classical pergola as we know it gained prominence during the Italian Renaissance. Here, they were not only grand architectural features but also practical elements, providing support for grapevines and other climbing plants, creating shaded walkways and picturesque garden tunnels. Over centuries, pergolas have evolved from these ornate historical designs into versatile, modern structures that beautifully blend functionality with cutting-edge aesthetics, making them a timeless staple in contemporary outdoor living and landscape design.
The Manifold Benefits of Adding a Pergola to Your Home
Integrating a pergola into your outdoor space brings a multitude of advantages, significantly enhancing both the usability and aesthetic appeal of your property. Far beyond simply being an attractive feature, a well-designed pergola can genuinely transform how you experience your backyard or garden.
Firstly, and perhaps most immediately, a pergola provides much-needed **shade**. Its open roof structure masterfully filters sunlight, offering a comfortable retreat from the intense midday sun without completely blocking the sky. This partial shade allows you to enjoy your outdoor areas for longer periods, even on the hottest summer days, making al fresco dining or lounging considerably more pleasant. While not entirely waterproof, it also offers a degree of protection from light rain, meaning a sudden drizzle won’t necessarily end your outdoor gathering.
Beyond comfort, pergolas are powerful tools for **landscape design**. They act as natural focal points, drawing the eye and adding architectural interest where none existed before. A pergola can effectively define separate zones within a larger outdoor space – perhaps delineating a cozy lounging area from a vibrant dining space, or creating an elegant transition along a garden pathway. This structural definition helps to organize your landscape, making it feel more intentional and cohesive. Furthermore, the vertical elements of a pergola add height and dimension, breaking up flat landscapes and creating visual layers that are pleasing to the eye.
Another significant benefit is the **increase in usable living space**. By creating a designated, comfortable area outdoors, a pergola essentially extends your home’s footprint. This expanded living area can be customized to serve various purposes, from an intimate outdoor reading nook to a lively entertainment zone equipped with an outdoor kitchen. This versatility significantly boosts your home’s functionality and enjoyment. For those who love gardening, a pergola provides an ideal framework for climbing plants such as wisteria, climbing roses, clematis, or grapevines. These plants not only add natural beauty, fragrance, and an additional layer of organic shade but also integrate the structure beautifully into its natural surroundings.
Finally, a carefully chosen and well-constructed pergola can substantially **add value to your property** and enhance its overall curb appeal. It signals a sophisticated approach to outdoor living, making your home more attractive to potential buyers should you ever decide to sell. Its aesthetic contribution, combined with its practical benefits, makes a pergola a wise investment for any homeowner looking to elevate their outdoor lifestyle.
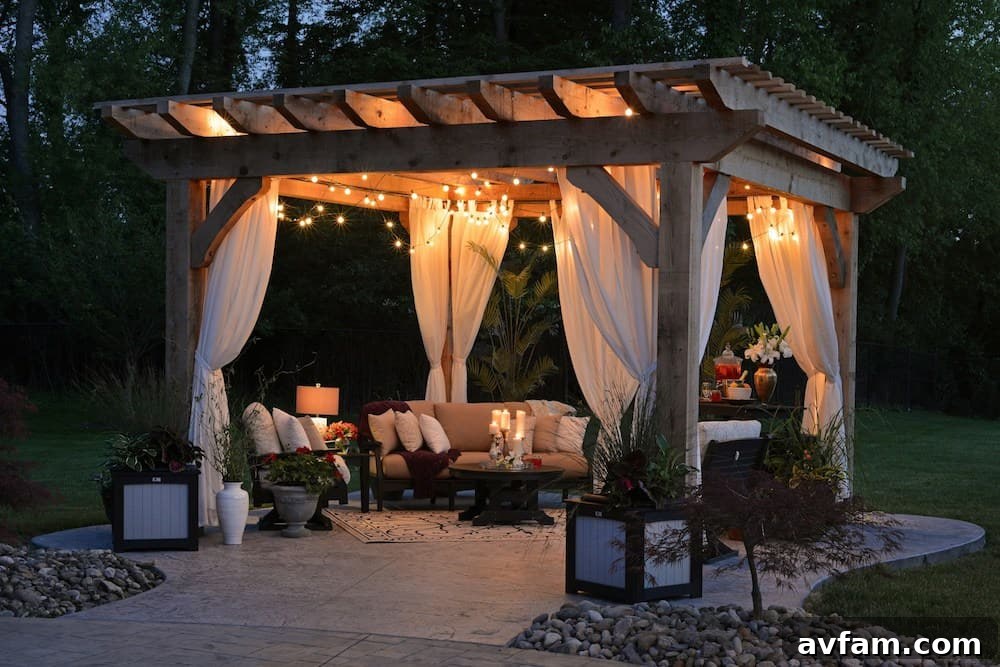
Planning Your Pergola Project: The Foundation of Success
Embarking on a pergola construction project without thorough planning is akin to building a house without blueprints. Effective planning is not merely a suggestion; it’s a critical prerequisite for a successful and satisfying outcome. This initial phase involves more than just dreaming; it requires practical considerations that will shape every subsequent decision, from design choices to material selection and budget allocation.
Adding a pergola to your outdoor space offers the unique opportunity to enhance both the aesthetic charm of your backyard and its functional versatility. Whether you envision it as a peaceful, shaded retreat for quiet contemplation, reading, and relaxation, or as an elegant, dynamic setting for lively outdoor entertaining, clearly defining its purpose is the crucial first step. This clarity will illuminate your path, guiding you through the myriad of design options and material choices, ultimately bringing your specific vision to life in a way that truly complements your lifestyle and home.
Determining the Purpose of Your Pergola: Envisioning Its Role
Before any design work begins, take ample time to consider how you truly intend to use your pergola. This fundamental question will dictate its size, shape, overall design, and even the choice of materials. Are you primarily seeking to create a cozy, intimate seating area for morning coffee or evening chats? Or do you require a more expansive dining space capable of hosting family meals and larger gatherings? Perhaps it’s meant to cover a hot tub, shelter an outdoor kitchen, or simply define a pathway within a sprawling garden.
The design possibilities for pergolas are genuinely endless, catering to every imaginable taste and architectural style. You could opt for traditional designs, often featuring intricate lattice patterns and classical columns, evoking a sense of timeless elegance. Alternatively, modern structures with clean lines, minimalist features, and perhaps a cantilevered roof offer a sleek, contemporary aesthetic. There are also rustic designs utilizing rough-hewn timbers, or Asian-inspired styles with distinct roof shapes. By deeply aligning the intended purpose of your pergola with your preferred design aesthetic, you can create a harmonious outdoor space that not only provides exceptional utility but also seamlessly complements your home’s existing architecture and landscape design, establishing a cohesive and visually appealing environment.
Choosing the Right Location for Optimal Enjoyment
The location of your pergola is paramount, influencing its functionality, comfort, and integration with your property. This decision requires careful consideration of several environmental and practical factors, ensuring the structure serves its purpose effectively throughout the year.
Firstly, analyze **sunlight patterns** throughout the day and across different seasons. Where does the sun rise and set in relation to your chosen spot? If the primary goal is shade, you’ll want to position your pergola to block the harshest midday sun. Conversely, if you desire morning sun for breakfast but afternoon shade, careful orientation is key. Secondly, assess **wind patterns**. A pergola can offer some protection from light breezes, but in very windy areas, additional bracing or a more robust design might be necessary. Thirdly, consider **existing landscaping and obstacles**. Are there mature trees whose roots might interfere with foundations, or branches that could fall onto the structure? Are there fences, sheds, or other structures that need to be accounted for in terms of clearance and visual appeal? You’ll want to choose a location that provides the desired amount of shade and privacy while also accommodating any nearby elements.
Furthermore, the orientation of your pergola can profoundly impact your outdoor living experience. Positioning it to capture the gentle morning sun for a bright, invigorating breakfast nook, or strategically aligning it to provide deep shade during the hottest parts of the afternoon for comfortable outdoor gatherings, can significantly enhance its utility. Beyond sun and wind, consider **drainage**; ensure the chosen spot does not accumulate standing water. Also, be mindful of **utility lines** (electrical, gas, water) both above and below ground; always call your local utility locator service before digging. Integrating climbing plants or vines into your pergola design from the outset can not only add a touch of natural beauty, fragrance, and texture but also offer additional, organic shade and a heightened sense of privacy as they mature, creating a living, breathing architectural element.
Understanding Local Building Codes and Permits
Before any physical work begins, it is absolutely essential to investigate local building codes and obtain any necessary permits. This step is often overlooked by DIYers but is crucial for safety, legality, and avoiding costly rework. Building codes are established to ensure structural integrity and public safety. Depending on your location, the size, height, and proximity of your pergola to property lines or existing structures might trigger permit requirements. Contact your local municipal planning or building department to understand their specific regulations. Ignoring this step could lead to fines, forced demolition, or issues when you try to sell your property. It’s always better to be safe and compliant.
Designing Your Dream Pergola: Aesthetics and Functionality
With a clear purpose and ideal location established, the next exciting phase is designing your pergola. This involves not only selecting the right materials but also meticulously deciding on the size and shape that will best suit your specific needs and complement your home’s architectural style. A pergola isn’t just a functional addition to your outdoor space; it’s a significant stylistic statement that can profoundly enhance the overall look and feel of your entire property.
When designing your pergola, it’s paramount to consider both the practical aspects and its aesthetic appeal simultaneously. The best pergolas seamlessly blend form and function. By carefully choosing the materials, dimensions, and overall shape, you can create a structure that not only provides optimal shade and comfort but also adds significant beauty, character, and enduring value to your outdoor area, creating a truly inviting atmosphere.
Selecting the Right Materials for Durability and Style
The choice of material for your pergola is one of the most impactful decisions you’ll make, affecting its longevity, maintenance requirements, and overall aesthetic. There are several popular options, each with distinct advantages and visual characteristics:
- Wood: This is a classic and highly popular choice, cherished for its natural warmth, organic beauty, and incredible versatility.
- Cedar and Redwood: Highly prized for their natural resistance to rot, decay, and insect infestation, these woods offer exceptional durability and a beautiful, rich appearance. They are often more expensive but require less chemical treatment.
- Pressure-Treated Pine: A more budget-friendly option, pine is chemically treated to resist decay and insects, making it suitable for outdoor use. It often requires staining or painting to enhance its appearance and further protect it.
- Tropical Hardwoods (e.g., Ipe): Extremely dense and durable, these woods offer unparalleled longevity and resistance but come at a higher cost and can be challenging to work with.
- Metal: Offering a sleek, modern, and often industrial appearance, metal pergolas are incredibly strong and low-maintenance.
- Aluminum: Lightweight, corrosion-resistant, and available in various powder-coated finishes, aluminum is an excellent choice for a contemporary look. It requires minimal upkeep.
- Steel: Stronger than aluminum, steel pergolas offer superior structural integrity, especially for larger designs. They often require a protective coating (like galvanization or powder coating) to prevent rust. Wrought iron, a type of steel, provides a more ornate, traditional aesthetic.
- Vinyl/Composite: These materials are celebrated for their exceptional durability and virtually maintenance-free nature. They do not rot, warp, splinter, or require painting. Vinyl typically comes in white, while composite materials (a blend of wood fibers and plastic) offer a broader range of colors and textures, often mimicking natural wood. They are ideal for those seeking a hassle-free, long-lasting option, though their initial cost can be higher than some wood options.
When making your selection, carefully weigh your budget, the desired aesthetic (rustic, modern, traditional), and the level of maintenance you’re prepared to undertake. Critically, consider how the chosen material will complement the existing architecture and landscaping of your home. The goal is for the pergola to blend seamlessly with its surroundings, acting as a natural extension, while simultaneously standing out as a beautiful and inviting focal point in your outdoor space.
Deciding on the Size and Shape of Your Pergola
The dimensions and form of your pergola are dictated by two primary factors: the available space in your yard and its intended use. This is where your initial planning truly comes into play. Begin by taking precise measurements of your designated area. Consider not just the footprint, but also the desired height to ensure comfortable head clearance and adequate air circulation.
Think about the number of people you typically wish to accommodate under the pergola. Will it house a small bistro set for two, a sprawling dining table for eight, or a full outdoor lounge set? The furniture you plan to include must comfortably fit within the structure, allowing for easy movement around it. Furthermore, consider the overall aesthetic you wish to achieve. A square or rectangular pergola offers a classic, structured look, while an L-shaped or custom design can cleverly wrap around corners or integrate with existing features, creating a more unique and tailored feel. For larger spaces, multiple pergolas or a segmented design might be appropriate.
When deciding on the size and shape of your pergola, it’s also valuable to envision how it will be used throughout the year and at different times of the day. Will it primarily serve as a cozy, shaded spot for intimate morning gatherings, or as a functional, expansive space for outdoor dining and lively evening entertaining? Will it need to provide shade from specific sun angles, influencing its orientation and the density of its roof elements? By thoroughly envisioning your daily and seasonal interactions with the pergola, you can tailor its dimensions and configuration to best suit your lifestyle, ensuring maximum comfort, utility, and aesthetic pleasure for years to come.
Preparing for Pergola Construction: Tools and Site Preparation
Once your design is finalized and materials are chosen, the next critical phase is meticulous preparation. This involves gathering all necessary tools and thoroughly preparing your construction site. Proper preparation is the key to a smooth, efficient, and safe building process, minimizing unexpected delays and ensuring the structural integrity of your finished pergola.
Gathering Your Necessary Tools and Materials List
Building a pergola, even a simple one, requires a specific set of tools. Before you begin any cutting or digging, ensure you have all these items readily available. A comprehensive tools list typically includes:
- Measuring and Marking Tools: Tape measure (25-30 ft), carpenter’s pencil, speed square, chalk line.
- Leveling Tools: Spirit level (long and short), string level, laser level (optional but highly recommended for accuracy).
- Digging Tools: Post-hole digger, shovel, wheelbarrow.
- Cutting Tools: Circular saw, miter saw (for precise cuts), handsaw (for smaller tasks).
- Drilling and Fastening Tools: Cordless drill/driver, various drill bits, impact driver (optional but very useful for fasteners), appropriate outdoor-grade screws, bolts, and washers.
- Safety Gear: Safety glasses, work gloves, ear protection, dust mask.
- Support Tools: Clamps, sawhorses, temporary bracing material.
In addition to tools, create a detailed materials list based on your finalized design. This list should include specific quantities of posts, beams, rafters, concrete mix, post anchors (if used), and all fasteners. Double-check your measurements and calculations to avoid multiple trips to the hardware store, which can slow down your progress and increase frustration.
Preparing the Ground for a Stable Foundation
The stability and longevity of your pergola depend entirely on a well-prepared foundation. Start by thoroughly clearing the entire area where you plan to construct your pergola. This means removing any existing vegetation, such as grass, weeds, shrubs, and especially any large rocks, roots, or other debris that could interfere with digging or leveling. Use a rake to gather loose material and remove it from the site.
Once cleared, the next crucial step is to level the ground as much as possible. Even a slight slope can compromise the stability and squareness of your pergola. Use a long spirit level and a straight edge, or a laser level, to identify high and low spots. You may need to add or remove soil to achieve a relatively flat surface. For significant slopes, consider terracing or building up the foundation with gravel or compacted soil. Proper ground preparation will ensure a stable and even foundation for your pergola, preventing future settling, leaning, or structural issues. Remember, a perfectly level starting point simplifies every subsequent step in the construction process.
Step-by-Step Pergola Construction: A Beginner’s Guide
With meticulous planning complete and all tools and materials at the ready, it’s time to bring your vision to life. This detailed, step-by-step guide will walk you through the entire pergola construction process, from laying the groundwork to installing the final structural elements. Remember to prioritize safety at every stage, wearing appropriate protective gear and ensuring stable working conditions.
Step 1: Setting the Posts – The Foundation of Your Pergola
The posts are the vertical backbone of your pergola, so their precise placement and secure installation are paramount. Begin by accurately marking the exact locations where each post will stand, using stakes and a chalk line to ensure perfect squareness and correct spacing according to your design. Double-check all diagonal measurements to confirm the layout is square.
Next, dig holes for each post. The depth of these holes is critical; a general rule of thumb is to dig them at least one-third of the post’s total length (e.g., for a 10-foot post, dig a 3.3-foot deep hole), extending below your local frost line if applicable, to prevent heaving. The width of the hole should be about three times the width of the post. For optimal stability, consider using concrete footings or sturdy post anchors embedded in concrete, rather than simply direct burial. If using concrete, place a few inches of gravel at the bottom of each hole for drainage, then insert your posts. Use temporary braces to hold each post perfectly plumb (vertically straight) in all directions. Fill the holes with concrete mix, ensuring it’s well-compacted and slopes slightly away from the post to shed water. Regularly check for plumb as you fill and before the concrete sets. Allow the concrete to cure fully for at least 24-48 hours (or as directed by the concrete manufacturer) before applying any load or proceeding to the next step.
Step 2: Installing the Main Beams
After your posts are securely set and the concrete has cured, it’s time to install the main horizontal beams. These beams will span across the top of your posts and support the rafters. Depending on your design, you might have one beam on each side or two parallel beams sandwiching the posts for added strength and a finished look. Carefully lift the beams into place. This step often requires an extra pair of hands for safety and ease. Ensure the beams are perfectly level across their entire length. Attach them securely to the tops or sides of the posts using appropriate structural fasteners such as heavy-duty carriage bolts, lag screws, or specialized post-to-beam connectors. If notching the posts for the beams, ensure the notches are precise and do not compromise the structural integrity of the posts. Verify all connections are tight and stable.
Step 3: Attaching the Rafters and Purlins
With the main beams in place, proceed to attach the rafters. Rafters are typically smaller dimension lumber that runs perpendicular to the main beams, extending across them to form the open roof structure. Lay out the spacing for your rafters carefully; common spacing ranges from 12 to 24 inches on center, depending on the desired shade and aesthetic. Evenly space them apart to create a consistent pattern. You can attach rafters using metal joist hangers, by notching them to rest on top of the beams, or by simply toe-nailing/screwing them directly to the top edge of the beams. Ensure all rafters are level and securely fastened. For an even denser shade pattern or more visual interest, you can add an additional layer of smaller “purlins” running perpendicular to the rafters (and parallel to the beams), often on edge. These are typically spaced closer together and attached to the top of the rafters. This layered approach creates a classic pergola look with enhanced shade capability.
Step 4: Finishing Touches and Personalization
Once the structural elements are complete, your pergola is technically ready for use. However, a few finishing touches can significantly enhance its durability, appearance, and comfort. Consider applying a protective stain or paint to all wood components. This not only adds to the aesthetic appeal but also shields the wood from UV damage, moisture, and pests, significantly extending its lifespan. Choose a color that complements your home and existing outdoor decor.
Finally, unleash your creativity to personalize the space. Adorn your pergola with climbing plants like fragrant jasmine, colorful bougainvillea, or bountiful grapevines to create natural shade and a lush, organic feel. Install string lights or outdoor lanterns for enchanting evening ambiance. Add fabric drapes or retractable canopies for adjustable shade and privacy. Incorporate comfortable outdoor furniture, decorative planters, or even an outdoor fan for added comfort. With careful planning, precise construction, and a touch of personal flair, building a pergola can be an incredibly rewarding and enjoyable project for any beginner, resulting in a cherished outdoor living space for years to come.
Looking for more inspiration to transform your outdoor areas? Check out these other fantastic summer outdoor home improvement projects to elevate your yard and garden!