
Effortless DIY Carpet Removal: Your Comprehensive Guide to a Fresh Start
Embarking on a home renovation project often starts from the ground up – literally. Whether you’re dreaming of stylish new hardwood, elegant laminate, or a fresh contemporary carpet design, the first crucial step is almost always the same: removing the existing carpet. While professional installation services are always an option, taking on the task of carpet removal yourself can lead to significant cost savings, giving you more flexibility in your budget for new materials or other upgrades. This detailed guide will walk you through every step, ensuring a smooth and efficient process from start to finish, transforming your space with your own hands.
Why DIY Carpet Removal is a Smart Choice
Deciding to remove your own carpet isn’t just about saving money; it’s about empowerment and control over your home improvement journey. Professional carpet removal can add hundreds of dollars to your overall project cost, money that could be better spent on higher-quality flooring materials or other aesthetic enhancements. Furthermore, a DIY approach allows you to work at your own pace, ensuring every detail is handled with the care it deserves, especially if you plan to expose existing hardwood floors beneath.
Essential Tools and Safety Gear for a Smooth Process
Before you even think about pulling up the first piece of carpet, proper preparation is key. Gathering the right tools and prioritizing safety will make the job much easier and safer. Here’s what you’ll need:
- Heavy-Duty Work Gloves: Absolutely non-negotiable. Carpet tacks are numerous, incredibly sharp, and can cause painful injuries. Protect your hands at all times.
- Utility Knife with Sharp Blades: For cutting carpet and padding into manageable sections. Always use a fresh, sharp blade for clean cuts and less effort.
- Pliers (especially Needle-Nose Pliers): Ideal for gripping carpet, pulling staples, and removing individual tack points.
- Flooring Scraper or Pry Bar: Essential for lifting glued-down padding and tack strips.
- Knee Pads: You’ll be spending a lot of time on your knees. These will save you from discomfort and potential injury.
- Safety Glasses: To protect your eyes from flying debris or dust.
- Dust Mask/Respirator: Old carpets can harbor significant amounts of dust, allergens, and even mold. A mask is crucial for respiratory protection.
- Heavy-Duty Trash Bags or Tarps: For containing cut carpet sections and debris.
- Shop Vacuum: For thorough cleanup of the subfloor.
- Hammer: For stubborn tack strips or nails.
Step-by-Step Carpet Removal Guide
1. Preparing Your Space for Removal
Start by clearing the room of all furniture, décor, and any obstacles. This not only gives you ample working space but also prevents damage to your belongings. Remove all baseboards if you plan to install new flooring that will require them to be removed anyway. This also makes carpet and tack strip removal easier, as the carpet edges are usually tucked under them. If you’re not removing baseboards, be extra cautious to avoid damaging them during the process.
2. Lifting the Carpet’s Edge
Choose a corner of the room to begin. This is typically the easiest spot to get leverage. Using your pliers, firmly grip the carpet edge and pull it up. You’ll likely feel resistance as the carpet is held in place by “tack strips” (also known as gripper strips). These are thin wooden strips embedded with sharp, angled nails, designed to hold the carpet taut around the perimeter of the room. Once you’ve freed the initial section from the first tack strip, continue to pull the carpet away from the adjacent strips, working your way along one edge of the room.
3. Cutting and Rolling for Easy Disposal
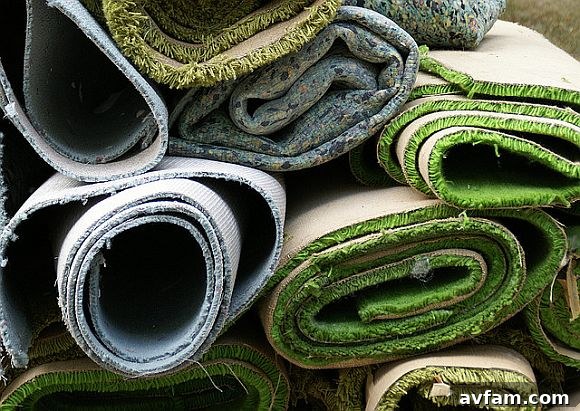
As you pull the carpet free from the tack strips, it will start to accumulate. To make it manageable for transport and disposal, use your sharp utility knife to cut the carpet into sections. Ideal sizes are typically 3-foot or 4-foot wide strips, which are easy to roll up and carry. Cut from the backing side of the carpet if possible, as this is often easier and preserves the blade longer. Roll each section tightly, perhaps securing them with duct tape or rope, making them compact and ready to be taken out of the house. This methodical approach prevents large, unwieldy pieces from becoming a tripping hazard or blocking your exit.
4. Removing the Carpet Padding
With the carpet gone, the next layer is the padding. Carpet padding can be attached to the subfloor in one of two main ways: staples or adhesive. The method of removal will depend on how it’s secured:
- Stapled Padding: If your padding is stapled down, you’ll need to meticulously pull out each staple. Needle-nose pliers are excellent for this task. Grip the head of each staple and pull upwards. This can be time-consuming, but thorough removal is essential to create a smooth surface for your new flooring.
- Glued Padding: For padding adhered with glue, a flooring scraper or a sturdy pry bar will be your best friend. Work the scraper under the padding, applying consistent pressure to break the adhesive bond. You may need to use some elbow grease, especially if the glue is old and strong. For particularly stubborn areas, specialized adhesive removers designed for flooring can be applied, but always test in an inconspicuous spot first and ensure proper ventilation.
5. Tack Strip and Fastener Removal
Once both the carpet and padding are removed, you’ll be left with the exposed tack strips and possibly hundreds of staples from the padding. It’s crucial to remove all of these. Use a pry bar or a hammer to carefully lift the tack strips from the subfloor. Be gentle, especially if you’re working over a hardwood floor, to avoid damaging the wood. For any remaining staples, a pair of needle-nose pliers or a dedicated staple remover tool will be invaluable. Ensure every single sharp object is removed; overlooking even one can cause future flooring issues or serious injury.
6. Post-Removal Cleanup and Subfloor Inspection
After all the carpet, padding, and fasteners are removed, it’s time for a thorough cleanup. Use a shop vacuum to remove all dust, debris, and tiny particles that have accumulated over the years. Inspect the subfloor for any damage, such as water stains, rot, or uneven spots. Address any issues promptly, as a clean, dry, and level subfloor is critical for the proper installation and longevity of your new flooring. For lingering adhesive residue, you might need a specialized cleaner or a light sanding, depending on your subfloor type.
Special Considerations for Your Project
Exposing Hardwood Floors
If your goal is to reveal and restore existing hardwood floors beneath the carpet, extra care during removal is paramount. While you’ll likely still need to do some refinishing work to the hardwoods (sanding, staining, sealing), minimizing any damage incurred during the removal process will significantly reduce the scope and cost of that refinishing. Be particularly gentle when removing tack strips and staples, using a thin pry tool to lift them rather than forcing them. Avoid gouging the wood at all costs.
Dealing with Concrete Subfloors
Removing carpet from a concrete subfloor can present different challenges, especially if the padding was glued down. Concrete often holds adhesive more firmly. You might need stronger adhesive removers or even a power scraper for large areas. Ensure the concrete is completely clean and dry before installing new flooring, as moisture can be a significant issue for many flooring types.
When to Call a Professional
While DIY carpet removal is generally straightforward, there are situations where calling in a professional is advisable. If your home was built before the 1980s, there’s a small chance that the carpet or padding might contain asbestos, especially if it’s old vinyl tile or adhesive underneath. In such cases, disturbing the material can release hazardous fibers, making professional assessment and removal essential. Additionally, for very large commercial spaces or if you have physical limitations, a professional team can complete the job quickly and safely.
Disposing of Old Carpet and Padding
Once you’ve wrestled all the old carpet and padding into manageable rolls, don’t just leave it on the curb. Check with your local waste management services or municipal recycling centers for proper disposal instructions. Some areas offer bulk waste pickup, while others may require you to take it to a specific facility. Some carpets can even be recycled! Proper disposal ensures your old flooring doesn’t become an environmental burden.
Conclusion: Embrace Your New Space
Removing old carpet can seem like a daunting task, but with the right tools, a methodical approach, and a commitment to safety, it’s a perfectly achievable DIY project. Not only will you save money, but you’ll also gain a deep sense of satisfaction from transforming your home with your own two hands. By following these steps, you’ll clear the way for your new flooring, paving the path to a refreshed, updated living space. Get ready to enjoy the clean slate you’ve created!
Photo: Flickr.com/photos/luschei/1255558993/