
How to Hang Wall Art So It Looks Right (And Stays Put): The Ultimate Guide
A blank wall in any room isn’t just empty; it’s often a missed opportunity. It can make a space feel unfinished, impersonal, or simply uninviting. The solution, fortunately, is as simple as it is transformative: adorn it with art that adds color, evokes a mood, and tells a story. However, the true difference between a wall that looks merely “nice” and one that feels “nailed it” lies in meticulous planning, precise leveling, and the strategic use of the right hardware.
This comprehensive guide is designed to empower you with the knowledge and confidence to hang wall art like a pro. We’ll walk you through a clean, stress-free methodology that consistently delivers solid, professional-looking results. Beyond the basics, we’ll tackle common frustrations, from uneven studs and crumbly drywall to frames that stubbornly refuse to sit straight, ensuring your cherished pieces are displayed beautifully and securely for years to come.
Essential Tools and Supplies for Flawless Art Installation
You don’t need a professional workshop brimming with specialized equipment to achieve gallery-worthy results. Most of what you’ll need can be found in any basic homeowner’s toolkit or picked up affordably from a hardware store. Gathering these essentials before you begin will streamline the process and prevent frustrating interruptions:
- Tape Measure: Absolutely crucial for accurate placement and spacing. A retractable metal tape measure is ideal for its durability and ease of use.
- Pencil: For making light, easily erasable marks on your wall and on painter’s tape to indicate drilling spots and measurements.
- Painter’s Tape: Your secret weapon for pre-visualizing placement without making holes, and for marking exact drilling spots. It adheres gently and removes cleanly without damaging paint.
- Level: A 2-foot or 3-foot level is excellent for ensuring larger frames are perfectly horizontal. For smaller pieces, a torpedo level or even a smartphone app can suffice, though a physical level is always more reliable.
- Stud Finder: (Optional but highly recommended) This electronic device helps you locate the wooden studs behind your drywall, which are the strongest points for hanging heavy art. Opt for a model that can also detect electrical wires and pipes for safety.
- Hammer or Drill/Driver: A hammer is needed for traditional picture hanging nails and hooks. A drill/driver is essential for installing drywall anchors and larger screws, making the job quicker and more precise. Ensure you have a variety of drill bits.
- Appropriate Picture Hangers or Wall Anchors: This is critical. Always choose hardware rated for a weight significantly *above* that of your frame. We’ll delve deeper into types and ratings shortly.
- Two Rubber Bumpers: Small, self-adhesive rubber or felt bumpers for the bottom corners of your frame. These prevent tilting, protect your wall from scuffs, and keep the art stable.
- Clean Microfiber Cloth: For wiping away pencil marks and dust, ensuring a pristine finish around your newly hung art.
Pro Tip: Before you even think about hanging, thoroughly inspect the back of your frame. Different hanging mechanisms require different hardware. A frame with a hanging wire needs a single hook, while D-rings often benefit from two hooks for greater stability. Sawtooth hangers are typically best for lighter pieces and can sometimes be tricky to level perfectly with a single nail.
Step 1: Determine the Optimal Height for Your Wall Art
The placement of your wall art is paramount to its visual impact. The most universally accepted guideline for hanging art is to position its center at eye level. This creates a comfortable and engaging viewing experience, allowing the art to be easily appreciated without craning necks up or down.
- The Golden Rule: A fantastic starting point for most art pieces, particularly in rooms with average ceiling heights, is to place the center of the art at approximately 57 inches (145 cm) from the floor. This measurement is derived from the average human eye level in museums and galleries, making it a reliable standard for your home.
While the 57-inch rule is excellent for standalone pieces on an empty wall, adjustments are necessary when hanging art above furniture:
- Above Furniture: When positioning art above a sofa, console table, headboard, or any other piece of furniture, the 57-inch rule often falls too low. Instead, aim to keep the bottom edge of your frame 6 to 8 inches (15 to 20 cm) above the top edge of the furniture. This creates a cohesive grouping, preventing the art from looking disconnected or “floating” too high above its accompanying piece. Ensure there’s enough space for any lamps or decorative items on the furniture below.
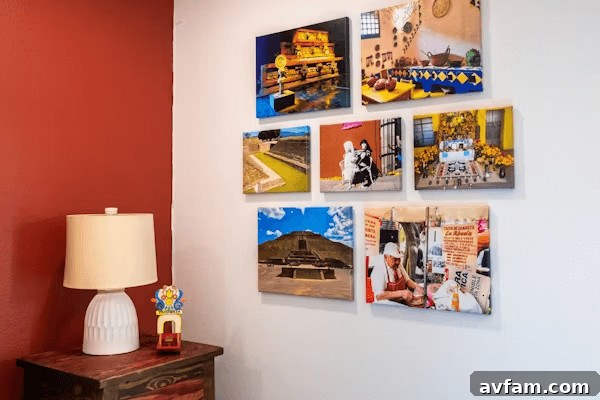
Consider the overall scale of the room and the artwork. A very large piece in a room with high ceilings might warrant a slightly higher placement, but always err on the side of slightly lower rather than too high, as art hung too high can feel detached from the rest of the room’s decor.
Step 2: Pre-Visualize and Mark Placement Without Making Permanent Holes
This crucial step is your safeguard against the dreaded “Swiss cheese wall” – a wall riddled with unnecessary holes from trial-and-error hanging. Pre-visualization allows you to experiment with placement, adjust freely, and finalize your decision before committing to drilling or hammering.
- Outline with Painter’s Tape: Begin by cutting strips of painter’s tape to represent the top corners of your artwork. Press these lightly onto the wall where you initially envision the piece hanging. For more accurate visualization, especially with complex or multiple pieces, you can cut a piece of kraft paper or newspaper to the exact size of your frame and tape it to the wall.
- Step Back and Evaluate: Once your temporary outline is in place, step back 6 to 10 feet (2 to 3 meters) – or even further, if your room allows. View the potential placement from various angles, including different seating positions. Does it feel balanced with the furniture? Does it complement the architectural features? Is it too high, too low, or off-center?
- Adjust Until Perfect: The beauty of painter’s tape or paper templates is their adjustability. Easily reposition the tape or paper until you achieve a placement that looks perfectly balanced and aesthetically pleasing within the room. This iterative process prevents guesswork and ensures satisfaction.
- Seek a Second Opinion (If Needed): If the piece is particularly heavy, wide, or part of a complex gallery wall, a second set of eyes can be invaluable. Grab a helper to hold the piece (or the paper template) while you step back and assess. A fresh perspective can often catch subtle imbalances, saving you a lot of frustration later on.
This method ensures that when you finally make your marks for drilling or hammering, you’re confident in your chosen spot, minimizing mistakes and damage to your walls.
Step 3: Secure Your Art: Finding Studs or Choosing the Right Anchors
The longevity and safety of your hung art depend entirely on the strength of its connection to the wall. This means either fastening directly into a wall stud or using an appropriate drywall anchor.
Leveraging Wall Studs for Maximum Strength
If you can locate a wall stud behind your drywall, always aim to use it. Wall studs are solid pieces of wood (typically 2x4s) that form the structural framework of your walls. They offer the most robust and secure point for hanging, especially for heavier items.
- Using a Stud Finder: An electronic stud finder is your best tool for this. Slowly slide it across the wall until it indicates the presence of a stud. Mark the edges of the stud with a pencil, then find its center. Most studs are spaced 16 or 24 inches apart on center.
- The “Tap Test”: If you don’t have a stud finder, you can try the “tap test.” Lightly tap along the wall. A hollow sound indicates drywall, while a more solid, dull thump suggests a stud. This method requires practice and isn’t as reliable as a stud finder.
- Drilling into a Stud: Once you’ve located a stud, you can typically drive a screw directly into it, or use a picture hanger hook designed for stud installation. Pre-drilling a pilot hole slightly smaller than your screw’s diameter is always recommended to prevent wood splitting.
Choosing the Correct Drywall Anchor When No Stud is Available
It’s not always possible to hit a stud exactly where you want your art to hang. In such cases, a drywall anchor is your next best solution. However, selecting the right anchor is crucial; never guess or use an anchor that’s too small or weak.
- Understand Weight Ratings: Every pack of drywall anchors will display a weight rating (e.g., “up to 20 lbs,” “up to 50 lbs”). This rating indicates the maximum weight the anchor can safely hold.
- Always Oversize: Here’s a critical rule: If your frame weighs 15 lbs, do NOT use an anchor rated for “up to 20 lbs.” Always choose an anchor rated significantly *above* the actual weight of your frame. For a 15 lb frame, aim for an anchor rated at 30-40 lbs or higher. This provides a safety margin and accounts for dynamic forces like accidental bumps.
- Types of Drywall Anchors:
- Plastic Expansion Anchors: Best for lighter items (5-15 lbs). They expand when a screw is driven into them.
- Self-Drilling (Threaded) Anchors: Good for medium weights (15-30 lbs). These anchors screw directly into the drywall and have coarse threads for a strong grip.
- Toggle Bolts/Molly Bolts: The strongest options for drywall, capable of holding heavy items (50+ lbs). They expand behind the drywall to create a secure brace. These require a larger pilot hole.
Never guess the weight of your frame. If unsure, use a bathroom scale to get an accurate measurement. Investing in the correct, oversized anchor will prevent your art from crashing down and damaging both the piece and your wall.
Step 4: Precision Measurement: Focus on the Hanger, Not the Frame Itself
This step is where many DIY hangers make a common, yet easily avoidable, mistake. Accurately transferring the hanger’s position to the wall is paramount for proper art placement. Measuring the entire frame from top to bottom won’t tell you where the hook needs to go; you need to measure from the top of the frame to the point where the hanger will actually rest on the hook.
For Frames with a Hanging Wire:
- Simulate Hanging Position: Place your frame face down on a clean, soft surface. Using one finger, pull the hanging wire upwards in the center, as if it were resting on a hook. Pull it taut, mimicking how it will actually sit when hung.
- Measure to the Highest Point: While holding the wire taut, measure the distance from the very top edge of the frame down to the highest point of the stretched wire. This measurement tells you precisely how far down from the top of the frame the hook needs to be on the wall.
For Frames with D-Rings or Keyhole Hangers:
D-rings, often used in pairs, offer excellent stability. Keyhole hangers are recessed into the frame and require a screw head to fit perfectly.
- Measure from Top to Hanger: Measure the distance from the top edge of the frame down to the center of each D-ring or keyhole. Mark these points.
- Measure Distance Between Hangers: For D-rings or multiple keyholes, measure the exact horizontal distance between the centers of the two rings/keyholes. This ensures your two hooks on the wall are perfectly spaced.
Transferring Measurements to the Wall:
Now, transfer these precise measurements to the painter’s tape you placed on the wall in Step 2. If your desired art center is 57 inches from the floor, you’ll use your hanger measurement to determine where the *hook* needs to go. For example, if the top of your frame is 10 inches above the hook, and you want the top of the frame to be at 62 inches (to achieve a 57-inch center for a 10-inch offset), then your hook would go at 52 inches.
Mark these exact points on the painter’s tape with your pencil. These marks are where you will install your picture hangers or drill your pilot holes for anchors.
Step 5: Install, Hang, Level, and Stabilize with Bumpers
With your placement marked and your hardware ready, it’s time for the final act of installation. Precision in these steps ensures your art looks perfect and stays that way.
- Install Your Hook(s) or Anchors: Carefully install your chosen picture hook(s) or drywall anchor(s) at the pencil marks you made on the painter’s tape. If using a hammer, strike gently but firmly. If drilling, ensure your drill is level and you’re using the correct drill bit size for your anchor. Remove the painter’s tape once the hardware is securely in place.
- Hang the Frame: Carefully lift your artwork and gently place its hanging mechanism onto the installed hook(s). Take a step back to observe its initial position.
- Level the Frame: Place your level on top of the frame. Observe the bubble. If it’s not perfectly centered, the frame is not level.
- Adjust for Perfection:
- Single Hook: For frames hung on a single hook, gently nudge the frame left or right until the level bubble is centered. Sometimes, the wire can slightly shift, so a small adjustment is all that’s needed.
- Two Hooks: If your frame is on two hooks (e.g., D-rings), you may need to make a micro-adjustment to one of the hooks. Carefully lift the frame, slightly raise or lower one of the hooks (e.g., by adjusting the screw or nail position), then re-hang and re-check with the level. This might take a couple of attempts, but the precision is worth it.
- Add Rubber Bumpers: Once your frame is perfectly level, add two small rubber or felt bumpers to the bottom corners on the back of the frame. These self-adhesive pads serve multiple critical functions: they prevent the frame from tilting forward, keep it from shifting out of alignment due to vibrations (like doors closing), and protect your wall from scuffs and marks. They also allow for better air circulation, preventing moisture buildup.
Step 6: Troubleshooting Common Wall Art Hanging Problems
Even with careful planning, sometimes things don’t go exactly as expected. Here are quick fixes for the most common issues you might encounter:
The Frame Keeps Tilting or Sliding
- Add Bumpers: This is the most common reason for tilting. If you haven’t already, add two rubber or felt bumpers to the bottom corners on the back of the frame. These create friction against the wall and keep the frame flush and stable.
- Check Wire Tension: If using a hanging wire, ensure it’s taut. A loose wire allows too much play, causing the frame to tilt forward. If it’s too slack, you may need to tighten it or reattach it a notch higher on the frame hardware.
- Re-level Hooks (for D-rings): If D-rings are slightly uneven, the frame will perpetually lean. Ensure both hooks are at precisely the same height.
The Frame is “Level” But Looks Crooked in the Room
This is a surprisingly common optical illusion. It usually means your ceiling, floor, or even a piece of furniture in the room is slightly out of level. Relying solely on a level can sometimes create an appearance of crookedness against an unlevel architectural feature.
- Use Visual Cues: Instead of strictly adhering to your level, use a strong visual horizontal line in the room as your guide. This could be the top of a sofa, a window sill, a mantlepiece, or a door frame. Adjust the art slightly until it appears visually parallel to that dominant line, even if your level shows a tiny deviation. Your eye is often a better judge of aesthetic balance in a nuanced space.
Drywall is Crumbly or Won’t Hold an Anchor
Old, damaged, or poorly installed drywall can be challenging. If your initial anchor pulls out easily or crumbles the drywall around the hole:
- Use a Larger or Stronger Anchor: Immediately switch to a larger, more robust anchor type. A toggle-style anchor (like a toggle bolt or Molly bolt) is often the best solution for crumbly drywall, as it distributes weight over a wider area behind the wall.
- Avoid Reusing the Same Hole: Never try to reuse a compromised hole. It won’t hold. Patch the old hole with spackle and choose a new spot nearby (even an inch or two away) for your new, stronger anchor.
- Consider a Batten (for very heavy art): For extremely heavy pieces on poor drywall, consider installing a wooden batten (a thin strip of wood) horizontally across two studs, then hanging your art from the batten. This provides a secure anchor point.
You Want to Create a Gallery Wall
Gallery walls are stunning but require extra planning to look cohesive and not chaotic.
- Lay It Out on the Floor First: Before touching your wall, arrange all your frames on the floor in your desired configuration. Experiment with different layouts, grouping, and spacing until you find a composition you love. Take a photo of the final arrangement.
- Make Paper Templates: Once your layout is finalized, trace each frame onto kraft paper or newspaper and cut out the templates. Label each template with the frame it represents.
- Tape Templates to the Wall: Using painter’s tape, carefully transfer your paper templates to the wall, mirroring your floor layout. Use a level for each piece and ensure consistent spacing.
- Consistent Spacing is Key: For a polished look, maintain consistent spacing between frames, typically about 2 to 3 inches (5 to 7.5 cm). For a more eclectic look, you can vary the spacing slightly, but try to keep it visually balanced.
- Mark Hanger Spots: On each paper template, mark exactly where the hanger for that specific frame needs to go (using the “measure the hanger” method). Then, simply drill/hammer through the paper template, remove it, and hang your art.
Choosing Art That Harmonizes with Your Room’s Aesthetic
Beyond the technicalities of hanging, selecting the right art for your space is an art in itself. It’s deeply personal, but certain principles of design, particularly scale and proportion, are crucial for a balanced and inviting room.
Scale and Proportion: Making Art Fit the Space
- Small Walls: For compact wall sections, such as between windows or narrow pillars, opt for a single medium-sized piece or a tight grouping of 2-3 smaller frames. Overpowering a small wall with a huge piece will make the room feel cramped.
- Large, Expansive Walls: A significant wall demands a commanding presence. Here, a single large-format piece of art can serve as a powerful focal point. Alternatively, a wide row of similarly sized frames or a thoughtfully curated, expansive gallery wall can fill the space effectively without looking sparse. Ensure the art doesn’t feel lost in the vastness.
- Narrow Spaces (Hallways, Entryways): Hallways often benefit from vertical pieces, which draw the eye upward and enhance the sense of height. A simple grid of smaller, complementary pieces can also work well, creating a visual rhythm as one moves through the space. Avoid pieces that protrude too much into the walkway.
Beyond Size: Color, Mood, and Lighting
Consider how the art integrates with the existing color palette and mood of the room.
- Color and Theme: Art can introduce an accent color, reinforce an existing theme, or even serve as the inspiration for the room’s entire decor. Choose pieces whose colors resonate with or strategically contrast with your furnishings.
- Mood and Style: Does the art evoke the feeling you want for the room? Serene landscapes for a bedroom, vibrant abstracts for a lively living area, or thought-provoking pieces for an office. Match the art’s style (modern, traditional, eclectic) to your interior design.
- Lighting Considerations: If the wall receives strong, direct sunlight, be mindful of the art’s materials. Choose pieces with finishes that are known to be fade-resistant, or consider adding UV-filtering glass to framed artwork to protect it from sun damage over time. Conversely, consider how the art will be lit at night – will accent lighting (like picture lights) enhance its beauty?
Ultimately, the art you choose should resonate with you. Trust your instincts, but use these guidelines to ensure your selections enhance, rather than detract from, your home’s overall design.
A Quick Way to Transform the Vibe of a Room
Among home improvement projects, hanging wall art stands out as one of the fastest and most satisfying “weekend wins.” It’s an incredibly effective way to infuse a room with fresh color without the commitment of painting, and to inject personality and character without the upheaval of a full remodel. The impact of well-chosen and well-placed art is immediate and profound, instantly elevating a space from ordinary to extraordinary.
If you’re seeking something bold and imaginative to define a game room, inspire creativity in an office, or add a mystical touch to a reading nook, browsing a curated collection of fantasy wall art online can be an excellent starting point. These pieces often feature rich narratives and striking visuals that can serve as the centerpiece of your decor. You can then effortlessly build a cohesive theme around your chosen art with just a few simple, complementary touches: a matching lamp shade, a cozy throw blanket in a coordinating color, or carefully styled shelves that echo the art’s motifs. This layered approach creates a truly immersive and personal environment.

The beauty of art is its versatility and the endless possibilities it offers for self-expression. Don’t underestimate its power to refresh and revitalize your living spaces.
Final Checklist: Before You Call the Job Done
Before you triumphantly put away your tools and admire your handiwork, take a moment to confirm these crucial details. This final checklist ensures everything is perfectly in place for long-term enjoyment and stability:
- Hanger/Hardware Match: Double-check that the hooks or screws you’ve installed are indeed the correct type and size for the specific hanging mechanism on the back of your frame (wire, D-rings, sawtooth, etc.). A mismatch can lead to instability.
- Anchor Rating Confirmed: Verify that the weight rating of your chosen wall anchor (if not using a stud) is comfortably above the actual weight of your artwork. This safety margin is non-negotiable for preventing future mishaps.
- Frame is Level (or Looks Level): Stand back and visually inspect the art from various points in the room. Confirm it’s either perfectly level with a physical level or, if necessary, visually aligned with dominant architectural or furniture lines in an unlevel room.
- Bumpers are Installed: Ensure those small but mighty rubber or felt bumpers are securely attached to the bottom corners on the back of the frame. They prevent tilting, protect your walls, and minimize shifting.
- Wall is Clean: Use your microfiber cloth to gently wipe away any visible pencil marks, dust, or fingerprints around the frame. A clean presentation makes all the difference.
That’s it. By following these steps and checking off this list, you’ve not only achieved clean lines and fewer holes in your walls but have also ensured that your cherished art is displayed beautifully and securely, ready to enhance your home for years to come.