
Mastering DIY Tile Installation: A Comprehensive Guide for Beginners
Embarking on a do-it-yourself (DIY) tile project can be an incredibly rewarding experience, transforming the aesthetics and functionality of your living spaces. Whether you envision a sleek new kitchen backsplash, a durable bathroom floor, or an elegant accent wall, tiling offers a fantastic opportunity to personalize your home and enhance its value. While often perceived as a task reserved for seasoned professionals, with the right knowledge and a methodical approach, even first-time DIYers can achieve stunning, long-lasting results.
Many aspiring home improvers hesitate at the thought of tiling, fearing the complexity or the potential for costly mistakes. However, by breaking down the process into manageable steps and focusing on meticulous preparation, you can confidently tackle your project. This comprehensive guide will equip you with essential insights, from selecting the correct tools and materials to understanding crucial installation techniques. Our aim is to demystify the tiling process, helping you avoid common pitfalls and empowering you to create a professional-looking finish that you’ll be proud of for years to come.
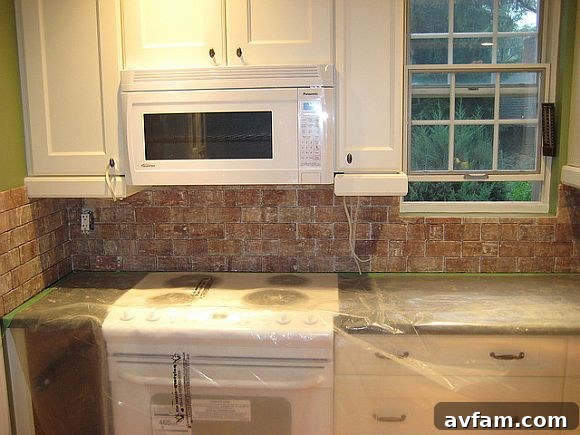
Start Small: The Ideal First Project
One of the most valuable pieces of advice for any DIY tiling endeavor, particularly for beginners, is to start with a smaller, less intimidating area. As highlighted by Bob Tedeschi in “The Pragmatist” column for the New York Times, tackling a project like a kitchen backsplash is an excellent way to familiarize yourself with the materials, tools, and the entire installation process without the overwhelming scope of a larger area. A backsplash offers several distinct advantages for a novice tiler:
- Manageable Scale: It’s a contained area, significantly less daunting than a full floor or shower surround. This allows for a shorter learning curve and quicker completion.
- Lower Stakes: Errors are less visible and generally easier to correct than those on a primary floor or high-traffic area.
- High Visual Impact: Even a modest backsplash can dramatically update and transform the aesthetic of your kitchen or bathroom, providing immediate gratification for your efforts.
- Reduced Material Investment: Requiring fewer tiles, less thinset mortar, and less grout, a small project keeps your initial material costs lower, making it a budget-friendly starting point.
By beginning with a backsplash, you can build confidence, refine your skills, and truly grasp the nuances of cutting, mixing, setting, and grouting tiles before moving on to more extensive and critical areas of your home. This progressive approach ensures a more successful and enjoyable DIY journey.
Essential Tools for Flawless Tile Installation
Having the correct tools is absolutely critical for achieving efficiency, accuracy, and a professional-grade finish in your tile installation. While some tools are general household items, others are specialized for tiling and will make the job significantly easier and more precise. Here’s a detailed breakdown of the tools you’ll need:
Basic & Safety Gear:
- Buckets: You’ll need several for mixing mortar and grout, as well as for clean water for rinsing sponges.
- Large Sponge: Essential for cleaning excess mortar and grout from the tile surface during and after installation.
- Rubber Gloves: Protect your hands from the alkaline nature of thinset mortar and grout, which can be irritating.
- Cheesecloth or Microfiber Cloth: Perfect for the final polish to remove any lingering grout haze from the tiles.
- Safety Goggles: Non-negotiable for eye protection against dust, flying tile shards, and splashes, especially when cutting tiles.
- Dust Mask (N95 or higher): Crucial for protecting your lungs from fine silica dust present in thinset, grout, and during tile cutting.
- Tape Measure & Level (4-foot minimum): Indispensable for accurate measurements and ensuring your tiles are perfectly plumb, level, and square.
- Utility Knife: Handy for opening bags of materials, trimming backer board, and various minor tasks.
- Kneeling Pads: Provide much-needed comfort and protection for your knees during extended periods of work on floors.
- Pencil or Marker: For marking cut lines on tiles and layout lines on the substrate.
Specialty Tiling Tools:
- Notched Trowel: This is a key tool for applying thinset mortar evenly to the substrate, creating ridges that allow for proper tile adhesion. The size and shape of the notches vary depending on the size of your tiles (larger tiles typically require larger notches).
- Margin Trowel: A smaller, more versatile trowel used for mixing small batches of mortar, scooping thinset from buckets, back-buttering tiles, and working mortar into tight spaces.
- Grout Float: A rubber-faced tool specifically designed to press grout firmly into tile joints and scrape excess grout cleanly from the tile surface without scratching.
- Tile Nipper: Used for making small, irregular cuts, curves, or “nibbling” away small pieces of tile for a precise fit around obstacles like pipes or outlets.
- Manual Tile Cutter: Ideal for making clean, straight cuts on ceramic and some porcelain tiles. It scores and snaps the tile.
- Wet Saw: For larger projects or working with harder materials like porcelain, natural stone, or glass, a wet saw provides precise, clean cuts with minimal effort and dust. These can often be rented from home improvement stores.
- Tile Spacers: Available in various sizes (e.g., 1/16″, 1/8″, 1/4″) and shapes (cross, T-shape), these small plastic pieces are absolutely crucial for creating uniform and consistent grout lines between your tiles.
- Rubber Mallet: Used to gently tap tiles into place after setting, ensuring good contact with the thinset and a perfectly level surface free of air pockets.
- Mixing Drill with Paddle Attachment: This powerful tool significantly simplifies the process of mixing thinset mortar and grout, ensuring a consistent, lump-free mixture far more effectively than hand-mixing.
Selecting Your Materials: Beyond the Tile
While the visual appeal of your chosen tiles is undoubtedly important, the long-term success and durability of your project hinge on selecting the correct accompanying materials. Bob Tedeschi’s excellent advice to defer grout selection until your tiles are chosen is highly practical, as the vast range of grout colors necessitates a perfect match or intentional contrast with your specific tile.
Tile Types: Matching Material to Application
Understanding the different types of tile will help you choose the best option for your project’s demands:
- Ceramic Tile: Frequently recommended for beginners due to its relative ease of cutting and forgiving nature. Ceramic is versatile, comes in a vast array of colors and patterns, and is suitable for most wall applications and light-traffic floors.
- Porcelain Tile: Denser, harder, and significantly more durable and water-resistant than ceramic. Porcelain is an excellent choice for high-traffic areas, all floors, and wet environments such as showers and exterior applications. Its hardness often requires a wet saw for cutting.
- Natural Stone Tile (e.g., Marble, Travertine, Granite, Slate): Offers unparalleled natural beauty, unique patterns, and a luxurious feel. However, natural stone is typically more porous, requires sealing, and demands more specialized installation and maintenance. Generally not ideal for a first-time DIY project.
- Glass Tile: Primarily used for decorative accents, backsplashes, and shower walls due to its luminous qualities. Glass can be challenging to cut cleanly without chipping and requires specific thinset.
- Mosaic Tile: Often supplied pre-mounted on mesh sheets, simplifying the layout for intricate designs. While easier to set in large sections, precise cuts and careful grouting are still essential.
When purchasing tiles, always calculate your area and then add an additional 10-15% for waste. This buffer accounts for cuts, potential breakage, and ensures you have extra pieces on hand for future repairs. Running out of a specific tile dye lot mid-project can cause significant delays and frustration.
Thinset Mortar: The Crucial Adhesive Foundation
Thinset mortar is the adhesive that securely bonds your tiles to the substrate. Choosing the correct type is paramount for optimal performance and longevity:
- Unmodified Thinset: A basic cement-based mortar. Historically, it required a liquid latex additive for improved adhesion and flexibility.
- Modified Thinset: Contains polymers already blended into the dry mix, offering superior bond strength, flexibility, and moisture resistance. This is generally the preferred choice for most DIY applications and provides better performance.
- Large-Format Tile Mortar: Specifically engineered with different rheology to prevent lippage (uneven tile edges) when installing larger tiles (typically 15 inches or more on any side).
- Rapid-Set Thinset: Formulated to dry quickly, ideal for projects with tight deadlines, but requires faster working and less room for error.
Always consult the tile manufacturer’s recommendations and the thinset packaging to ensure compatibility with your specific tile type and the existing substrate.
Grout: The Essential Finishing Element
Grout fills the spaces between your tiles, sealing them, providing structural integrity to the installation, and completing the aesthetic. It’s available in various types and, as previously mentioned, a vast spectrum of colors to either complement or stylishly contrast with your chosen tile:
- Sanded Grout: Contains fine sand, which adds strength and minimizes shrinkage. It is ideal for wider grout lines (typically 1/8 inch or more).
- Unsanded Grout: Smoother in texture, making it suitable for very tight grout lines (less than 1/8 inch) and for delicate or highly polished tiles that might be scratched by sanded grout.
- Epoxy Grout: A highly durable, stain-resistant, and completely waterproof option. Excellent for high-moisture areas like showers, commercial kitchens, and heavy-use floors. However, it is more challenging to work with, sets quickly, and is typically more expensive.
For cementitious grouts (sanded and unsanded), a grout sealer is indispensable. Applied after the grout has fully cured, it penetrates the grout lines, making them resistant to water, stains, and mildew, significantly extending the life and pristine appearance of your tiled surface.
Caulk: The Flexible Sealant
Often overlooked, caulk plays a vital role in any tile installation. It is used in all changes of plane, such as where walls meet, where tile meets a countertop or bathtub, and at inside corners. These areas are considered “movement joints” and require a flexible sealant rather than rigid grout, which would crack with normal building movement. Always choose a caulk that matches your grout color for a seamless, professional finish.
Meticulous Preparation: The Foundation of Success
Proper preparation is arguably the most critical phase of any tiling project. Cutting corners here can lead to uneven tiles, poor adhesion, and premature failure of your beautiful new surface. Before you even think about mixing mortar, ensure your workspace and substrate are impeccably ready.
- Clear the Area: Remove all furniture, appliances, fixtures, and any other obstructions from the work zone. This provides a clear, safe environment to work in.
- Protect Surroundings: Generously cover adjacent countertops, cabinets, existing flooring, and anything you wish to keep clean with drop cloths, plastic sheeting, or painter’s tape. Tiling can be a messy job.
- Surface Assessment & Preparation:
- Cleanliness: The substrate (the underlying surface you’re tiling on) must be absolutely pristine – clean, dry, and entirely free of grease, dust, dirt, wax, old adhesives, or any loose debris. Cleanliness ensures proper adhesion.
- Flatness: This is paramount. Any bumps, dips, or irregularities in the substrate will invariably transfer to your tiles, creating an uneven surface (known as “lippage”). Use a long level or straightedge to meticulously check for flatness. High spots can be ground down, while low spots should be filled with a suitable patching compound or a self-leveling underlayment for floors.
- Stability & Rigidity: Ensure the substrate is structurally sound and rigid. For floor installations, excessive deflection or movement can lead to cracked tiles and grout. Reinforce as necessary.
- Backer Board Installation: For wet areas such as showers, tub surrounds, or certain floor applications, always install cement board or a similar waterproof tile backer board specifically designed to withstand moisture. Follow manufacturer guidelines for installation.
- Priming: Depending on your substrate, a suitable primer may be required to ensure proper adhesion of the thinset.
- Room Temperature: As wisely advised by Bob Tedeschi, maintain a moderate and consistent room temperature, ideally between 65 to 75 degrees Fahrenheit (18 to 24 degrees Celsius). This controlled environment ensures that both the thinset mortar and grout cure properly and achieve their optimal consistency, strength, and workability. Avoid extreme temperatures or drafts.
- Layout Planning (The Dry Run): This step is non-negotiable and one of the most crucial for a successful outcome. Dry-lay your tiles on the floor or a large flat surface to determine your exact layout. This allows you to:
- Establish a Starting Point: Typically, you’ll want to start from the center of the wall or floor and work outwards. This ensures an even distribution of any cut tiles at the edges, making them less noticeable.
- Minimize Cuts: Optimize the layout to reduce the number of difficult or awkward cuts, particularly those around obstacles.
- Strategically Place Cuts: Plan to place any small or oddly shaped cut tiles in less conspicuous areas, such as behind appliances or under cabinets.
- Visualize the Final Look: Confirm how the pattern, grout lines, and overall aesthetic will appear before committing to permanent placement.
The Tiling Process: Step-by-Step Installation
With your meticulous preparation complete and all tools at the ready, you are now prepared to begin laying tiles. Approach each step methodically and take your time; rushing can lead to errors.
1. Mixing the Thinset Mortar:
Always follow the manufacturer’s instructions precisely for your specific thinset product. Add the recommended amount of clean water to your mixing bucket, then slowly incorporate the thinset powder while continuously mixing with a drill and paddle attachment. Aim for a consistency similar to that of smooth peanut butter or thick oatmeal – it should be firm enough to hold a ridge when pulled with a notched trowel, but still pliable. After initial mixing, let the thinset “slake” (rest) for 5-10 minutes. This allows the polymers to fully hydrate. Then, remix thoroughly before use. Only mix as much thinset as you can comfortably apply and set tiles within 30-45 minutes, as it will begin to set (or “skin over”) in the bucket.
2. Applying Thinset and Setting Tiles:
- Spread Thinset: Using the flat edge of your notched trowel, apply a thin “scratch coat” of thinset to a small section of your prepared substrate, pressing firmly to ensure good adhesion. Then, hold the trowel at a 45-degree angle and comb the thinset with the notched side to create uniform, parallel ridges. The direction of the ridges should be consistent. Work in small sections, typically 3-4 square feet at a time, to prevent the thinset from drying out (skinning over) before you can place your tiles.
- Back-Butter Larger Tiles: For larger tiles (generally 12×12 inches or more), it is highly advisable to “back-butter” them. Apply a thin, even layer of thinset to the entire back of the tile using the flat side of your margin trowel before setting it onto the combed thinset on the floor. This critical step ensures maximum mortar coverage and significantly reduces the risk of hollow spots under the tile, which can lead to cracking.
- Place Tiles: Carefully set the first tile into the wet thinset, aligning it perfectly with your layout lines. Press it down firmly with a slight twisting motion to ensure full contact and collapse the thinset ridges. Immediately insert tile spacers at the corners and along the edges to maintain consistent and even grout lines.
- Level and Tap: As you set each tile, use your level to check that it is flush with its neighbors and perfectly level across the surface. Gently tap the tile with a rubber mallet if necessary to ensure full contact, remove any trapped air, and achieve precise leveling.
- Clean Excess: Periodically, check for any thinset mortar that may be oozing up through the grout lines or onto the tile surface. It is much easier to wipe away excess thinset with a damp sponge before it begins to dry and harden. Once cured, it becomes extremely difficult to remove without damaging the tile. Keep your grout lines clean and clear.
- Continue Laying: Work your way systematically across the planned area, always checking for level, plumb, and consistent grout lines. Make any necessary tile cuts as you proceed, fitting them into the layout.
3. Drying Time:
Once all tiles are laid, it is crucial to resist the urge to grout immediately. Allow the thinset mortar to cure completely, which typically takes 24-48 hours, depending on humidity levels, ambient temperature, and the specific thinset product used. Always refer to the manufacturer’s instructions for exact curing times. Walking on tiles too soon or grouting prematurely can compromise the bond of the thinset and lead to tile failure or grout issues.
Grouting: The Finishing Masterpiece
After the thinset has fully cured and dried, it’s time for grouting. This final step is where your project truly comes to life, providing structural integrity, protection, and its finished, professional appearance.
1. Mixing Grout:
As with thinset, meticulously follow the manufacturer’s instructions for mixing your specific grout product. Use clean, cool water and a mixing drill with a paddle attachment to achieve the best, lump-free consistency. Grout should resemble a thick, workable paste. Allow it to slake (rest) for a few minutes, then remix thoroughly before applying. Only mix what you can use within the working time specified on the packaging.
2. Applying Grout:
Scoop a generous amount of mixed grout onto your grout float. Holding the float at a 45-degree angle, press the grout firmly and thoroughly into all the tile joints, ensuring they are completely filled from top to bottom. Work in manageable sections, applying diagonal passes over the tiles to force the grout deep into the joints and scrape off excess from the tile surface. Ensure even coverage across all joints.
3. Cleaning the Grout:
- Initial Wipe (First Pass): After approximately 10-30 minutes (the exact time depends on the type of grout, temperature, and humidity), the grout will begin to stiffen. Use a damp (not soaking wet!) sponge, wiping in light, circular motions to remove the bulk of the excess grout from the tile surface and to gently shape the grout lines. Rinse your sponge frequently in a bucket of clean water to avoid spreading grout haze. Be careful not to dig into or pull grout out of the joints.
- Haze Removal (Second & Third Passes): Once the grout has dried further (usually a few hours later or the next day), a faint haze or film will typically appear on the tile surface. Use a clean, slightly damp sponge or a piece of cheesecloth/microfiber cloth to polish away this haze. You may need several passes with a clean, barely damp sponge or cloth until the tiles are perfectly clean and shining.
4. Curing and Sealing:
Allow the grout to cure completely according to the manufacturer’s directions, typically 24-72 hours, before subjecting the tiled surface to heavy use or applying a sealer. For cementitious grouts (sanded and unsanded), apply a high-quality penetrating grout sealer once it’s fully cured. This vital step protects the grout from moisture, stains, and mildew, making it significantly easier to clean and preserving its appearance for many years.
Common Pitfalls to Avoid for a Professional Finish
Even with careful planning, mistakes can occur. Being aware of these common issues can help you deftly sidestep them and ensure a more successful project:
- Poor Surface Preparation: An uneven or unstable substrate is the leading cause of uneven tiles, lippage, and cracked grout. Proper prep is paramount.
- Incorrect Thinset Consistency: Thinset that is too watery will cause tiles to slip; too thick, and it won’t bond properly, leading to hollow spots.
- Insufficient Mortar Coverage: “Hollow spots” or voids under tiles, often due to inadequate thinset coverage or failure to back-butter, significantly weaken the installation and can lead to cracking. Aim for at least 80% coverage (95% for wet areas).
- Rushing the Process: Tiling requires patience. Adequate drying and curing times between each step (thinset, grout, sealer) are essential for a durable finish.
- Ignoring Expansion Joints: Failure to use flexible caulk in corners, where tile meets other surfaces (like a bathtub or countertop), and at changes of plane can lead to unsightly cracks in rigid grout due to normal building movement.
- Not Buying Enough Materials: Running out of tiles, especially if they are from a specific dye lot, can cause significant project delays and color inconsistencies. Always buy extra.
- Improper Tool Use: Using the wrong notched trowel size or an incorrect grouting technique can compromise the bond and appearance.
The Enduring Reward of DIY Tiling
Completing a DIY tiling project is an incredibly satisfying accomplishment. Beyond the tangible financial savings compared to hiring a professional, you gain a deep sense of pride and ownership in your home. You’ll not only have a beautiful, durable, and personalized space to enjoy for years but also acquire valuable new skills and a deeper understanding of home improvement. Your newly tiled surface will stand as a testament to your hard work and attention to detail.
Have you embarked on any DIY tiling adventures? What invaluable tips or lessons did you discover along the way that you wish you had known beforehand? We invite you to share your experiences, insights, and any questions in the comments section below – your wisdom could be just what another budding DIYer needs to find their confidence!
Photo Credit: flickr.com/photos/garyjwood/2807768141