Transforming an outdoor space often begins with ensuring comfort and seclusion. For many homeowners, a backyard isn’t just a patch of grass; it’s an extension of their living area, a sanctuary for relaxation, entertainment, and cherished family moments. Even a small yard can feel mighty and serve multiple purposes when thoughtfully designed. Our own journey to reclaiming our backyard privacy recently led us down an unexpected, yet highly rewarding, path.
Life in our cozy indoor/outdoor space was perfectly balanced until a neighbor’s decision inadvertently disrupted our equilibrium. Without prior notice, a natural barrier of lush bushes on their property, which had long provided a discreet separation, was suddenly removed. This seemingly minor change had a profound impact: where once there was verdant foliage, there was now a clear, unobstructed view directly into our home. Their kitchen and dining room windows, previously hidden from sight, now offered a direct line of vision into our backyard, and inevitably, we could see directly into their living areas. This sudden lack of privacy instantly made our cherished outdoor space feel exposed and less inviting.
While we did have some existing bamboo screens, they were unfortunately past their prime. Worn, tattered, and literally falling apart, they offered no real concealment, serving more as a decorative remnant than an effective privacy solution. The urgency of the situation became clear when we learned our neighbor was preparing their home for a new tenant. Though the house was empty at the time, we knew that once new occupants moved in, our privacy would be completely compromised, making our outdoor area unusable for private activities.
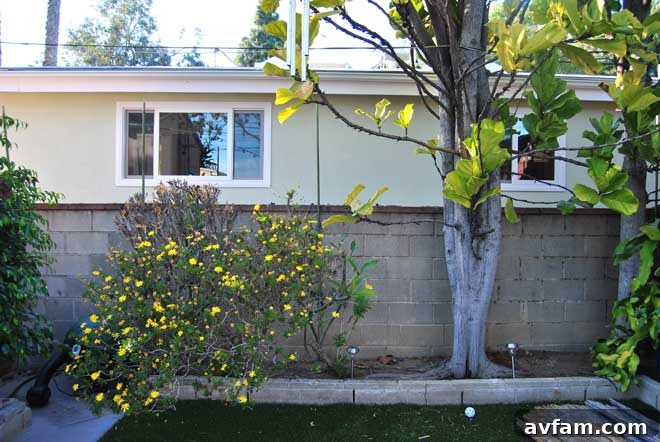
Faced with this immediate need, we began exploring various options to restore the much-needed visual buffer between our homes. Our primary goal was to find a solution that was not only effective and durable but also relatively quick and cost-efficient to implement. We wanted something that would enhance our backyard’s aesthetics without becoming an overwhelming construction project.
Our initial thoughts gravitated towards extending the existing brick wall that bordered our properties. We had previously undertaken a similar project in another section of our yard, raising its height with a sturdy wood fence, which proved to be a successful endeavor. However, this particular section of the brick wall was significantly shorter, meaning we would need to construct a substantially taller wood fence to achieve adequate privacy. This presented several challenges: a taller fence would demand more robust structural support, potentially requiring complex engineering, and a considerable investment in both time and materials. Moreover, the timeline for such a project would be extensive, clashing with our urgent need for a swift resolution before new tenants arrived.
Another option we considered was purchasing pre-made wood fence panels and mounting them on risers directly against the brick wall. While the convenience of pre-fabricated panels was appealing, this approach also had its drawbacks. Even with ready-made panels, we would still be tasked with designing and constructing a sturdy frame to support their weight and ensure their stability. Wood panels, especially at the height needed, can be quite heavy, making installation more laborious and potentially requiring multiple hands. Furthermore, wood fences, while classic, often demand ongoing maintenance like painting or staining to protect them from the elements and prevent rot, which wasn’t ideal for our desire for a low-maintenance solution.
As we continued to weigh our choices, we stumbled upon what ultimately proved to be the perfect solution: installing corrugated steel panels along the existing wall. This option immediately stood out for its simplicity, modern aesthetic, and inherent durability. The idea was straightforward: use furring strips to create a stable mounting surface on the brick wall, and then securely attach the steel panels to these strips. This approach promised a clean, contemporary look with minimal fuss. Often, the most elegant solutions are the simplest, and in this case, the corrugated steel panels ticked all the boxes for speed, cost-effectiveness, and a distinct aesthetic appeal that would complement our outdoor space rather than detract from it. We were confident that this DIY corrugated steel privacy fence would be the ideal way to regain our backyard’s lost seclusion.
Equipped with a clear vision and a renewed sense of purpose, we headed to Lowe’s, a trusted resource for all our home improvement needs. Their extensive selection of tools and materials made it easy to gather everything necessary for the project. With supplies in hand, we were eager to begin the transformation, knowing that our private outdoor sanctuary was just a few steps away from being fully restored.
Tools & Materials for Your Corrugated Steel Privacy Fence
Before embarking on any DIY project, especially one involving masonry and metal, it’s essential to have all your tools and materials ready. This not only streamlines the process but also ensures safety and efficiency. For our corrugated steel privacy fence project, we carefully selected items known for their durability and suitability for outdoor conditions. Here’s a detailed list of what you’ll need to create your own robust and stylish privacy screen:
- Corrugated Steel Panels (8 panels, 4×8 feet each): The heart of your privacy fence. We opted for standard 4×8 panels, which are easy to handle and provide excellent coverage. Consider galvanized steel for superior rust resistance and longevity, especially in humid or rainy climates. These panels offer a distinctive industrial-chic aesthetic that is both modern and durable.
- Furring Strips (approximately 20 feet of total length): These wooden or metal strips serve as the crucial attachment points for your steel panels on the brick wall. They create a secure base and an air gap, preventing direct contact between the steel and brick, which can be beneficial for moisture management. We used wood furring strips, typically 1×2 or 1×3 inches, cut to the appropriate lengths.
- Tapcon Concrete Screws: Specifically designed for fastening into masonry, these screws are indispensable for attaching the furring strips securely to your brick wall. They come in various lengths; choose one appropriate for the thickness of your furring strips and the depth of penetration needed for a strong hold into the brick.
- Corrugated Steel Screws (with washers): These specialized screws are used to fasten the steel panels to the furring strips. Look for self-tapping screws designed for metal, often featuring a hex head and a built-in rubber washer (EPDM washer) to create a watertight seal, preventing leaks and rust around the screw holes.
- Carbide-Tipped Masonry Drill Bit: Essential for pre-drilling pilot holes into the brick or concrete for your Tapcon screws. The carbide tip ensures it can penetrate hard masonry effectively. Ensure the drill bit size matches the diameter recommended for your Tapcon screws for a snug fit.
- Hammer Drill and Driver: A hammer drill is absolutely critical for drilling into brick or concrete. Unlike a regular drill, it combines rotation with a rapid hammering action, making quick work of masonry. A separate driver (or a drill with a driver setting) will be needed for the Tapcon screws and the corrugated steel screws. If your hammer drill has a driver setting, it can serve both purposes, making your tool kit more compact.
- Safety Gear: Always wear safety glasses to protect your eyes from debris, work gloves to protect your hands, and ear protection, especially when using a hammer drill, which can be quite loud.
- Measuring Tape, Level, Pencil: For accurate measurements, ensuring straight lines, and marking drilling points. Precision in these steps is key to a professional-looking finish.
Having these items on hand before you start will ensure a smooth and efficient installation process for your durable and attractive corrugated steel privacy fence.
Step-by-Step Guide to Installing Your Corrugated Steel Privacy Fence
Building a corrugated steel privacy fence against an existing brick wall is a straightforward yet highly effective DIY project. By following these steps, you can achieve a modern, durable, and low-maintenance privacy solution for your backyard. Remember to prioritize safety throughout the entire process.
Step 1: Preparation and Planning
Before you begin drilling, it’s crucial to properly plan your layout. Start by thoroughly cleaning the brick wall surface, removing any loose debris or dirt. Measure the total length and height of the area you intend to cover with the steel panels. Using these measurements, calculate how many furring strips you’ll need and their appropriate lengths. We recommend spacing your furring strips vertically along the wall at regular intervals, typically at the top, bottom, and middle of where each panel will sit. Additionally, plan for a furring strip wherever two steel panels will overlap to ensure a secure attachment for both. Use a pencil and a level to mark the exact locations for each furring strip and, subsequently, the drilling points for the Tapcon screws.
Step 2: Attaching the Furring Strips to the Wall
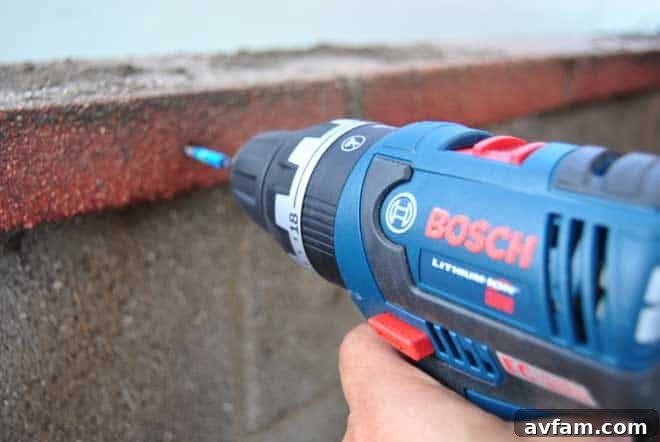
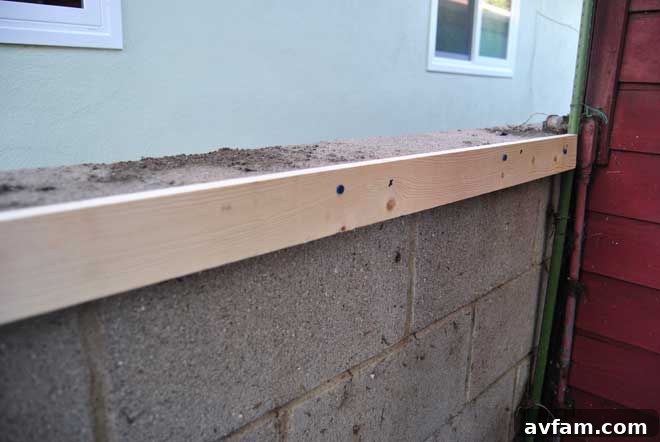
The furring strips will act as the backbone for your steel panels, providing a stable surface for attachment. The first step in installation is to securely fasten these strips to your brick wall. Using your pre-marked lines as a guide, position the first furring strip. With your hammer drill fitted with the carbide-tipped masonry drill bit, carefully pre-drill pilot holes through the furring strip and into the brick wall at each marked point. The depth of these holes should be appropriate for the length of your Tapcon concrete screws to ensure maximum grip. Many Tapcon screw kits include a matching drill bit, which simplifies this process. Once the pilot holes are drilled, switch your drill to a driver setting (or use a separate driver) and drive the Tapcon concrete screws through the furring strip and into the pre-drilled holes. Ensure the furring strips are perfectly level and plumb before tightening the screws completely. Do not overtighten, as this can strip the masonry or the screw head. Repeat this process for all your furring strips, ensuring consistent spacing and alignment.
Step 3: Installing the Corrugated Steel Panels
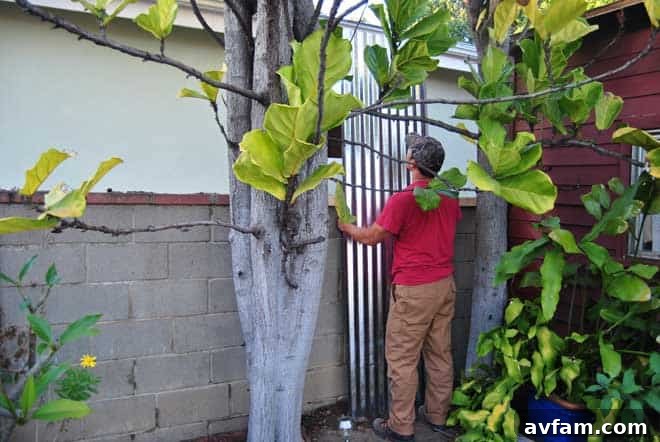
With your furring strips securely in place, it’s time to install the corrugated steel panels. This step requires precision to ensure a seamless and professional finish. Begin by lifting your first steel panel and carefully aligning it against the furring strips, making sure it is perfectly level at the top and plumb along its side. Using a level frequently during this stage will prevent a crooked fence. For aesthetics and structural integrity, it’s crucial to overlap adjacent panels by at least one full ridge. This overlap not only conceals the seam but also adds rigidity to the entire structure. Once a panel is correctly positioned, use your driver to drill the corrugated steel screws through the panel and into the underlying furring strips. We highly recommend using screws with rubber washers to create a watertight seal and prevent moisture penetration, which can lead to rust. Secure each panel with screws at the top, bottom, and middle along each furring strip it crosses. Where panels overlap, drive screws through both layers of steel into the furring strip for a strong, unified connection. Continue this process, panel by panel, ensuring each piece is level, plumb, and properly overlapped until your entire privacy fence is complete.
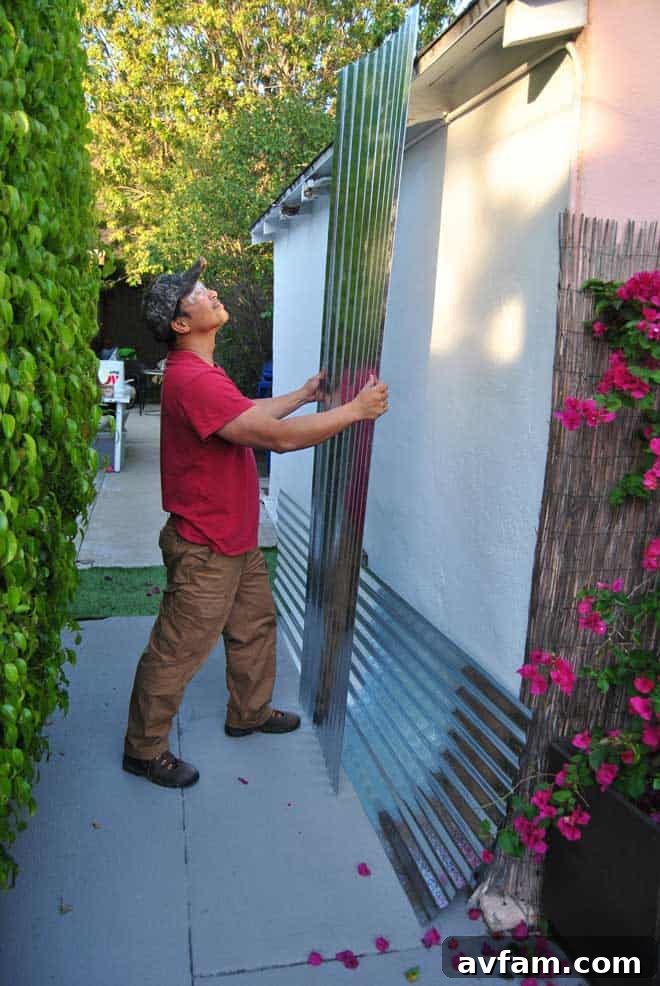
A quick shout-out to Duluth Trading Company for their incredible DuluthFlex Ultimate Fire Hose Cargo Pants, which I had the pleasure of trying out during this project. Their durability and flexibility made the physical demands of installation much more comfortable.
Step 4: Enjoy Your Newfound Privacy and Modern Aesthetic
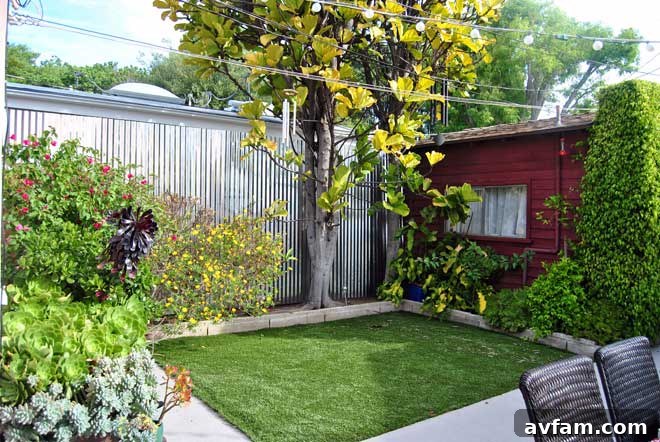
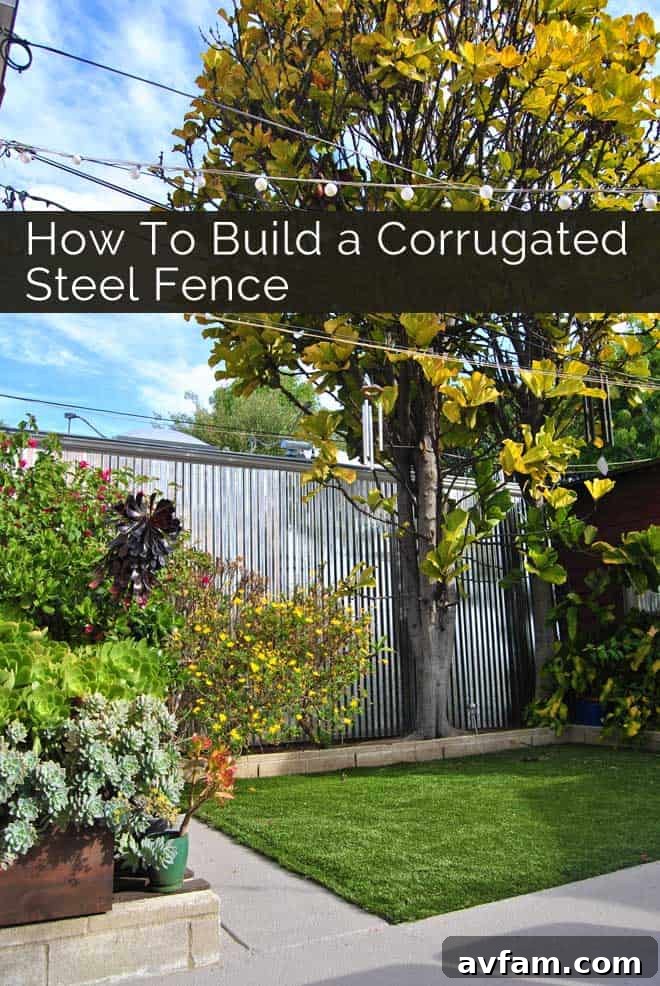
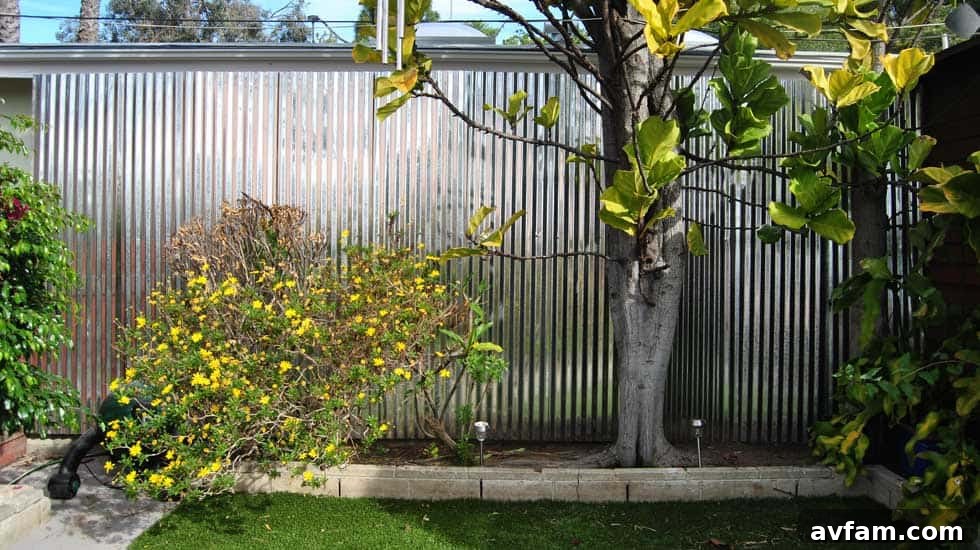
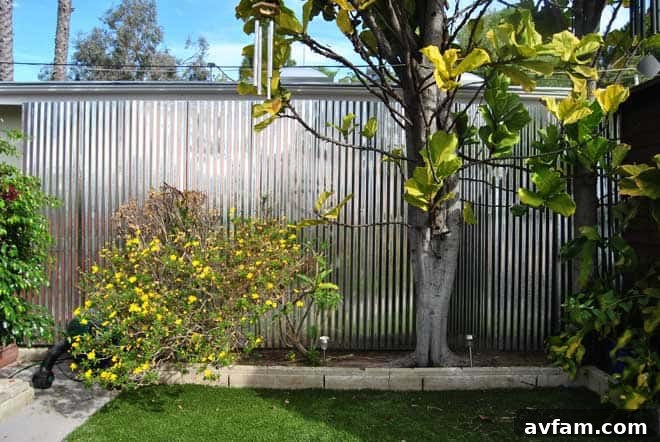
With the final panel secured, the last and most rewarding step was simply sitting back and enjoying the transformation of our newly privatized backyard. The change was immediate and dramatic. Our outdoor space, once exposed and vulnerable, was now a secluded haven, offering the peace of mind we had longed for. The corrugated steel panels instantly elevated the aesthetic of our yard, lending it a distinctive industrial-chic look. The sleek, ribbed texture of the steel, combined with its metallic sheen, created a contemporary vibe that felt more like a trendy coffee house patio in Austin than a typical suburban backyard – a truly delightful and unexpected bonus!
Beyond its striking appearance, the practical benefits of our DIY corrugated steel privacy fence have been immense. The panels provide complete visual blockage, ensuring that our outdoor activities remain truly private. We no longer have to worry about prying eyes, allowing us to fully relax and entertain without inhibition. Durability has also proven to be a major advantage. Our new fence has already weathered several formidable Santa Ana wind storms with absolute ease, standing firm and showing no signs of strain or damage. This resilience to harsh weather conditions speaks volumes about the robust nature of galvanized steel and the secure installation method.
Interestingly, the fence has even offered an unforeseen benefit. Just last week, during a minor earthquake tremor, the panels served as a peculiar but effective early warning system. We distinctly heard the rhythmic shaking and rattling of the steel panels against each other, even when there was absolutely no wind in the air. It was a freaky, yet fascinating, experience to witness and hear them move independently, serving as a strange testament to their responsiveness and the slight give in their structure during seismic activity.
Choosing corrugated steel for our privacy fence was an excellent decision, balancing aesthetics, durability, and ease of installation. It’s a testament to how a simple, well-executed DIY project can dramatically enhance the functionality and beauty of your outdoor living space. If you’re seeking a modern, low-maintenance, and robust privacy solution for your backyard, consider the versatility and appeal of corrugated steel panels. They might just provide the perfect blend of style and seclusion you’re looking for, transforming your outdoor area into a truly mighty and private oasis.